


|
There are many different dyeing kits available in the stores but all you really need is some food coloring to dye the eggs. Dyeing Easter eggs is a fun activity for all to enjoy; you will not only end up with dyed eggs that can be hidden for the kids to find or that can be used as Easter decorations, but you can also remove the shell and then eat the hard boiled egg inside. For ideas on how to use up the hard boiled eggs, see our collection of Hard Boiled Egg recipes. If the dyed Easter eggs are going to be consumed, be sure that they are stored properly.
|
| Pierce the large end of the eggs with a pin. This pierces the air cell, allowing the air to escape, preventing a flat spot from being formed on the large end of the egg during the cooking process. It also helps in making the eggs easier to peel after cooking. | 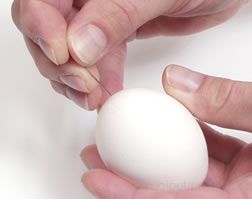 |
| Pour cold water into a saucepan and add 1½ teaspoons of salt per quart of water. (The salt may help make the peeling process easier). Make sure there is enough water in the pan so that the eggs will be completely covered. Bring the water to a boil and with a large spoon, place the eggs into the water. |  |
| When the water returns to a boil, turn down the heat so that the water is at a low simmer and then begin timing the eggs for the desired doneness. Do not cover the pan. | 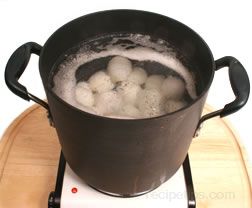 |
Hollow Eggs
If you would like to display your eggs, it is a good idea to “blow out” your eggs before decorating. Poke a whole in each end of a raw egg, the largest whole on the large end, with a pin. With the pin, break up the yolk on the inside of egg. Blowing through the small end of egg, blow the insides of the egg through the large whole. Wash egg and let dry before decorating.
Preparing the dye
Preparing the dye to color eggs can either be done with a store bought kit or made at home with food coloring. For the store bought kit, follow the directions on the package. To make dye at home be sure that you have enough containers available for each color that you want to create. Each color will need 1 cup of water, 2 teaspoons distilled vinegar and the desired food coloring.
| Gather all of the ingredients needed. Make sure to lay out old newspapers or paper towels on the work surface to soak up any spills that might occur. | 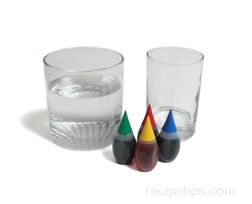 |
| Add the vinegar to the water and the desired number of drops of food color to achieve the color that you want. |  |
| Carefully lower the egg into the dye with a spoon or egg dyeing utensil that comes in most egg dyeing kits. Make sure that the egg is completely covered with the dye. | 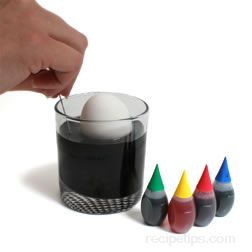 |
| Allow the eggs to sit anywhere from two minutes to overnight to reach the desired color. When finished, carefully remove the egg from the dye, pat dry with a paper towel and allow to dry competely on a wire rack. | 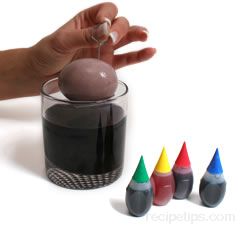 |
Once the eggs are dry, they can be gathered together and stored in a basket or container until you are ready to hide them, or decorate with them. If the eggs are going to be eaten, be sure they are stored properly until you are ready for them to served.
Color Chart
| Color | Number of drops of coloring |
| Orange | 17 Yellow and 3 Red |
| Purple | 15 Blue and 5 Red |
| Dark Green | 14 Green and 6 Yellow |
| Raspberry | 14 Red and 6 Blue |
| Teal | 15 Green and 5 Blue |
| Plum | 10 Red and 4 Blue |
| Grape | 17 Blue and 4 Red |
| Fucshia | 18 Red and 4 Blue |


