


Using the term "boiled" when referring to cooking eggs in the shell can be misleading, because eggs referred to as "hard-boiled" or "soft-boiled" should never be cooked at a full boil for the entire length of the cooking time. Eggs cooked in the shell with heat that is too high or with a cooking time that is too lengthy, will become tough and rubbery and a dark line may form between the yolk and the white.
The following steps can be used for cooking eggs in the shell:
| Pierce the large end of the eggs with a pin. This pierces the air cell, allowing the air to escape, preventing a flat spot from being formed on the large end of the egg during the cooking process. It also helps in making the eggs easier to peel after cooking. | 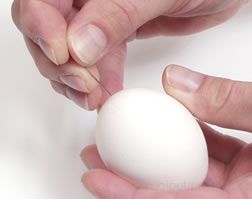 |
| Pour cold water into a saucepan and add 1½ teaspoons of salt per quart of water. (The salt may help make the peeling process easier). Make sure there is enough water in the pan so that the eggs will be completely covered. Bring the water to a boil and with a large spoon, place the eggs in a single layer on the bottom of the pan. | 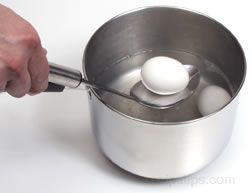 |
| When the water returns to a boil, turn down the heat so that the water is at a low simmer and then begin timing the eggs for the desired doneness. Do not cover the pan. | 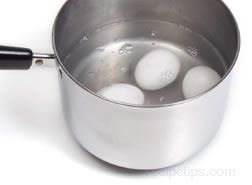 |
Use the following cooking times as a guide for the desired
firmness for the yolk of each egg size (the whites will be firm).
| Size | Degree of Doneness | Time Required |
| Medium | Soft-cooked yolk | 4 minutes |
| Medium-cooked yolk | 6 minutes | |
| Hard-cooked yolk | 11 minutes | |
| Large | Soft-cooked yolk | 5 minutes |
| Medium-cooked yolk | 7 minutes | |
| Hard-cooked yolk | 12 minutes | |
| Extra Large | Soft-cooked yolk | 6 minutes |
| Medium-cooked yolk | 8 minutes | |
| Hard-cooked yolk | 13 minutes |
| Note: The temperature of the egg at the start of the cooking process will affect the cooking time. An egg that is at room temperature at the start of the cooking process will require about 1 minute less cooking time for each time listed above. The times listed above are based on eggs taken directly from the refrigerator. |
|
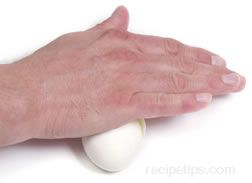
After the required time has elapsed, run cold water over the eggs to stop the cooking process. This will help prevent discoloration of the yolk and will also assist with the peeling process. Running cold water over the eggs creates steam between the egg white and the shell which makes the shell easier to remove. To peel the egg, simply roll it lightly over a hard surface which will crack the shell, making it easy to remove. It is also worth noting that very fresh eggs are more difficult to peel than older eggs. |
 |
|
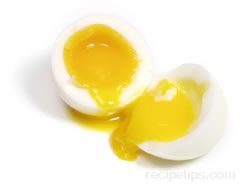
Soft-cooked Yolk |
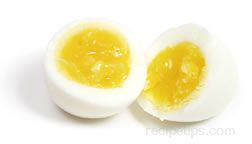
Medium-cooked Yolk |
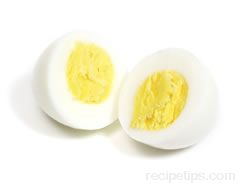
Hard-cooked Yolk
Safely Prepare Eggs for Eating or Decorating
Hollow Eggs
If you would like to display your eggs, it is a good idea to “blow out” your eggs before decorating. Poke a whole in each end of a raw egg, the largest whole on the large end, with a pin. With the pin, break up the yolk on the inside of egg. Blowing through the small end of egg, blow egg through the large whole. Wash egg and let dry before decorating.
If you prefer to decorate hard boiled eggs, remember, it is much safer to use decorated eggs for display only, do not eat.
Hard Boiled Eggs
Before decorating Easter eggs, it is important to prepare and store them safely.
*Eggs should be stored in the coldest part of the refrigerator, not in the storage compartment of the door where temperature fluctuates with the opening and shutting of the door.
*Store eggs with the rounded end pointed up in order to keep the air cell on top and help keep the yolk centered.
*Do not store eggs next to strong smelling food, the shells are porous and eggs will absorb strong odors.
*Do not leave uncooked eggs at room temperature for more than 2 hours.
*Eggs that have been hard boiled for decorating must be refrigerated within 2 hours to prevent food borne illnesses.
*Do not dye eggs that have cracked during boiling.
*Use hard boiled eggs that have been stored in the refrigerator, within one week.


