


| |||||||||||||||||||||||||||||||||
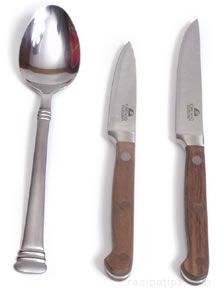 |
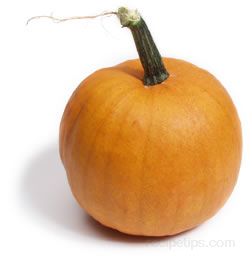
Generally, a large spoon, a selection of sharp knives, and a sharp utility knife are sufficient for pumpkin carving. |
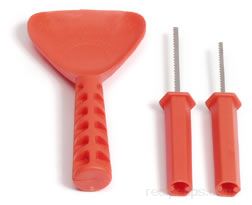 |
Pumpkin Carving Kits: The kit includes a scraper and sawing tools. Although the demonstration below is shown using kitchen utensils, the pumpkin carving kits make the job easier, safer, and faster. |
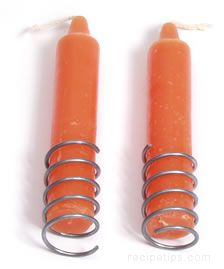 |
A Light Source: There are many different varieties of candles on the market today. For the demonstration below, we used the above twist holder and candle. The wire holder is twisted into the bottom of the carved pumpkin and the candle is placed into the holder. A tea light or a small flashlight will serve the same purpose. |
Carving a Pumpkin
| Begin carving the pumpkin by tracing a lid. A dry erase marker was used for the tracing. A dry erase marker can be rubbed off easily after the cut is made. The lid above is a circle with a small notch. The notch will make replacing the lid easier when pumpkin carving is complete. Another option is to cut a pentagon (a polygon of five angles and five sides) or hexagon (a polygon of 6 angles and 6 sides) to serve as a lid. | 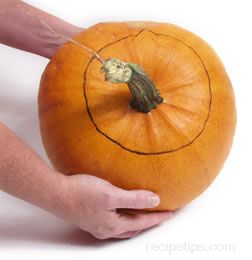 | |
| Cut around the outline of the lid with a utility knife or carving saw. While cutting, hold the knife/saw at an angle, this will create a cone shaped lid that will prevent the lid from falling into the pumpkin when carving is finished. | 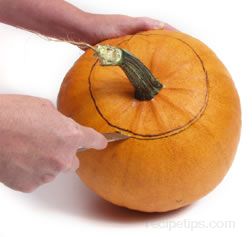 | |
 |
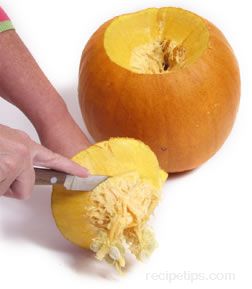 | |
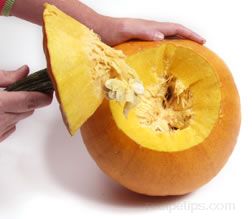
Pull the stem to remove the cut lid. Depending on the thickness of the pumpkin, you may have to twist the lid to remove. Remove the pulp from the lid with a sharp utility knife. | ||
| Remove the strings and seeds from the inside of the pumpkin. Save the seeds in a separate container if you plan to make roasted pumpkin seeds. | 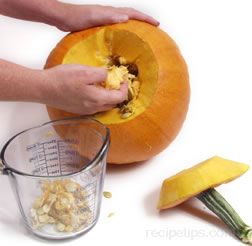 | |
|
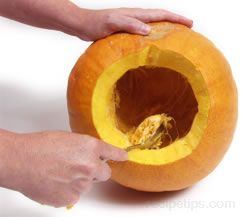
After all the strings and seeds have been removed, scrape the walls of the pumpkin with a spoon or pumpkin scraper. For best carving results, it is recommended that the walls are 1" thick in the area to be carved. Tip: A canning jar lid also works great for cleaning out the inside of the pumpkin. The edges of the lid are sharp enough to do a good job of scraping the insides and lid is easy to handle when using. |
 | |
| With a dry erase marker, outline the face of your Jack-O-Lantern. The above outline was filled in to allow the viewer to see the outline clearly. Stencils are available for pumpkin carvings. The stencils are attached to the pumpkin with tape or push pins. The outline is drawn with a pencil or washable marker. Carve the face of the pumpkin with a sharpened knife or pumpkin saw. | 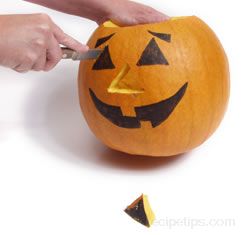 | |
| Insert your light source, replace the lid and enjoy! | 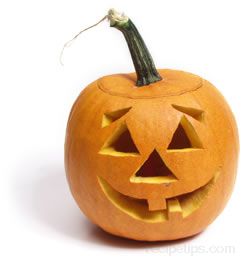 | |
Preserving a Jack-o-lantern
Depending on weather conditions, a carved pumpkin typically last from 1 - 7 days. Some options for extending the life of your carved pumpkin are listed below.
- There are products available on the market that can be sprayed onto your pumpkin, or that you can dip your pumpkin into.
- An "at home" option is to rub petroleum jelly onto all cut surfaces.
- The carved pumpkin can also be sprayed with a mild mixture of household bleach and water. The bleach will kill organisms that cause rotting.


