|
Homemade pasta can be cut into many shapes and sizes but the options
are limited in comparison to factory made dried pastas. Some shapes and
sizes can be cut by hand but many must be formed by the use of a machine
and special cutting rollers and dies. Some of the common shapes and sizes
that can be created when making homemade pasta and instructions on how
to cut them are shown in the information below.
|
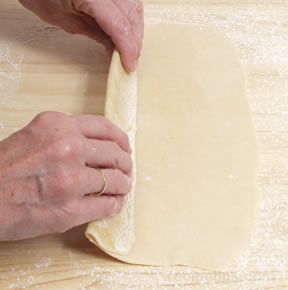
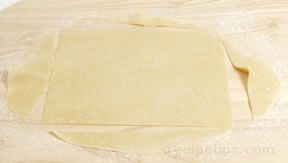
Lasagne / Cannelloni / Pappardelle:
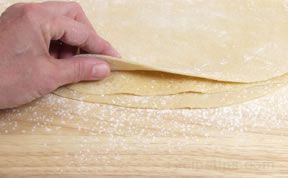
After the rolled out pasta sheets have dried for approximately
15 minutes, place one on a lightly floured work surface.
|
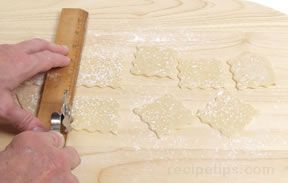
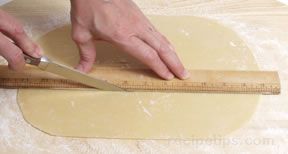
- Using a knife or fluted pastry wheel, square off the edges so
you have a sheet of pasta that is a suitable size for the size
sheets you will be cutting. A sheet approximately 9 x 13 works
well for 3 x 13 inch strips of lasagne and a 7 x 10 inch sheet
works well for 3 1/2 x 5 inch rectangle lasagne sheets.
|
|
|
|
For various pasta types, cut according to steps shown below for
lasagne, cannelloni, and pappardelle.
|
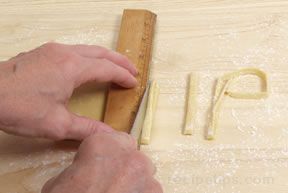
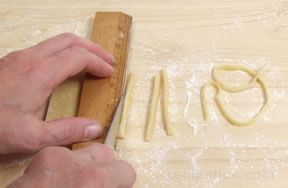
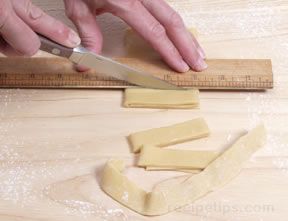
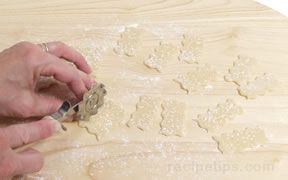
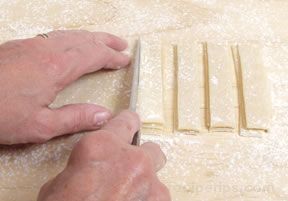
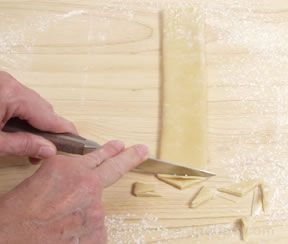
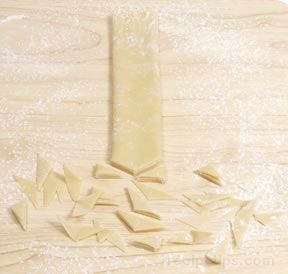
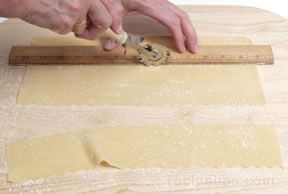
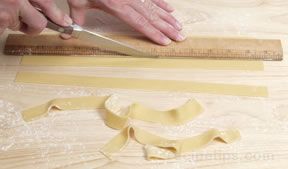
- Lasagne (strips): Lasagne can be cut
several different ways. It can be cut into long strips or rectangle
shapes. Strips are generally cut 3 to 3 ½ inches wide
by 13 inches long. A fluted pastry wheel is used to create a wavy
edge, but a knife can be used if a straight edge is desired.
|
|
|
|
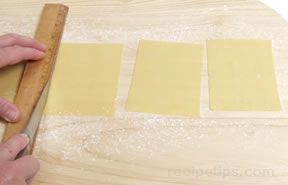
- Lasagne (rectangle sheets): The rectangle
lasagne pieces are generally cut to approximately 3 ½
x 5 inches or 4 x 6 inches, using a knife to create
a straight edge. When deciding on what size to use, consider the
size of the baking dish that you will be using and use a size
that will work best for the dish.
|
|
|
|
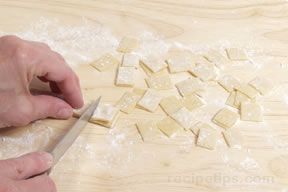
- Cannelloni: Cannelloni can be cut
in the same manner as the rectangle shaped lasagne. Cut to a size
best suited to your baking dish, generally cut to approximately
3 x 4 or 4 x 4 inches
|
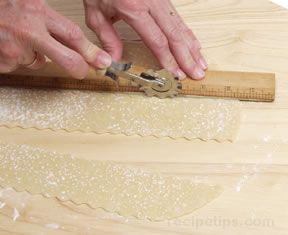
- Pappardelle: Pappardelle can be cut
as instructed "Noodles" or it can be cut in strips from
the flat sheet of pasta. Pappardelle is cut into ¾ inch
wide strips. They can be cut with a knife or a fluted pastry wheel.
A ruler can be used to assist in keeping the strips straight and
consistent in width.
|
|
|
|
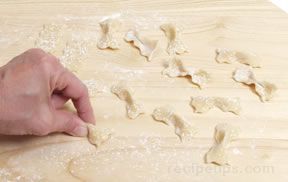
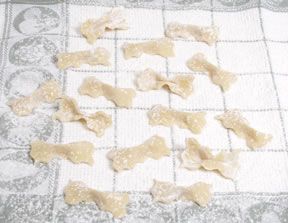
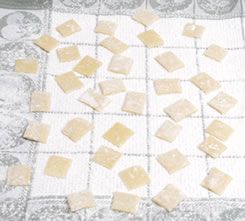
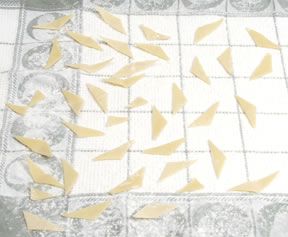
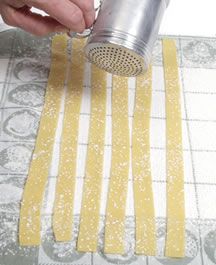
- Spread the pasta out on a lightly floured surface or a floured
dish towel. Dust the pieces with flour and allow them to dry for
at least 15 minutes before cooking. The drying period will allow
the noodles to firm up slightly and help prevent them from sticking
to each other.
|
 |
|
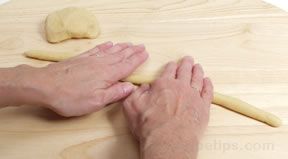
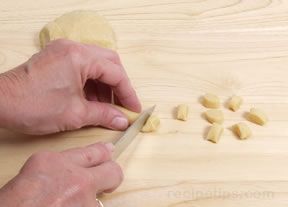
Fusilli:
After the rolled out pasta sheets have dried for approximately
15 minutes, place a sheet on a lightly floured work surface.
|
|
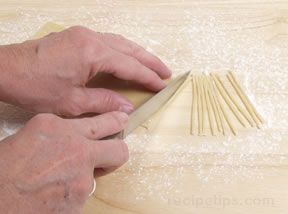
- Using a sharp knife, cut the pasta sheet into 3 inch strips.
|
|
- Cut across 3 inch strips to produce approximately 1/16 x 3 inch
strips.
|
|
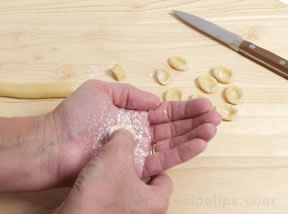
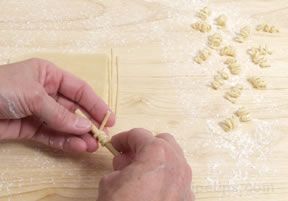
- Carefully wrap the 1/16 x 3 inch strips around a floured wooden
stick. Gently pull the strips off the stick and place on a floured
surface. Shapes should look similar to a spring. Let pasta dry
before cooking.
|
|
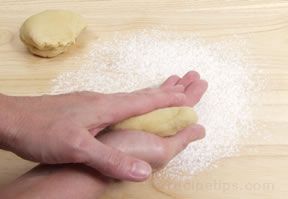
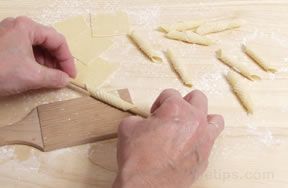
Garganelli:
After the rolled out pasta sheets have dried for approximately
15 minutes, place a sheet on a lightly floured work surface.
|
- Using a sharp knife, cut the sheet into 2 or 2 ½ inch
wide strips. Cut across strips at 2 or 2 ½ inch intervals
to form squares.
|
|

|
- Starting in one corner of the square, roll the pasta around
a floured wooden stick that is ¼ inch or less in diameter.
To give the pasta a grooved surface, place the pasta square on
a grooved board and roll the square on the wooden stick while
applying pressure to form grooves on the outer surface.
|
|
|
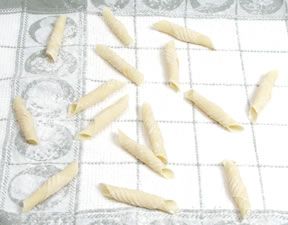
Carefully slide the rolled pasta off the stick. To prevent the
pasta from becoming flattened, do not squeeze it as it is pulled
off the stick.
|
- Place the garganelli tubes on a lightly floured surface and
allow pasta to dry for at least 15 minutes before cooking. The
drying period will allow the pasta to firm up slightly and help
prevent them from sticking to each other.
|
|
 |
|