|
Equipment | Making Pasta | Cutting and Shaping | Asian Noodles
Flavored and Colored Pasta | Drying Pasta | Tips
Equipment
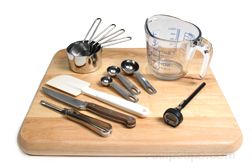
The equipment needed to make fresh homemade pasta consists of fairly basic items. At a minimum you will need a work surface, measuring cups and spoons, rolling pin, knife, and your hands for mixing and kneading. In addition to these basic items, there are other tools that can make the process simpler and allow more options in the variety of pastas you can make. Some of these tools with a brief description are listed below.
| Equipment for Making Pasta Dough |
|
Equipment |
Description |
|
Mixing Bowls |
The bowls can be used for mixing the dough if preferred over mixing on a work surface. |
| Pastry Board |
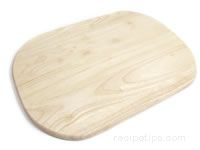
A large wooden board used to mix the pasta dough. It provides a good work surface and is easy to clean. |
| Pasta Rolling Pin |
A thin long wooden rolling pin that is tapered at the ends. The pasta rolling pin works well for rolling out pasta but it takes some practice to get proficient at using it. A regular heavy, wooden rolling pin can also be used. |
| Flour Dredger or Sifter |
A dredger is a metal container with a cover that has small holes perforated in it. It is used for sprinkling a light coat of flour on the pasta while you are working with it. The flour sifter can be used in the same manner. |
| Pastry Scraper |
A thin stainless steel blade with a wooden handle used to scrape up dough that sticks to the work surface when working with pasta. The scrapers are sometimes made of plastic, rather than stainless steel. |
| Electric Mixer with Dough Hook |
The mixer can be used to mix the pasta dough. |
| Food Processor |
The processor can be used to mix the pasta dough and it can also be used to puree or liquefy vegetables, herbs and fruits for flavored pastas. |
| Hand-Cranked Pasta Machine/Roller |
A machine used to knead and roll the pasta dough. It also has cutting attachments used to cut different widths of pasta strands. The machine is run by hand. |
| Hand-Cranked Extrusion Machine |
A machine used to cut different shaped pasta. The machine has different die attachments to make different shapes. The machine is run by hand. |
| Electric Extrusion Machine |
A machine that mixes the pasta dough and extrudes pasta shapes and strands, depending on the type of die being used. The machine is electric and does not require hand-cranking. |
| Cutting/Chopping Board |
A wooden or hygienic nylon board used to protect the surface it is placed on when cutting or chopping food. |
| Knives |
Knives of various sizes used to cut pasta dough and to chop, dice and mince other ingredients. |
| Pasta Wheels |
A device with a cutting wheel at one end that is used to cut pasta into strips. The edge of the wheel may be smooth or it may have a fluted edge to give the pasta a decorative edge when cutting it. |
| Pasta Rollers |
A device with a special type of roller at one end. It is available with a variety of rollers. The rollers are made for cutting different width strands of pasta, squares and circles. |
| Pasta Cutters |
A device, similar to a cookie cutter that is used to cut circles of pasta for making stuffed pasta such as ravioli. They are available in different sizes and with smooth or fluted edges. If you have the appropriate size cookie cutter, that will also work. |
| Ravioli Rolling Pin |
A type of rolling pin that has indentations all around it the size of stuffed pasta squares. The rolling pin is used to mark out a sheet of pasta for making stuffed pasta squares. The squares on one side have stuffing added and then the other half is folded over to form the top layer. The squares are sealed around the edges and then slice apart into individual squares according to the markings from the rolling pin. |
| Ravioli Form Tray |
A tray that has square perforated cutouts for stuffed pasta. The tray has a sheet of pasta laid on top, the stuffing is added to each individual pasta square and then the top layer is added. A rolling pin is rolled over the top layer, which seals the squares and cuts them apart by applying pressure, forcing the perforated dies on the ravioli tray to cut through the pasta dough. |
| Pastry Brush |
The pastry brush can be used to moisten the edges of stuffed pasta before sealing it. It can also be used to brush off excess flour on the pasta. |
| Drying Rack |
A rack used to hang round or flat strands of pasta on to allow the pasta to dry thoroughly for storage. |
| Vegetable Peeler |
The peeler can be used to shave Parmesan and other hard cheeses. |
| Knives of Various Sizes |
Various size knives may be needed for different purposes. They can be used for cutting pasta. They can also be used for cutting ingredients that will be used in the pasta, in the pasta sauce or pasta dish. |
| Small Grater |
Used to grate Parmesan cheese. It can also be used to grate other ingredients such as nutmeg. |
| Mortar and Pestle |
Tools used to pound ingredients, such herbs, garlic, peppercorns, salt, and walnuts. The mortar and pestle are tools traditionally used to pound ingredients together to make pesto sauce. |
Making Homemade Pasta
Making homemade pasta takes time and effort but it is an inexpensive way of providing you with a fresh, delicious tasting delicate textured pasta. There are tools available to assist in the pasta making process that will make it easier and save time. The basic ingredients involved are flour, eggs and salt. Other ingredients, such as milk, water and oil are also used in some recipes. Flavoring agents are also used to provide a variety of flavored pastas. The following information provides the step in the pasta making process.
Mixing the Pasta Dough
The amount of ingredients will vary according to quantity of pasta you are making, the size of the eggs, and whether milk, water or oil are added to the recipe. A basic recipe for one pound of pasta calls for 2 ½ cups of unbleached all-purpose flour, 3 large eggs and a pinch of salt. The actual amount of flour may vary depending on the actual size of the eggs. Use very fresh eggs and take them out of the refrigerator approximately one hour before using.
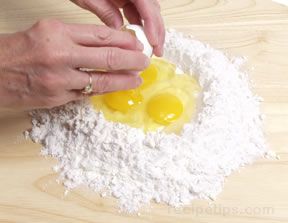
- Pour 2 1/2 cups of flour in the middle of a clean smooth work area. Make a well in the center of the flour. Crack the three eggs into the well and add a pinch of salt.
- Beat the eggs with a fork and gradually start to mix the flour in with the eggs by drawing the flour from the inside walls of the well.
- Once the dough becomes thicker and sticks to the fork, start working the dough with your hands. Continue to draw flour in from the sides of the well until all of the floor has been incorporated in the dough.
- The ball of dough should be moist and pliable, and will probably still be a little lumpy. If the dough seems too moist and sticky, sprinkle with approximately one more tablespoon of flour. If the dough is to dry, sprinkle it with 1 tablespoon of water.
Alternative - Food Processor: Rather than mixing the dough by hand, a food processor can be used for mixing.
- Be sure the processor is fitted with a plastic dough blade or the metal chopping blade. Add the flour and salt to the container and turn the machine on.
- Gradually pour beaten eggs in through the feeding tube while the machine is running. Continue to process until the dough forms a ball and begins to ride up in the center, on top of the blades.
- If the dough is too dry, it will not form a ball. To moisten the dough, add 1 teaspoon of water. If it is too sticky, add 1 teaspoon of flour. Add more water or flour if necessary for dough to be the correct texture.
Alternative - Electric Mixer: An electric mixer with a dough hook can be used to mix the pasta dough also.
- Combine all ingredients in the mixing bowl.
- Mix ingredients using with the electric mixer at a medium speed. Mix until dough pulls away from the sides of the bowl.
- If the dough is too dry, it will not form a ball. To moisten the dough, add 1 teaspoon of water. If it is too sticky, add 1 teaspoon of flour. Add more water or flour if necessary for dough to be the correct texture.
Kneading and Rolling the Pasta Dough
The pasta dough should be kneaded until the dough becomes smooth and elastic. Be sure the work surface is cleaned off before kneading the dough. Use pastry scraper to remove any pieces of dough stuck to the surface of the work area.
Kneading:
- Lightly flour clean work surface and place dough on floured area.
- Knead the dough by pressing on it with the heel of your hands, pushing it away from you. Fold the dough back over towards you and repeat the kneading process.
- Continue to knead the dough in this manner. Turn the dough a little each time you knead it.
- If the dough is sticky, sprinkle it with flour as you are kneading.
- Knead until dough is smooth and elastic. This process may take anywhere from 5 to 20 minutes.
- Gather kneaded dough and form a ball. Cover the ball of dough with plastic or foil and set aside to rest at room temperature for at least 1 hour.
| Note: If the dough was mixed in a processor, it will not need as much kneading as it would if it was mixed by hand. |
Rolling:
- After the pasta has rested, pull off a piece of dough, approximately 1/3 of a 3 eggs dough recipe, and set the remaining dough aside and leave it covered.
- Lightly flour the working surface, form the piece of dough into a ball and place on floured area. Using the palm of your hand, flatten into approximately a six inch circle.
- With a lightly floured rolling pin, begin to roll the dough starting from the center and rolling away from you, stretching the dough as you roll. Slightly rotate your rolling position with each roll, always starting at the center and rolling away from you.
- After 2 or 3 rolls, rotate the dough about a quarter of a turn. Dust dough, work surface and rolling pin with flour if dough starts to get sticky.
- Continue to roll until dough is an even thickness of 1/8 inch or less. Roll out thinner if making thin noodles.
- If making stuffed pasta, use the dough immediately. If cutting noodles, lightly dust the rolled out dough and let it dry for approximately 15 minutes before cutting.
Alternative - Kneading and Rolling by Machine
Kneading:
- Adjust rollers on rolling machine so that they are on the widest setting.
- Pull off a piece of dough, approximately 1/3 of a 3 eggs dough recipe, and set the remaining dough aside and cover with plastic.
- Flatten the piece of dough and feed it through the machine at the widest setting. Hold the rolled out end as it comes out of the machine. Fold the dough in thirds, similar to a letter, and feed it through again. If dough is sticky, dust the dough and the machine rollers with flour before sending through the machine.
- Send the dough through the rolling machine 5 to 8 times, folding after each pass through. Send through until dough is smooth and elastic.
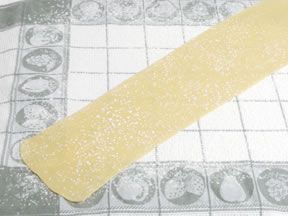
- When the dough is smooth and elastic, lay the sheet of pasta out on a lightly floured surface or a lightly floured dish towel.
- Repeat steps 2 through 4 on the remaining dough. Lightly cover the strips of dough until they are ready to be rolled into thinner sheets.
Rolling:
- Set rolling machine to one setting thinner than the widest setting. Take one of the kneaded strips and feed into the machine. Catch the sheets of dough as it comes out so that it does not stick together.
- Set the rollers one setting thinner and without folding the dough, send it through the machine again. If the dough gets sticky at any time, dust the pasta sheets and the rollers with flour before sending the sheets of dough through the machine.
- Repeat step 2 until the dough is the desired thickness, setting the rollers to one setting thinner with each pass. Generally the pasta is the proper thickness when the machine is on the next to last setting.
- For stuffed pasta and thinner noodles, use the thinnest setting for the last pass through.
- Lay the sheets out on a lightly floured surface or a dish towel lightly dusted with flour and let dry for approximately 15 minutes before cutting. If making stuffed pasta, use immediately.
Cutting and Shaping Homemade Pasta
Homemade pasta can be cut into many shapes and sizes but the options are limited in comparison to factory made dried pastas. Some shapes and sizes can be cut by hand but many must be formed by the use of a machine and special cutting rollers and dies. Some of the common shapes and sizes that can be created when making homemade pasta and instructions on how to cut them are shown in the information below.
Shapes and Sizes Cut by Hand
Noodles:
- After the rolled out pasta sheet has dried for approximately 15 minutes, place it on a lightly floured work surface. Dust the sheet lightly with flour.
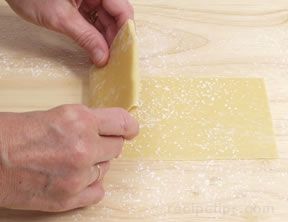
- Starting at the end closest to you, fold a 2 to 3 inch strip of pasta up away from you. Continue to fold the strip up away from you until the entire pasta sheet is folded into a flattened roll.
- With a sharp knife, cut across the flattened roll to form the width of the desired type of pasta noodle. Cut pappardelle at ¾ inch; tagliatelle at ¼ inch; fettuccine at 1/6 to 1/5 inch (slightly less than tagliatelle); linguine at 1/8 inch; tagliolini at 1/8 inch or less; tagliarini at 1/16 to less than 1/8 inch.
- Unroll folded noodles and spread out on a lightly floured surface, a floured dish towel or hang over the back of a chair on a floured dish towel. Allow them to dry for at least 15 minutes before cooking. The drying period will help firm the noodles slightly and help prevent them from sticking to each other.
Lasagne / Cannelloni / Pappardelle:
- After the rolled out pasta sheets have dried for approximately 15 minutes, place one on a lightly floured work surface. For various pasta types, cut according to steps 2, 3 and 4.
- Lasagne: Lasagne can be cut several different ways. It can be cut into long strips or rectangle shapes. Strips are generally cut 3 to 3 ½ inches wide by 13 inches long. A fluted pastry wheel is used to create a wavy edge, but a knife can be used if a straight edge is desired. The rectangle lasagne pieces are generally cut to approximately 3 ½ x 5 inches or 4 x 6 inches, using a knife to create a straight edge. When deciding on what size to use, consider the size of the baking dish that you will be using and use a size that will work best for the dish.
- Cannelloni: Cannelloni can be cut in the same manner as the rectangle shaped lasagne. Cut to a size best suited to your baking dish, generally cut to approximately 3 x 4 or 4 x 4 inches.
- Pappardelle: Pappardelle can be cut as instructed in step 3 under "Noodles" or it can be cut in strips from the flat sheet of pasta. Pappardelle is cut into ¾ inch wide strips. They can be cut with a knife or a fluted pastry wheel. A ruler can be used to assist in keeping the strips straight and consistent in width.
- Spread the pasta out on a lightly floured surface or a floured dish towel. Dust the pieces with flour and allow them to dry for at least 15 minutes before cooking. The drying period will help firm the noodles slightly and help prevent them from sticking to each other.
Farfalle:
- After the rolled out pasta sheet has dried for approximately 15 minutes, place it on a lightly floured work surface.
- Farfalles are cut from pieces ranging from 1 ½ to 2 ½ inch squares. Using a ruler to assist in maintaining consist size pieces, cut the desired size squares from the sheet of pasta using a straight or fluted pastry wheel. If cutting 2 inch squares, first cut sheet into 2 inch strips and then cut across strips at 2 inch intervals to form 2 inch squares.
- Cut squares in half to form 1 x 2 inch rectangles. Pinch rectangles together in the middle of the long side using your thumb and forefinger to form butterfly or bow tie shapes. If shapes do not hold, moisten fingers and pinch again.
- Spread the pasta out on a lightly floured surface or a floured dish towel. Dust the pieces with flour and allow them to dry for at least 15 minutes before cooking. The drying period will help firm the pasta slightly and help prevent them from sticking to each other.
Quadrucci:
- After the rolled out pasta sheets have dried for approximately 15 minutes, place a sheet on a lightly floured work surface and stack the remaining sheets on top. Lightly dust each layer with flour before placing the next layer on top.
- Cut 4 inch strips in the stack of pasta sheets, cutting through all layers with a sharp knife.
- Cut across the 4 inch wide strips to create 4 inch strips that are the width of the size square you desire. The most common sizes used for quadrucci pasta are 3/8, ½, and ¾ inch squares. If you want ½ quadrucci, cut the strips ½ inch wide.
- Cut across the 4 x ½ inch strips at ½ inch intervals to produce ½ inch square pasta pieces.
- Separate the squares and spread out on a lightly floured surface or floured dish towel. Dust the squares lightly with flour and allow them to dry for at least 15 minutes before cooking. The drying period will help firm the pasta slightly and help prevent them from sticking to each other.
Fusilli:
- After the rolled out pasta sheets have dried for approximately 15 minutes, place a sheet on a lightly floured work surface.
- Using a sharp knife, cut the pasta sheet into 3 inch strips. Cut across 3 inch strips to produce approximately 1/16 x 3 inch strips.
- Wrap 1/16 x 3 inch strips around a floured wooden stick.
- Carefully pull the strips off the stick and place on a floured surface. Shapes should look similar to a spring. Let pasta dry before cooking.
Garganelli:
- After the rolled out pasta sheets have dried for approximately 15 minutes, place a sheet on a lightly floured work surface.
- Using a sharp knife, cut sheet into 2 or 2 ½ inch strips. Cut across strips at 2 or 2 ½ inch intervals to form squares.
- Starting in one corner of the square, roll the pasta around a floured wooden stick that is ¼ inch or less in diameter. To give the pasta a grooved surface, place the pasta square on a grooved board and roll the square on the wooden stick while applying pressure to form grooves on outer surface.
- Carefully slide the rolled pasta off the stick. Do not to squeeze the pasta as it is pulled off the stick to prevent it from becoming flattened. Place the garganelli tubes on a lightly floured surface and allow pasta to dry for at least 15 minutes before cooking. The drying period will help firm the pasta slightly and help prevent them from sticking to each other.
Matagliati:
- After the rolled out pasta sheets have dried for approximately 15 minutes, place a sheet on a lightly floured work surface.
- Lightly dust the pasta sheet and then starting at one end, fold over approximately a 2 inch strip. Continue to fold this end over until you end up with a flattened roll.
- Trim across one end of the strip to create a straight edge. Starting at the straightened edge, cut diagonally to cut off each corner, leaving a pointed end. Cut across the strip, cutting the point off and creating a straight edge again. Repeat cutting off the corners diagonally and then the pointed end until the entire strip has been cut up.
- Do not worry about cutting pieces exactly the same each time. Matagliati means "badly cut" so misshaped pieces are expected.
- After the pieces have been cut, separate the layers into single pieces and place on a lightly floured surface and allow pasta to dry for at least 15 minutes before cooking. The drying period will help firm the pasta slightly and help prevent them from sticking to each other.
Orecchiette:
- Orecchiette are generally made from flour and water dough. The flour and water are mixed together and kneaded in the same manner as the egg pasta dough but is not rolled out into sheets.
- After the dough has been kneaded, pull a piece off and roll it in your hands. Place the dough on a lightly floured surface and begin to roll the dough back and forth using the palm of your hands. Continue to roll until the pasta dough forms a tube approximately 3/8 inches wide. If the dough becomes sticky, lightly flour the working surface and your hands.
- Start at one end of the rolled pasta use a sharp knife cut off pieces slightly less than 3/8 inch thick.
- Flour the palm of your hand and place one of the pieces in the center of your palm. Using your other hand, take your thumb and press in the center of the pieces to form a disk shaped pasta. If dough becomes sticky, dust your palm and thumb before using. The shape that is formed looks similar to an ear.
- As each piece is formed, place it on a lightly floured surface and allow pasta to dry for at least 15 minutes before cooking. The drying period will help firm the pasta slightly and help prevent them from sticking to each other. Orecchiette can be air dried and stored for several months at room temperature. It may take 24 or more hours to dry completely. Cut one open to check for dryness. If you cannot cut it with a knife it is dried sufficiently. If you cut it open and it still damp in the middle, it requires more drying.
Stuffed Pasta
When making stuffed pasta, the pasta dough should be rolled thinner than when making other pasta because the stuffed pasta requires two layers. Using thinner layers will prevent the edges of the stuffed pasta from becoming too thick. The pasta dough for stuffed pastas should not be allowed to dry before beginning the preparation process. It is best to have the pasta moist so that the layers will stick together better when sealed.
Fillings:
- Fillings can be as simple as one or two ingredients to several ingredients used in special recipes. Ingredients, such as meats, fish, cheese, vegetables, and herbs, are used in preparing fillings for stuffed pastas. It is common for eggs to be used in fillings to bind ingredients together.
- The filling used should be as free of moisture as possible to prevent the pasta from becoming soggy. Remove as much moisture as possible from all ingredients before mixing together.
- If using a moist filling, do not let the pasta set too long before cooking because the moisture from the filling may cause the pasta to stick to the surface where it has been placed.
- Be sure the filling is completely prepared before starting to work with the pasta so the pasta does not dry out while you are preparing the filling.
- When adding filling to pasta, do not over fill because too much filling will not allow enough room for the edges to seal properly.
Ravioli:
- Roll pasta dough into a rectangle shaped sheet. Using a knife or fluted pastry wheel, square off edges so you have approximately a 9 x 12 inch sheet of pasta. Cut the pasta sheet into 3 inch wide strips, resulting in four 3 x 9 inch strips.
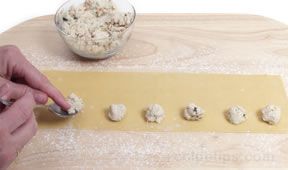
- Place three mounds, of approximately 1 teaspoon of stuffing each, on two of the four strips. Space each mound about 1 inch apart, leaving approximately ½ inch on each edge.
- Moisten the area of pasta around each mound with water or beaten egg using a pastry brush or your fingertip.
- Place the remaining pasta strips on top of the strips with the stuffing and press firmly around each mound, sealing the two layers together.
- Using a knife or fluted pastry wheel, cut between each mound to create individual ravioli.
- Crimp the edges of the ravioli with a fork to ensure that they are sealed properly.
- Place the finished ravioli on a floured surface and lightly dust them with flour. Allow pasta to dry for at least 15 minutes before cooking.
Ravioli Alternatives:
- Individual ravioli - Cut the sheet of pasta into individual squares or use a circle pasta cutter to cut individual circles. Place approximately 1 teaspoon of stuffing on each individual pasta square or circle. Moisten edges and place an individual square or circle on top and crimp the edges.
- Ravioli form tray - Place the sheet of rolled pasta on top for the form tray, which has been lightly floured and press the dough into the depressions of the form. Fill depressions with stuffing and moisten around all edges of the stuffing. Place another sheet of rolled pasta on top the form, covering the stuffing. Run a rolling pin over the top of the form to seal and cut the individual ravioli. If all ravioli does not get cut all the way through, use a knife or pastry cutter to cut them apart.
- To ensure that the ravioli is properly sealed, crimp all edges with a fork. Dry pasta as shown above.
Agnolotti:
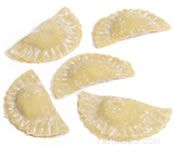
- Agnolotti is made basically in the same manner as ravioli except the ending shape of the pasta is a half moon. Individual agnolotti shapes are cut in squares or circles.
- Place the filling in the center of the square or circle and moisten the edges.
- Fold the shapes in half and press firmly along the edges to seal.
- If using a square, the shape must be cut into a half moon shape using a round pastry cutter or cookie cutter. If using a circle the agnolotti will already be a half moon shape once it is folded in half.
- Crimp edges with a fork to ensure the edges are properly sealed.
- Place the finished agnolotti on a floured surface and lightly dust them with flour. Allow pasta to dry for at least 15 minutes before cooking.
Tortellini:
- From a thinly rolled pasta sheet, cut circles using a cookie cutter, glass or pastry cutter. Circles should be 2 to 3 inches in diameter.
- Drop approximately 1 teaspoon of filling in the center of each circle. The amount of filling will vary according to the size circle you are using.
- Moisten the area of pasta around each mound with water or beaten egg using a pastry brush or your fingertip.
- Fold circles in half to form a half moon shape and press edges firmly to seal properly.
- Wrap the pasta around your forefinger, turning the sealed edges up. Bring the two corners together and pinch to seal.
- Place the finished tortellini on a floured surface and lightly dust them with flour. Allow pasta to dry for at least 15 minutes before cooking.
Cutting and Shaping Pasta by Machine
Cutting with a Hand-Cranked Roller Machine
Noodles:
- The rolled pasta strips that were rolled through the pasta machine can also be cut into different width noodles through the pasta machine. Be sure the rolled strips have dried for 15 to 30 minutes before sending them through the pasta machine. This will help prevent them from sticking together. Do not let them get overly dry or they will crack as they go through the rollers.
- Lightly dust the strips with flour before sending them through the pasta machine. This will help the machine cut through the pasta for a clean cut.
- Be sure the proper cutting attachment has been applied to the machine for the width of pasta you want cut and then begin to feed the strip of pasta into the machine. Turn the handle with one hand and catch the pasta with the other hand as it is coming out of the machine to prevent the noodles from falling into one big pile.
- Spread the noodles out on a lightly floured surface, a floured dish towel or hang them over the back of a chair on a floured dish towel. Allow them to dry for at least 15 minutes before cooking. The drying period will help firm the noodles slightly and help prevent them from sticking to each other.
- Tagliatelle, fettuccine, Linquine, tagliolini, and pappardelle can all be cut with a hand-cranked pasta machine by the use of different width attachments. After noodles are sent through and cut to the desire width, they can be cut to the length required.
Cutting with a Hand-Cranked Extrusion Machine
Pasta Shapes:
- The extrusion machine is used to make pasta shapes by forcing the dough through dies. The pasta is mixed by hand or with a processor and then feed into to machine without being rolled first. The pasta cannot be too moist or the pasta will stick together as it extrudes from the machine. If it is too moist it should be sprinkled with flour and then sent back through the machine.
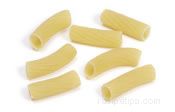
- The extrusion machine can produce shapes such as macaroni, rigatoni, bucatini, and fusilli. The shapes that can be made will depend on the dies available for that machine. As the pasta shapes are extruded from the machine, they must be cut off at the desired length.
- Place extruded pasta on a floured surface and dust lightly with flour. Allow pasta to dry for at least 15 minutes before cooking. The drying period will help firm the pasta slightly and help prevent them from sticking to each other.
| Note: The hand-cranked rolling machine can only produce flat noodles. The hand-cranked extrusion machine can only produce tube pasta and some shapes, depending on the dies available for that machine. To create tubes and shapes, and also be able to create noodles, you would have to have both machines. |
The Electric Extrusion Machine
Recent changes in the electric extrusion machine have produced a machine that allows pasta to be made quick and easy. Earlier models did not make the dough the proper consistency, resulting in dough that was hard to extrude. With the electric extrusion machine there is no need to mix, knead, or roll the dough. The ingredients are added to the machine, it mixes the dough and extrudes the pasta in a shape created by the attached die. Some of the common shapes created by the electric extrusion machine are macaroni, rigatoni, ribbed penne, ziti, lasagne, cappellini, bucato, spaghetti, and vermicelli.
Making Pasta with an Electric Extrusion Machine:
- Choose the correct die for the pasta shape you want to make and attach it to the machine.
- Add the ingredients as called for in the recipe you are using. Note that each machine varies in the amount of liquid required. The electric machine will run a little drier dough than the hand-cranked machines and the dough has a loose consistency. Do not add the full amount of liquid called for in the recipe. Add 90 to 95 percent of the amount called for and then allow the dough to mix. Check its consistency and add more liquid if necessary. The amount of liquid may vary each time you make pasta due to differences in humidity, heat and the type of flour being used. After experimenting with the machine, you will get a feel for the correct amount of liquid to use most of the time, but even then certain conditions can cause that to vary.
- Turn the machine on and the pasta should begin to extrude in the shape of the die you have selected.
- Have a bowl or a floured dish towel ready to catch the pasta as you cut it off at the desired length and then place pasta shapes on a floured surface. For long lengths, catch them in your hand, cut to desired length and place on a floured surface.
- Dust pasta lightly with flour and allow pasta to dry for at least 15 minutes before cooking. The drying period will help firm the pasta slightly and help prevent them from sticking to each other.
Tips on Extruding Dough Properly:
- Spray the die with olive oil or non-stick cooking spray before attaching it to the machine. The coating will help the pasta extrude more smoothly.
- If the dough is too sticky when it is extruded or it is sticking to the mixing unit, the dough is too moist. Add a small amount of flour, remix the dough and try extruding again.
- If the dough has rough edges when it is extruded or it won't extrude from the machine, the dough is too dry. Add a small amount of liquid, remix the dough and try extruding again.
- When extruding fine pasta, such as spaghetti or vermicelli, allow the dough to be a little moister than for other pastas. This will allow the delicate pasta to extrude easier.
Advantages and Disadvantages of Hand-Cranked and Electric Machines
Hand-Cranked Machines
Advantages:
- Hand-cranked machines are easier to clean because the dough is drier and feed into the machine as a solid mass compared to the electric machine whose dough has a loose consistency. The hand-cranked extrusion machine is slightly harder to clean than the cutting machine because the dies require a little additional work to clean.
- Although the dough needs to be the proper consistency, it is more forgiving than the dough for the electric machine and the consistency of the hand-cranked dough is generally easier to correct.
- A hand-cranked machine is less noisy than an electric machine.
- The cost of a hand-cranked machine is considerably less than an electric machine. A fairly good hand-cranked machine can range from $40 to $60, which is about 1/3 the cost of a lower end electric extrusion machine.
Disadvantages:
- Hand-cranked roller machines only make flat pasta noodles and extrusion machines only make shaped pasta. To do both you have to purchase both types of machines.
- Hand-cranked machines take more time than the electric machines. It requires mixing the dough separately, kneading and allowing it to rest. If making flat pasta noodles, the dough first has to be rolled to the proper thickness. With the electric extrusion machine, the dough is mixed in the machine and then extruded, skipping the mixing, kneading, resting and rolling steps.
Electric Extrusion Machines
Advantages:
- Electric extrusion machines can make noodles and shapes, using one machine. A die is changed on the machine when a different shaped noodle or pasta is desired. Each machine comes with a set of dies.
- You can make pasta in a short amount of time. Once you are experienced on the proper amount of liquid and flour to use in your machine, you can make a batch of pasta in less than 20 minutes.
- The electric extrusion machine requires less working space. You only need room for the machine and a floured surface to lay the fiinished pasta. The hand-cranked machine requires room to mix the dough, to knead and roll the dough, an area to lay the rolled pasta sheets before cutting, an area for the machine and a place to lay the finished pasta out on a floured surface.
Disadvantages:
- The electric extrusion machine is harder to clean because the loose consistency of the dough allows it to get into more parts of the machine. It can take a considerable amount of time to get all the dough out of the tight spots of the machine and its parts. The extra time in cleaning can end up consuming the time saved in using the electric machine over the hand-cranked machine.
- It is harder to get the right consistency of dough to provide proper extrusion of the pasta. The consistency of the dough can vary more for the hand-cranked machine and still result in acceptable pasta.
- The electric extrusion machine is much noisier than the hand-cranked machine. Different machines will vary in the degree of noise they make.
- Electric extrusion machines are much more expensive than the hand-cranked machines. The cheaper models are almost three times more expensive and the higher end models can be $400 or more. Unless you make a lot of pasta, the time savings may not justify the cost of an electric machine.
Asian Noodles
Asian noodles, like pasta noodles, are available in round, flat and square shapes, and in various widths and lengths. Most often Asian noodles are purchased, rather than made by hand. They are available fresh, dried or partially dried from Asian markets or some varieties are available in food stores.
Asian egg noodles and udon noodles can be made by hand with no more difficulty than making pasta noodles by hand, but udon noodles require a different cooking method. Other Asian noodles require ingredients not as readily available and involve process that make them more difficult to make. Pulled noodles are especially difficult to make by hand, because it requires the ability to twirl stretched out pasta dough in both hands, fold and refold, and repeatedly stretch and twirl, and fold and refold until long fine noodles are formed from the dough. Today most pulled noodles are made by machine.
Preparing Asian Noodles:
Many Asian noodles require some preparation before they are used in their final cooking stage. Shown below are some of the preparation processes used for different Asian noodles.
Egg Noodles: Egg noodles do not require any preparation before cooking. Whether fresh or dried, they are ready to cook. If you are using them in soups or stir-fries, they need to be boiled first.
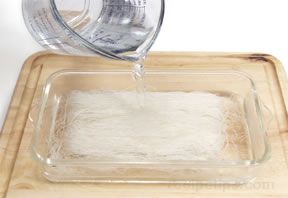
Rice Noodles: Rice noodles need to be soaked before cooking. The flat, regular size rice noodles should be soaked for 15 minutes in hot (not boiling) water and then rinsed and drained to remove the starches. Thinner noodles, such as rice vermicelli, and fresh rice noodles should be softened by pouring hot water over them and then drained before cooking.
Cellophane Noodles: Cellophane noodles should be soaked in hot (not boiling) water for approximately 5 minutes. Soak only until softened. Rinse and drain well. If the cellophane noodles are going to be deep-fried, they do not need to be presoaked.
| Note: Cellophane noodles are extremely hard before they are soaked. Do not try to break them up with your hands. The noodles have a tendency to break into sharp fragments that can injure your hands. Use a kitchen shears or chop the noodles with a cleaver if you need to break them into pieces. |
Udon Noodles: Udon noodles do not require presoaking but if they are going to be stir-fried or used in a soup, they should be precooked. For cooking instructions, see Cooking Guide - Asian Noodles.
Flavored and Colored Pasta
Generally the color of the pasta is an affect of the flavoring agent used in the pasta. The taste from the flavoring agents is most often fairly mild. Shown below are some of the most common flavoring agents and how to add them to your homemade pasta.
|
Flavors and Colors of Pasta - Pasta Dough Ingredients |
|
Flavoring Agent |
Description |
Flavor |
Color |
|
Whole Wheat Flour |
Whole wheat flour must be mixed with an all-purpose flour to make the dough workable. Begin by using 1 part whole wheat flour to 1 part all-purpose flour. To increase the flavor and color, experiment with mixing a larger portion of whole wheat flour than all-purpose flour. It may take a couple of tries to get the most flavor and still have workable dough. |
Enhances the natural nutty flavor of basic pasta |
Medium tan to light brown |
| Buckwheat Flour |
Mix 3 parts buckwheat flour to 1 part all-purpose flour. Whisk an egg into the water that will be mixed with the flour. This will help make the dough smooth and workable. |
Strong nutty flavor |
Light to medium brown |
| Oat Flour |
Oat flour must be mixed with an all-purpose flour to make the dough workable. Begin by using 1 part oat flour to 1 part all-purpose flour. The amount of water may need to be adjusted also. |
Nutty |
Tan to medium brown |
| Brown Rice Flour |
Flour made from rice that has only the inedible hull removed. This flour is high in fiber and produces dough that resembles pasta dough made from whole wheat flour, except the dough made from brown rice flour is a little stickier. Pasta dough made with brown rice flour works best for making flat noodles. |
Slightly sweet |
Tan to light brown |
| Rice Flour |
Rice flour is mixed with water to produce a translucent noodle. |
Mild |
Translucent white |
| Mung Bean Threads |
Mung bean starch and potato starch are combined to produce a flavorless noodle that takes on the flavor of the food that it is combined with. |
Flavorless |
Translucent white |
| Corn Meal |
Begin by using 1 part corn meal to 1 part all-purpose flour. If too much corn meal is used, the dough becomes too grainy and will be difficult to roll out and extrude.
Color Note: Color depends on the type of corn meal used. |
A slightly nutty, corn flavor |
Yellow, white or blue - See: Color Note |
| Spinach |
Cook approximately ½ pound of spinach until the leaves are tender. Puree or finely chop the cooked spinach and then squeeze out as much moisture from the spinach as possible. To assist in removing the moisture, wrap the spinach in a piece of cheesecloth and wring out moist. Add 3/8 cup (6 tablespoons) of spinach to the eggs and gradually mix the flour into the egg mixture. |
Mild spinach |
Medium to dark green |
| Broccoli |
Stir ¼ cup of finely chopped and steamed broccoli in with the eggs and gradually work the flour into the egg mixture. Save the water from cooking the broccoli and use if the dough is too dry and needs some liquid added. |
Mild broccoli |
Medium to dark green |
| Tomato |
Mix 2 to 3 tablespoons of tomato paste in with the eggs and gradually work the flour into the egg mixture. The paste may produce a dough that is stickier than normal, if so, gradually add a little more flour until it is the proper consistency. |
Mild tomato |
Light reddish-orange to dark reddish-orange |
| Beet |
Mix ½ cup of cooked beets, pureed and strained, in with the eggs and gradually work the flour into the egg mixture. Save the water from cooking the beets and use if the dough is too dry and needs some liquid added. |
Slight flavor change from basic pasta |
Deep pink to dark red |
| Carrot |
Mix ½ cup of cooked and pureed carrots in with the eggs and gradually work the flour into the egg mixture. |
Strong carrot |
Orange |
| Red Bell Pepper |
Remove the stem and seeds from one red bell pepper, cut it into small pieces and puree. Mix the pureed peppers in with the eggs and gradually work the flour into the egg mixture. |
Slightly sweet |
Bright orangish-red |
| Chile Pepper |
Remove stems and seeds from 4 or 5 chile peppers and then finely chop or pureed them. Mix the pureed chile peppers in with the eggs and gradually work the flour into the egg mixture. Different varieties of chile peppers can be used, such as jalapeño, cayenne, poblano, and Serrano. Each has a different degree of hotness and the amount used in the dough may need to be adjusted accordingly. 1 to 2 teaspoons of crushed, dried chile peppers can also be used. |
A sharp biting flavor, which will vary in strength according to the type of pepper used |
Color will vary according to the variety of pepper used, but is generally some shade of orangish-red |
| Squid Ink (Black) Pasta |
Mix ½ ounce of squid ink in with the eggs and gradually work the flour into the egg mixture. Squid ink can be found in specialty gourmet shops or can be extracted from the ink sacs of fresh squid or cuttlefish. |
Has little or no flavor. It may have a slightly mild seafood flavor, if any |
Dark gray, almost black |
| Garlic |
Crush 2 to 3 garlic cloves, mix in with the eggs, and gradually work the flour into the egg mixture. |
Garlic |
Creamy beige |
| Herb |
Mix ½ cup of finely minced herbs in with the eggs and gradually work the flour into the egg mixture. A single herb or any combination of two or more herbs can be used. Some of the herbs that work well in flavoring pasta are sage, thyme, parsley, cilantro, chives, rosemary, tarragon, basil, and oregano. |
Intense herb |
Creamy beige with green flecks |
| Garlic and Herb |
Mix ¼ cup of finely minced herbs and 1 or 2 crushed garlic cloves in with the eggs and gradually work the four into the egg mixture. |
Garlic and herb |
Creamy beige with green flecks |
| Curry |
Mix ¾ teaspoon of fresh curry powder or 1 to 1 1/2 teaspoons of stored or commercial curry powder in with the flour, pour the flour on the working surface and form a well in the middle of the mound of flour. Add eggs in the well and begin gradually working the flour and curry powder into the eggs. |
Spicy |
Tint of burnt orange |
| Saffron |
Mix 3/8 teaspoon of saffron powder in with the flour, pour the flour on the working surface and form a well in the middle of the mound of flour. Add eggs in the well and begin gradually working the flour and saffron powder into the eggs. Saffron threads can also be used. Soak ½ teaspoon of saffron threads in 1 tablespoon of very hot water. Add the saffron liquid, which has been strained, to the eggs and gradually work the flour into the egg mixture. |
Spicy, mildly bitter |
Bright yellowish-gold |
| Lemon |
Mix 1 ½ to 2 tablespoons of lemon zest or 3 tablespoons of lemon juice in with the eggs and gradually work the flour into the egg mixture. If using lemon juice, you will need to add a little more flour to prevent the dough from being too sticky. |
Mildly tart lemon |
Light yellow |
| Strawberry |
Place 2/3 cup of cleaned and halved fresh strawberries in a saucepan. Heat and simmer for 20 minutes. Strain the juice from the strawberries by placing in a strainer and squeezing out as much juice as possible. Use only the juice for the pasta. Add the juice in with the eggs and gradually work the flour into the egg mixture. If dough is sticky after all the flour has been worked in, add a small amount of flour until the dough is the proper consistency. |
Mild straw-berry |
Dull pale red |
| Chocolate |
Mix 2/3 cup of unsweetened cocoa powder in with the flour, pour the flour on the working surface and form a well in the middle of the mound of flour and cocoa powder. Add ¼ cup of confectioners' sugar and 1 teaspoon of vanilla in with the eggs and pour egg mixture in the well in the middle of the flour. Gradually work the flour into the egg mixture. If the dough is too dry, add a teaspoon of water at a time until the dough is the proper consistency. |
Mild Chocolate |
Brown |
These are just some of the more common flavoring agents used. You can experiment with other flavoring agents or mix two or more together to develop your own unique flavor. The quantities of flavoring agents stated above are a starting point for flavoring and coloring your pasta. Experiment and adjust these quantities according to your personal taste.
Some Asian noodles are available in flavors, such as spinach, green tea and red shiso. Most Asian noodles get their flavor from some of their basic ingredients, such as eggs, wheat flour, buckwheat flour, mung bean threads, and rice flour. Cellophane noodles, made from mung bean threads, have little flavor but absorb the flavor of the food that they are cooked with.
Drying Pasta
Pasta is allowed to dry to varying degrees for different purposes. The amount of drying time varies according to the type of pasta, drying conditions and the drying method used. Shown below are some of the drying methods used and their purpose.
Drying Before Cutting: The pasta dough should be allowed to dry after it has been rolled out and before cutting it into noodles or shapes. Allowing it to dry for approximately 15 minutes will make the dough less sticky and allow it to cut better whether cutting by machine or by hand. If cutting noodles, do not let the dough dry too much, because if it is too dry it may start to crack while being cut.
If making stuffed pasta, do not allow the dough to dry before cutting and stuffing. This will allow the dough to remain slightly sticky, which will provide a better seal.
Drying Before Cooking: After fresh pasta noodles and shapes have been cut, they should be allowed to dry for at least 15 minutes before cooking. The drying period allows the pasta to dry enough so that it becomes a little firm and less sticky, which helps prevent the pasta from clumping and sticking together when it is cooked. The shaped pastas also hold their shape better when allowed to dry slightly before cooking.
Drying Before Storage: Fresh pasta can be dried completely and then stored at room temperature. Shaped pasta should be laid out on a floured surface and lightly dusted with flour. The shapes should not be touching each other and they should be turned over periodically to allow proper air exposure to all sides. This will allow the shapes to dry evenly.
There are a couple of ways in which pasta noodles can be dried. The noodles can be laid out on a floured surface, lightly dusted with flour, left uncovered and allowed to remain there until they are completely dried. The strands should be separated so they are not touching, allowing proper air exposure.
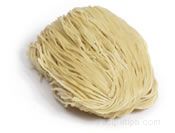
Pasta noodles can also be hung over the back of a chair on a floured dish towel, over a broom handle, or on a drying rack to dry. Allow the noodles to sit in a warm dry location to dry. Long pasta noodles, such as angel hair, tagliatelle, tagliarini, and fettuccine, are sometimes wrapped into a nest and allowed to dry. The nests must be turned over often to aid in drying thoroughly to prevent it from molding on the bottom side.
The drying time for all fresh pasta will vary greatly. Drying times are affected by the size, shape and thickness of the pasta. The drying method and the temperature and humidity of the area in which it is dried will also greatly affect the drying time. Once the pasta is completely dry, it can be stored in an airtight container, in a cool dry area, at room temperature, for several months.
Tips for Making Homemade Pasta
- Strengthen your homemade pasta dough by substituting ½ cup or less of semolina flour in place of an equal amount of all-purpose flour.
- When working with the pasta dough, if it becomes sticky at any point dust it with lightly with flour. Also, dust the equipment you are working with, such as the rolling pin or the rollers in the pasta machine, to prevent the dough from sticking.
- When putting pasta dough strips through a rolling machine to thin the dough, if the strips become long and hard to handle, cut the strips in half to make them easier to handle.
- Allowing the pasta dough to dry for approximately 15 minutes before cutting will result in cleaner cuts.
- Drying the cut pasta noodles or shapes for 15 minutes or more before cooking will allow the pasta to firm up a little and prevent the pasta from sticking together when cooking.
- Save the trimmings when cutting pasta noodles or shapes. Press the trimmings together, reroll and cut additional noodles or shapes.
- When making stuffed pasta, work as quickly as possible to prevent the pasta dough from drying out and becoming difficult to work with. Also to prevent problems with sealing properly.
|


