


|
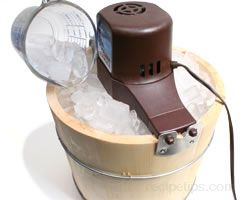
See More Information on Making Homemade Ice Cream: There are several different freezing methods that can be used when making homemade ice cream. A common method involves the use of an ice cream maker. Ice cream makers are available in many different models. Some require the use of ice and some have a freezing unit that does not require ice. You can also make ice cream without using a ice cream maker by using your freezer as a freezing unit. Shown below are several different freezing methods that can be used. Use the information below to help you through the freezing process but also be sure to consult your user's manual for the model of ice cream maker you are using so that you are aware of any special instruction. Ice Cream Maker Using Ice | Ice Cream Maker with a Freezing Unit
| ||||||||||||||||||||||||||||||||||||||||||||||||||||||||||||||||||||||||||||||||||||||||||||||||||||||||||||||||||||||||
|
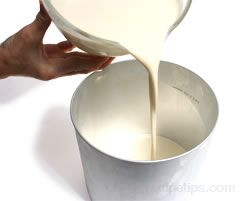
Preparing Ice Cream Can The ice cream can that will hold the ice cream during the freezing process should be stored in the freezer for at least several hours before starting the freezing process. Be sure the ice cream mixture has been chilled and aged properly before beginning the freezing process. | ||
Pour the ice cream mixture into the chilled ice cream can, making sure to not fill the can more than 3/4 full. Some ice cream makers have a can that will have a fill line indicated on it. This will leave room for expansion when the mixture freezes. Also, keep in mind that if flavoring ingredients are going to be added at the end of the process, you will have to allow space for these ingredients. |
 | |
| Place the dasher in the ice cream can, making sure the end is placed in the slot on the bottom properly and that the metal stem is at the top pointing up. | 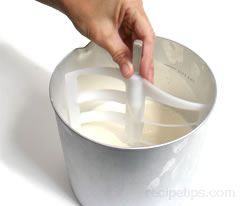 | |
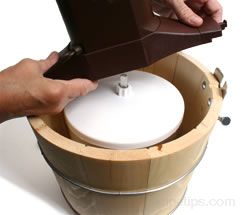
| Place the cover on the can. The stem of the dasher fits into the hole in the center of the cover. | 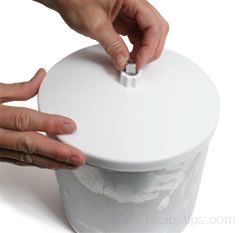 | |
|
|
 | |
|
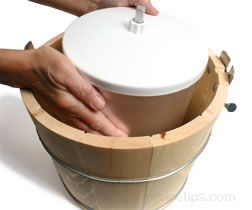
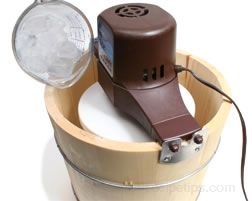
Fit the end of the motor drive with the two tabs into the plate with the two tab openings. Engage the motor drive by placing the stem of the dasher in the hole on the bottom of the drive unit and rotate the can slightly until it engages with the cover. |
 | |
| At the opposite end of the drive unit, allow the tab to drop into the slot on the latch plate. Rotate the latch over the tab to lock into place. | 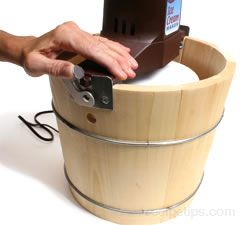 | |
|
|
 | |
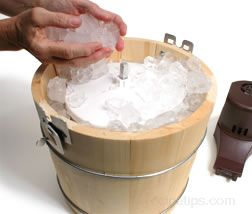
|
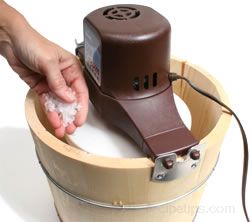
Sprinkle about 1/2 cup of rock salt (regular salt will also work) evenly over the ice. Note: When the unit is turned on, the ice cream can rotates, the dasher inside does not move. |
 | |
|
Continue to add layers of ice and salt as stated above until the ice level is to the top of the can. The unit should run for 20 to 40 minutes before it stops, depending on the amount of ice cream in the unit. Start checking the ice cream after 25 minutes because it may not stop on its own when the ice cream is done, especially if the unit is not full. |
 | |
Note: Salt is necessary to force the ice to melt. As the ice melts and forms a brine solution, it absorbs the heat from the ice cream mixture causing its temperature to lower. The ice cream mixture's temperture will gradually lower until it reaches its freezing point of 27°F if the proper proportions of ice and salt are used. A ratio of 5 cups of ice to 1 cup of salt should keep the melting solution at 8° to 12°F. If salt was not used the ice would melt at 32°F and would not be able to lower the ice cream mixture's temperature to its 27°F freezing point. Because of the coarseness of rock salt, it will work to melt the ice faster that regular salt, thus freezing the mixture quicker. | ||
|
|
 | |
| Before removing the cover, be sure to remove all the salt and ice from the top of the can and cover so it doesn't get in the ice cream when removing the cover. | 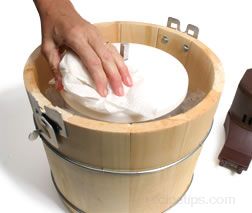 | |
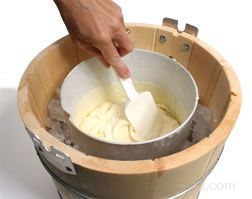
| Remove the cover and pull out the dasher. Check ice cream for proper consistency. The ice cream should be thick but too soft to scoop. This consistency is good for stirring in flavorings. | 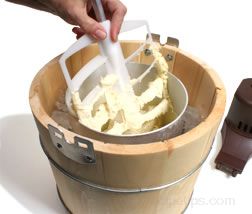 | |
|
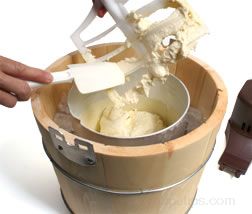
Use a spatula to remove the ice cream on the dasher. Stir in flavorings that are desired. Flavorings can also be added before removing dasher and then by placing cover back on the unit and replacing motor unit to churn the ice cream to mix in flavorings. It may be easier to just stir them in by hand rather than going through the extra set up again. |
 | |
|
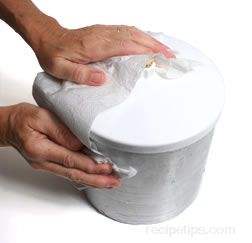
If hardening in the can, leave the ice cream in the can and pack the ice cream down firmly. Plug the hole in the center of the cover with the cork. Place the cover back on the ice cream can. See illustration below. It is best to wipe the cover and can clean before the hardening process. Once the can has been properly cleaned, place can in the freezer for 3 to 4 hours until hardened. |
 | |
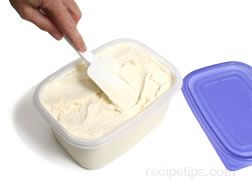
| If hardening in a different container, scrape the ice cream into a container with an airtight cover. | ||
|
Pack ice cream down firmly and be sure to leave at least 1/2 inch head space for expansion during hardening process. Place the cover on the container tightly. Place the ice cream in the freezer for 3 to 4 hours to harden. |
 | |
|
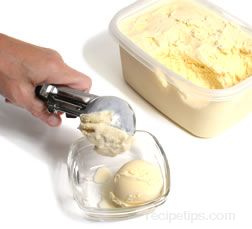
Once the ice cream has hardened, remove from freezer and serve. Return any remaining ice cream to the freezer for storage. |
 | |
|
|
 | |
| Place the cork in the center of the cover and then place the cover on the can. | 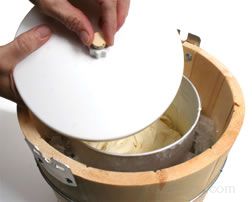 | |
| Add layers of ice and salt the same as when going through the freezing process. Add enough ice to cover the entire can and cover. | 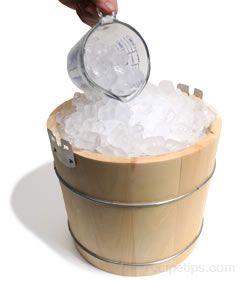 | |
|
Cove the can with towels or a blanket and allow to sit for approximately 3 hours. The time that it takes to harden will vary depending on the amount and type of ice cream. Unwrap the bucket and check the ice during this time and if needed add more to keep can covered with ice. Rewrap with covering. After the ice cream has hardened sufficiently, take the can out of the bucket and clean the ice and salt off from it. Remove the cover and scoop ice cream into bowls or cones. Serve and enjoy! |
 | |
Freezing with an Electric Ice Cream Maker with a Freezing Unit
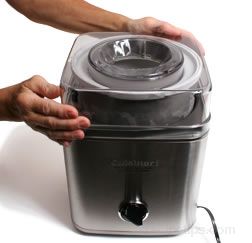
The instructions below are for using an electric ice cream maker that uses a freezing unit that contains a cooling liquid between double insulated walls. The unit is placed in the freezer for the cooling liquid to freeze; and once frozen, it does the work of the ice and salt in the unit above. This is just one type of model. Realize that there are many different types of ice cream makers and unless you have this same model, it is best to read the user's manual for your model before beginning the freezing process. This type of freezing process is also a "stir freezing" method because the ice cream is being stirred throughout the freezing process.
|
Freezer Unit Prep The freezing unit of the ice maker must be completely frozen before the ice cream freezing process begins. Place the freezing unit in a freezer and allow the cooling liquid in the double walls of the unit to freeze completely. This could take from 6 to 24 hours, depending on the temperature of the freezer, how full the freezer is, and how often the freezer door is opened. To check if it is frozen, shake the unit; if you can hear it moving around in the walls of the unit, it is not completely frozen yet and should be returned to the freezer. | ||
|
Churning After the freezing unit is completely frozen, set it in the base of the ice cream maker. Place the cover and mixing arm on the unit. Once the cover and mixing arm are secured, turn the unit on to start the ice cream maker churning. The freezing unit turns and the mixing arm is stationery. |
 | |
| Pour the ice cream mixture into the frozen unit through the opening on the top of the cover. Fill it no more than 1/2 inch from the top. If you are going to be adding flavoring ingredients at the end of the process be sure to leave room in the freezing unit. | 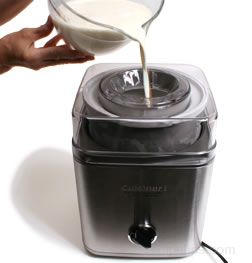 | |
|
The unit should run for 25 to 40 minutes before the ice cream has thickened enough. Start checking the ice cream after 25 minutes. Depending on the amount of ice cream in the unit it may take additional time. The ice cream should be thick but too soft to scoop. This consistency is good for adding in flavorings. |
 | |
| When the ice cream is ready, add the strawberry sauce and churn until evenly mixed into the ice cream. | 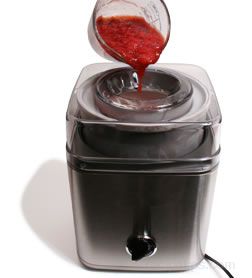 | |
|
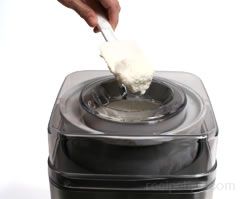
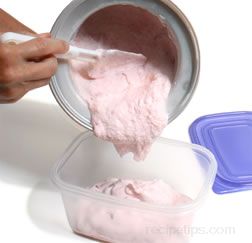
Remove the cover and pull out the mixing arm. Use a spatula to remove the ice cream. |
 | |
| If flavorings do not seem to be completely mixed, quickly stir by hand to distribute evenly. | 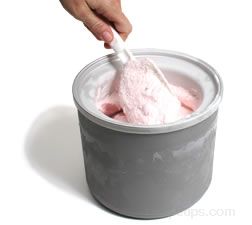 | |
|
Place the ice cream in the freezer for several hours to harden. |
 | |
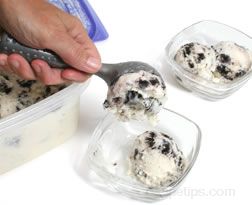
| After the ice cream has hardened sufficiently, take the ice cream container out of the freezer, remove the cover and scoop ice cream into bowls or cones. Serve and enjoy! | 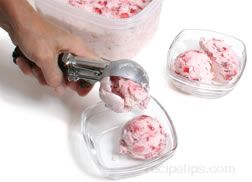 | |
Freezing without an Ice Cream Maker
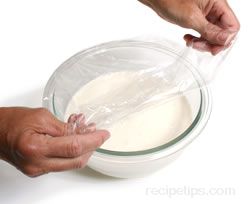
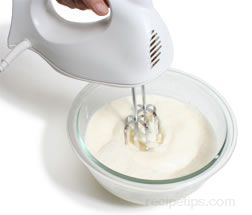
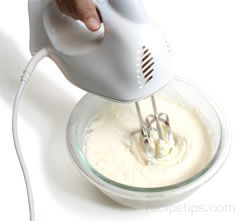
The instructions below are for using an electric hand mixer to break up the ice crystals during the freezing process. The mixture can also be hand beaten using a fork or a food processor can be used. This simple freezing process is referred to as a "still freezing" method because the ice cream is not stirred continually throughout the freezing of the ice cream mixture.
|
|
 | |
|
|
 | |
|
Place the container in the freezer and allow the mixture to freeze for 2 hours. Remove from the freezer and beat with a hand mixer to break up ice crystals that are beginning to form. Cover and place back in the freezer. |
 | |
|
Freeze for 2 more hours and then remove from the freezer and beat again with the hand mixer. The ice cream should be thick but to soft to scoop. If it is not thick enough, return it to the freezer for additional freezing time. Beat again before adding cookie chunks. |
 | |
| If ice cream has thickened properly, stir in the cookie chunks until well distributed throughout the ice cream. Do not beat with the hand mixer after the cookie chunks have been added. Beating would break the cookies into crumbs and tiny pieces. | 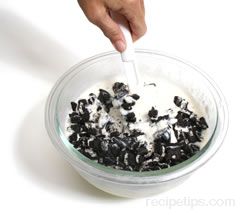 | |
|
|
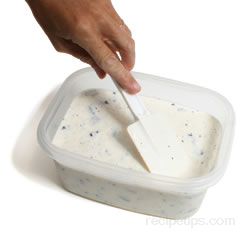 | |
| Cover and place the container in the freezer and allow the ice cream to freeze until firm. | 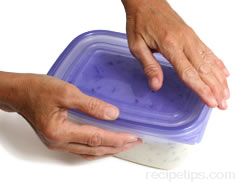 | |
| After the ice cream has hardened sufficiently, take the ice cream container out of the freezer, remove the cover and scoop ice cream into bowls or cones. Serve and enjoy! |
 |
Freezing without an Ice Cream Maker
When ice cream is eaten freshly made, there is not a problem with it becoming too hard. Homemade ice cream is best eaten after its initially hardening time because the consistency will be best for scooping and the flavor is always best when it is fresh. If it cannot be eaten after a couple of hours of hardening, it can remain in the freezer and eaten later but it may have a tendency to harden more than desired. Shown below are some tips and advice that may help prevent the ice cream from getting too hard.
- Be sure that the ice cream mixture has been chilled and aged properly before beginning the freezing process. If the mixture it not cool enough it can cause larger ice crystals to form during the freezing process.
- Using too much sugar can cause the ice cream to become too hard also, but be sure to follow the recipe carefully because too little sugar can cause it to be too soft.
- If the ice cream is not churned fast enough, larger ice crystals can develop, causing the ice cream to become too hard when frozen. The faster it is churned the more air that is whipped into it, which will help it from freezing as hard.
- If you are trying to make a little lighter version of ice cream and use milk in the recipe instead of cream or half & half, there may not be enough fat in the ice cream mixture. Fat does not freeze so it helps give the ice cream a smoother texture. Try increasing the amount of fat by using cream or half & half instead of just milk.
- To help prevent the ice cream from freezing too solid, a little alcohol can be added to the mixture because alcohol does not freeze. This will help keep it from freezing so solid. Add 1 or 2 tablespoons of vodka to the mixture just before starting the churning and freezing process. Vodka is a good choice of alcohol because it is clear and has no taste so it will not affect the appearance or take away from the taste of the ice cream.
If you will be storing the homemade ice in the freezer for a while before serving, keep the information above in mind when making your next batch of homemade ice cream. If the ice cream does freeze too hard for scooping, allow it to sit out on the counter for 10 minutes before trying to serve it.


