Loading

How to Use a Pastry Bag

Provided By

Learning how to use a pastry bag will allow you to use more cake decorating ideas and provides more options when decorating cupcakes, cookies, and other desserts. The pastry bag gives you the ability to use decorating techniques that add a special touch to your dessert.

A pastry bag is a cone shaped bag that has a small opening on one end and a large opening on the opposite end. The small opening is the decorating end that generally has different tips that can be interchanged to create different decorative shapes. The large end is used for filling the bag with a mass of soft food, such as frosting, filling, whipped cream, or dough. A pastry bag is sometimes referred to as a piping bag or a decorating bag and can be found at stores that carry cake decorating supplies.

Before you begin to decorate with it you need to know how to use a pastry bag. You will need to know how to assemble the pastry bag properly and what the different tips are used for when decorating cakes, cupcakes, cookies, and other desserts. To learn how to use it for some of the basic techniques, see Decorating with a Pastry Bag.

Share this!
Facebook


Types of Pastry Bags
| Coupler and Decorating Tips | Filling the Pastry Bag
Using the Pastry Bag | Cleaning the Pastry Bag and Tools


Types of Pastry Bags

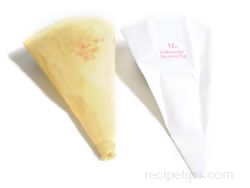
There are several types of pastry bags available. There are reusable, disposable, and parchment pastry bags; each is used in the same basic manner. They can be found in cake decorating stores or where cake decorating supplies are sold; for example, in craft supply stores, kitchenware departments, and gourmet kitchen shops. They are not generally sold in your regular supermarket.


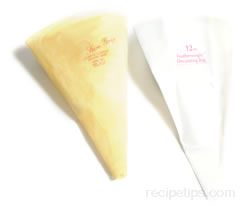
  • Reusable Pastry Bags - These bags are also referred to as featherweight bags. They are made from various materials, such as canvas, cotton (lined with plastic), and polyester. Some are machine washable, which makes cleanup easier. When cleaned and maintained properly, they can be used over and over many times.


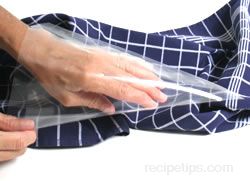
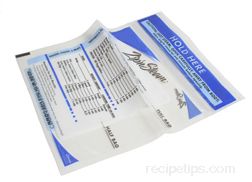
  • Disposable Pastry Bags - Disposable bags are made of heavy duty plastic and can be used with or without a coupler. When you are done decorating, the bag is thrown away, making cleanup easy.

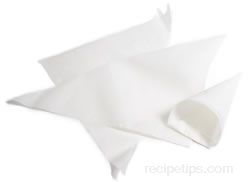
  • Parchment Cones - These cones are made from parchment paper and you construct the cone yourself. When you are finished using them, they are discarded. One advantage to this type of a pastry bag is that if you only need just a small amount of one color, you can make a small parchment bag that will hold as little as a tablespoon of frosting.


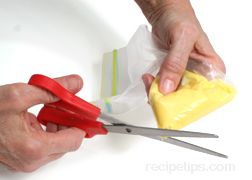
  • Plastic Bag - If you do not have a pastry bag an airtight sealable bag can be used for drizzling, piping, or writing on the cake. The frosting is placed in one of the corners of the bag and the tip is cut off. The frosting is then squeezed out the hole to create the design. This alternative method works fine for a quick design but does not offer much of an option for a decorative pattern.


Coupler and Decorating Tips

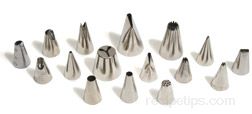
The pastry bag is used along with a coupler and decorating tips, which allows you to create different types of designs when decorating. The coupler consists of two sections, the base and the ring. The decorating tips are attached using the coupler.


Coupler Base and Ring

Decorating Tips


Assembling the Coupler and Decorating Tips to the Pastry Bag


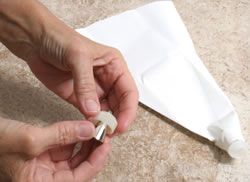
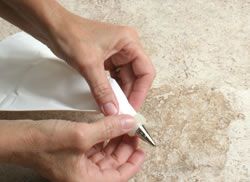
  • The coupler base is placed inside the bag through the hole at the narrow end of the pastry bag. Push the base through the end until one or two of the threads are showing.

  • The decorating tip that is to be used is placed in the coupler ring.
  • The decorating tip is then attached to the pastry bag by screwing the coupler ring on to the base. This holds the tip in place but allows the tip to be easily changed when decorating if a different design is needed.


Fitting a Coupler for a New Pastry Bag


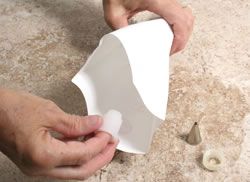
  • When using a pastry bag for the first time, you will have to cut a hole at the narrow end for the coupler base to fit through.

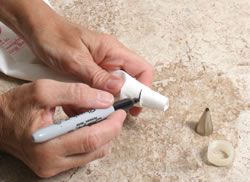
  • First place the coupler base into the bag and push it into the tip as far as it will go. Mark the outside of the bag where the first threads of the coupler show through.

  • Remove the coupler base and cut the tip of the bag at the marking.


  • Place the coupler base back in the bag and push it through the hole until one or two threads are showing. Then continue to assemble the bag as shown above.


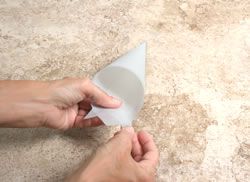
How to Make a Parchment Cone

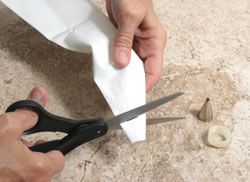
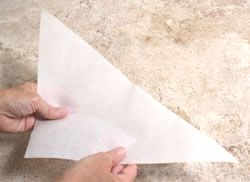
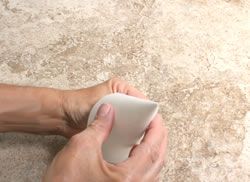
Parchment cones are easy to make and provide a nice option for when you are working with a small amount of frosting colored frosting. The cones can be made in various sizes to meet your needs. They are very convenient to use when decorating with fine lines or other fine details and they work great for touch-up work. You can purchase the triangle shaped parchment paper, or you can make them by folding a square of parchment in half diagonally and cutting along the fold to create two triangles. Use the step-by-step instructions below to create a parchment cone.

  • Hold the triangle-shaped parchment paper with the longest straight edge facing away from you. You will be holding one of shorter edges in each had with the point facing you.

 
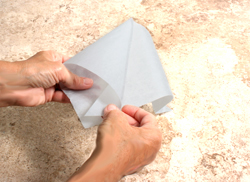
  • Begin by using your right hand to grab the left point of the long straight edge. Pull the point up and around to meet the point facing you so that you are forming a cone. The points and edges should line up.
 
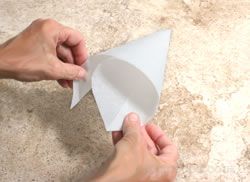
  • Then holding the two points together with your left hand grab the right point of the straight edge and pull it up and around the cone shape. Pull the right point around until it meets with the left point. You may want to turn the cone over to be able to see that you are getting the points aligned.


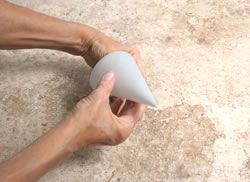
  • Once the points all meet, pull the inside point to the left and towards you until it is approximately 1 inch to the left of the center point. Then pull the outside point to the right and towards you until it is approximately 1 inch to the right of the center point.

 
  • Adjusting these two points should completely close the tip of the cone.

 
  • If the tip is not closed completely, adjust the left and right points until it is closed.
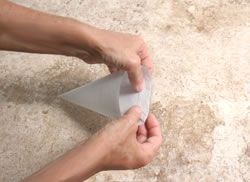
  • Once the tip is completely closed, turn the points done several times until they are even with the rest of the top edge.
 
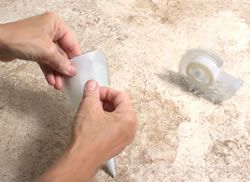
  • Finish the parchment cone by taping the outside seam. If you feel it is necessary, you can also tape down the piece of folded down edge.
 

  • Fill the bag with frosting, secure the open edge, and snip the tip to the desired size. The cone is then ready to use in basically the same manner as other pastry bags.


Filling the Pastry Bag


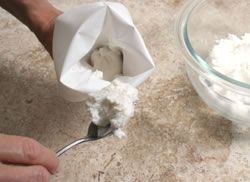
  • To fill the bag, turn down the top 1/3 to 1/2 of the bag. Hold on to the bag under the fold and spoon the icing into the bag.
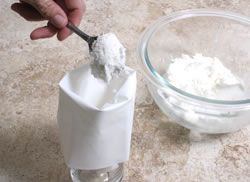
  • Another method that can be used when filling the bag is to set the bag in a glass with the tip end down. Roll the bag down over the outside of the glass about 3 inches and then spoon the frosting in the bag.
  • Whatever method you use, do not fill more than half full. If the bag is too full, the icing will ooze out the top when squeezing it from the pastry bag. Also, if there is too much frosting in the bag, it will begin to melt from being held in your hand too long.
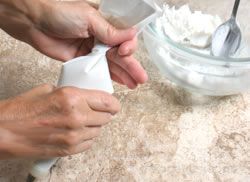
  • Twist the top of the bag tightly just above where the frosting ends in the bag.

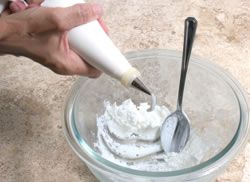
  • Squeeze a little frosting into a bowl to make sure there is no air in the bag. The bag should be ready for you to begin decorating.


Using the Pastry Bag

Holding the Pastry Bag

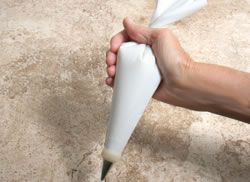
  • Place the twisted part of the pastry bag in the V of your hand between your forefinger and thumb. Wrap your thumb over the twisted area to help hold the twist in the bag.

  • Wrap your fingers around the bag to form a sturdy grip. Your fingers are used to apply pressure when you want to squeeze the frosting out of the bag.
  • Use two fingers from the opposite hand to help guide the pastry bag while using.


Angle of the Pastry Bag

There are two basic angles in which to hold the pastry bag when decorating. A 90° angle and a 45° angle. Each is used for different purposes when using the pastry bag.

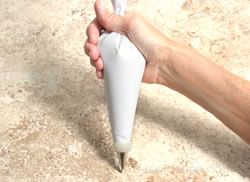
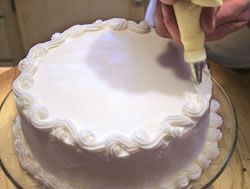
  • A 90° angle (perpendicular to the surface) is used when not much movement of the pastry bag is required. The bag is generally just lifted straight up from the design being made. It is used for dots, stars, and rosettes.

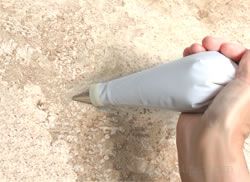
  • A 45° angle (halfway between perpendicular and parallel to the work surface) provides more mobility when working with the pastry bag, allowing you to do a little more. It is used when writing, piping, making flower pedals, and creating different shapes.


Direction of the Pastry Bag

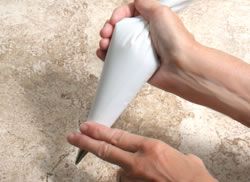
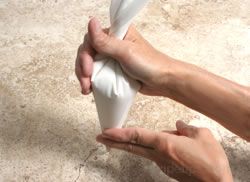
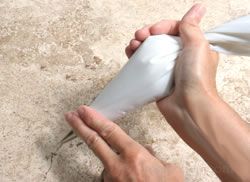
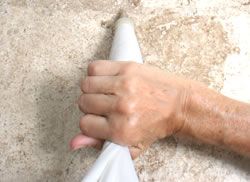
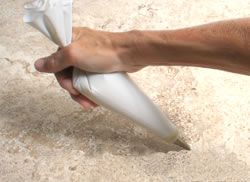
  • The direction that the pastry bag is pointed when making some of the designs is also important. The direction is often referenced by the numbers on the face of a clock. The directions may state to have the back of the pastry bag pointed at 12:00, 3:00, 6:00, 9:00, or any hour in between.


12:00 Position

3:00 Position


6:00 Position


9:00 Position


Cleaning the Pastry Bag and Tubes

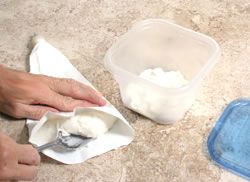
  • To clean the pastry bags, squeeze the remaining frosting to the wide opening of the bag; then scoop the frosting out and store it in an airtight container.
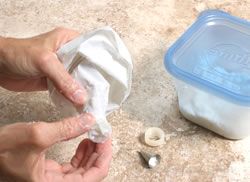
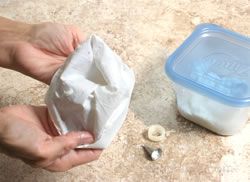
  • After scooping the frosting out of the pastry bag, remove the tip and coupler unit from the bag.


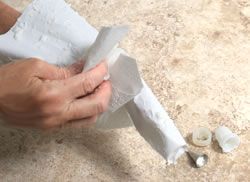
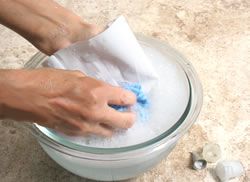
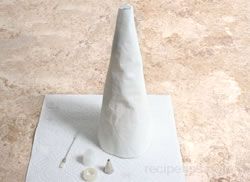
  • If using a disposable bag, just throw it away. If it is a reusable bag, turn it inside out and wipe off as much of the excess frosting as you can with a paper towel.
  • Wash the pastry bag in hot, soapy water to remove all the frosting.


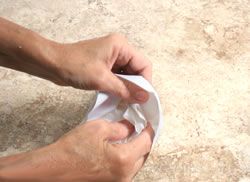
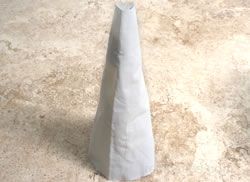
  • Rinse thoroughly and dry the bag as much as possible. Then stuff it loosely with paper towels.
  • Stand the pastry bag up on the counter. Allow it to stand there until it is completely dry.
  • Note: Some reusable bags can be washed in the washing machine but do not dry them in the dryer. The heat from the dryer can melt the plastic coating and ruin the bag. Allow the bag to air dry.
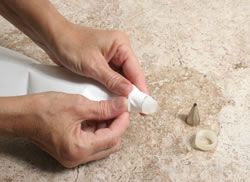
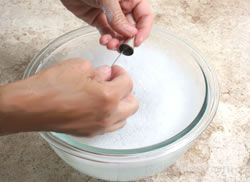
  • Wash the tip and coupler in hot, soapy water. Use a pastry tube brush to clean the pieces. If you do not have one, use some other type of small brush or pipe cleaner.
  • Clean thoroughly, rinse and dry. Lay the pieces out on a dry paper towel and allow to air dry completely before storing.

Loading

How to Use a Pastry Bag Reviews

There currently aren't any reviews or comments for this article. Be the first!
E-mail: 
Advertisement
Reproduction in whole or in part without written permission is strictly prohibited.
© Copyright 2024 Tecstra Systems, All Rights Reserved, RecipeTips.com