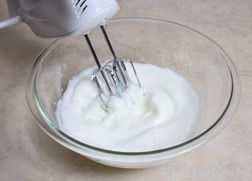
- Remove the eggs from the refrigerator so they will be room temperature when ready to use.
- In a small heavy saucepan, combine the sugar, cream of tartar, and salt. Stir the mixture to combine evenly; add the water.
|

 |
|
|
|
|
|
|
|
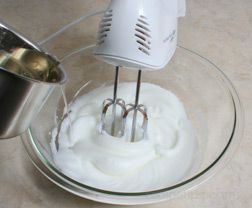
- Once the eggs are at a soft peak, begin to slowly pour the boiled sugar mixture into the egg whites Pour the mixture along the side of the bowl while beating the two together.
|
- Make sure to pour the sugar mixture in a slow steady stream off to one side and continue to beat the frosting the entire time. Do not pour the sugar mixture into the beaters. To incorporate it into the egg whites, move the beaters back and forth into the area where the sugar mixture has been added.
|
|
|
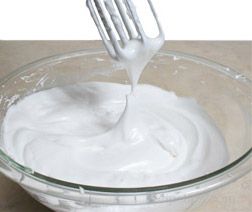 |
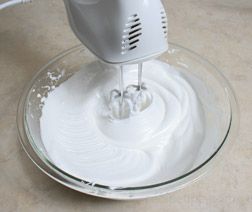
- Once all of the sugar mixture has been added, pour in the almond extract. Beat until the frosting is thick enough to form stiff peaks.
- If you have trouble getting the frosting thick enough to form stiff peaks, you can add a little powdered sugar to help it thicken. Start by only adding a tablespoon at a time. Beat in well and check for stiff peaks again before adding more powdered sugar.
|
- Once the frosting has thickened to form stiff peaks, begin frosting the cake.
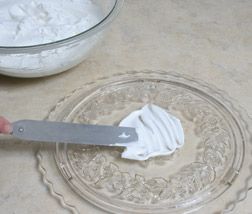
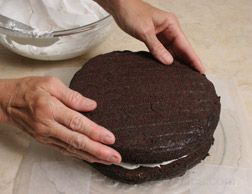
- Before placing the first layer on the plate, spread a small amount of frosting in the middle of the cake plate. This will help hold the cake in place while frosting it.
|
|
|
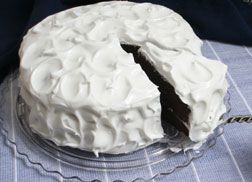
- A layer cake is shown here but this frosting can be used on a sheet cake or cupcakes as well.
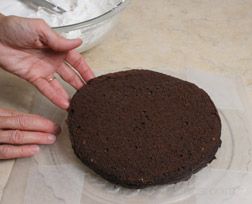
- Place the first layer of cake on the plate bottom side down. Carefully slide four inch wide strips of wax paper under the cake on all sides. This will help prevent the frosting from getting all over the plate while you are spreading it on the cake.
|
|
|
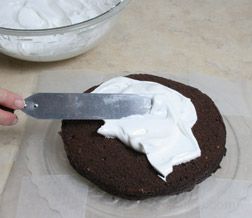
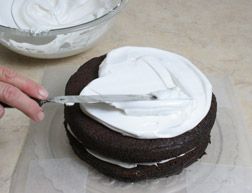
- Begin by spreading a layer of frosting on this first layer. Be sure to work with a sufficient amount of frosting when spreading it on the cake. This will help prevent touching the cake with the spatula and picking up crumbs that will get into the frosting. If necessary, the excess frosting can be removed once the cake is covered.
|
|
|
- When first spreading the frosting on the cake, push it around and do not make a backwards motion. Once the cake is covered you can spread the frosting back and forth without picking up crumbs.
|
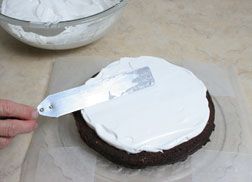
- Spread it on a little less than one half inch thick; only spread it out to within one quarter inch from the edge. This will allow room for the frosting to spread out when the second layer is placed on top.
- Once the frosting has been spread around, level it with the edge of the spatula before placing the second layer on top.
|
|
|
- Place the second layer, bottom side up, on top and gently press down. Check to see if it is level. If it is slightly unlevel, press it down a little more in the high areas. If the top layer is too unlevel, you can add a little frosting between the layers in the area that needs to be built up.
|
|
|
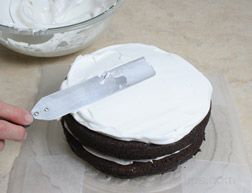
- Once the cake is level, frost the top in the same manner as the middle layer was frosted. The frosting on top can also be use to help level the cake. Remember to work with a sufficient amount of frosting to help prevent picking up the crumbs.
|
|
|
- Smooth and level the top the best you can. A spatula that is as long as the cake is wide will help make it easier to smooth and level. If you don't have one that long you will have to make several swipes across the cake to make it as smooth and level as possible.
|
|
 |
 |
|
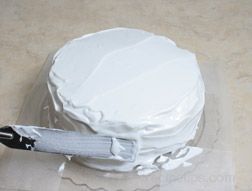
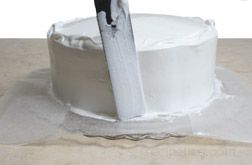
- After frosting the top of the cake, spread the frosting around the sides. Be sure to work with a sufficient amount of frosting to prevent picking up the crumbs.
|
 |
|
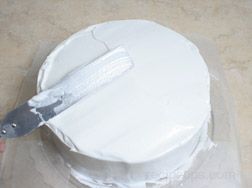
- Once the sides are all frosted, smooth the frosting out by running the spatula vertically around the cake.
|
 |
|
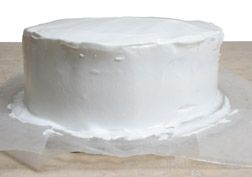
- If necessary, smooth the top again before decorating so you have an even surface to work with.
|
 |
|
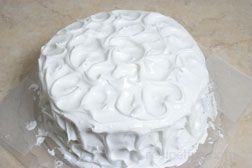
- When the cake is evenly coated around the sides and on top, finish decorating it with a swirled design pattern.
|
|
|
 |
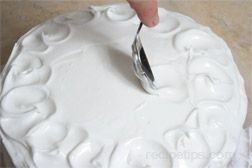
- Using the tip of a spoon, make swirl designs in the frosting. Begin by first making a half circle to the left, starting at the 12 o'clock position; then swirl the spoon down to the 6 o'clock position.
|
|
- In the same manner, start at the 12 o'clock position again and swirl to the right; swirl the spoon down to the 6 o'clock position, meeting the bottom of the left half circle. Continue to create the swirled circles until the top has been covered.
|
 |
|
- After the top has been covered with swirls, create the same design pattern all around the sides of the cake.
|
- Once the swirled design is finished, carefully slide the pieces of wax paper from under the cake. This should provide a beautiful frosted cake on a clean platter that is ready to serve.
|
|
|
- Note: Other design patterns can be used to decorate this frosting, but because it is so light and fluffy, detailed decorating patterns should be avoided. The ripple, swirl, and peak patterns are three designs that work well with this frosting.
|
|
Storing Boiled Frosting
See the tips below on how to store boiled frosting.
- This fluffy white frosting is best when used as soon as it is made, but if necessary it can be stored for a day.
- When storing the frosting, be sure to cover it tightly; and then refrigerate. If it is not stored airtight it will begin to set.
- Once the boiled frosting has been spread on the cake, it can be stored at room temperature, but refrigerating it will help keep the frosting soft and fluffy longer.
- Cover the cake with a domed cake server or a large container that is deep and wide enough to not disturb the frosting when placed over the cake.
- Freezing the boiled frosting is not recommended.
|


