|
There are an endless number of kitchen tips available for you to try. Shown below are some popular tips that will help you in your everyday use of some common baking and cooking ingredients. To see other tips, select one of the kitchen tips listed above.
Ingredient Tips
Baking | Fruits | Vegetables
Ingredient Tips - Baking
Brown Sugar
- Placing a piece of bread in with the brown sugar will prevent it from becoming hard, or sealing the package tight and storing it in the refrigerator will also keep it soft and fresh.
- To soften brown sugar after it has hardened, try one of the following techniques:
- Place a fresh apple wedge in the bag of hardened sugar, seal the bag and leave it for 1 to 2 days until the sugar is soft again. Remove the apple wedge and stir sugar. Store in an airtight plastic bag.
- Soften in the microwave by placing brown sugar in a microwavable dish, cover with two dampened paper towels and then cover with the dish cover or plastic wrap. Microwave at 30 second intervals, stirring with a fork after each interval. When it has softened, allow to cool and store in an airtight plastic bag. Do not overcook or sugar will begin to melt.
- In a conventional oven, place the brown sugar in an ovenproof dish that has sides. Preheat oven to 225°F and place sugar in the oven for 5 or 10 minutes. Do not overcook, bake only long enough for sugar to soften. Cool and store in an airtight plastic bag.
- Place hardened brown sugar in a bowl and cover with a damp cloth. Cover with foil or plastic wrap and allow to stand at room temperature overnight or until the sugar softens. Store softened sugar in an airtight plastic bag.
- If you run out of brown sugar unexpectedly, mix a cup of granulated sugar with two tablespoons of molasses to make your own.
Butter / Margarine
- When butter or margarine is called for in a recipe, use it in stick form. Do not use whipped butter or margarine. The whipped form has air whipped into it to make it softer and more spreadable. When measured tablespoon for tablespoon, the whipped form is actually less in weight than the stick form so it would not be an exact substitute.
- When substituting margarine for butter, use only margarine made with 80% fat. Products with less than 80% fat will have a negative affect on the quality and texture of the end product.
- To quickly soften a stick of butter with out melting it, cover it with a thoroughly heated bowl.
Cornstarch
- Test for freshness by mixing one teaspoon of vinegar with one teaspoon of cornstarch. The mixture will bubble if the cornstarch is fresh.
Eggs
- Remove eggs from the refrigerator approximately 15 to 20 minutes before you are going to use them.
- Check the shells of eggs to determine freshness. Fresh eggs have shells that are rough and chalky. Old eggs have shells that are smooth and have lost the chalky appearance. Or, place in cold salt water and if it sinks it is fresh. If it rises to the surface, it is old and should be discarded.
- To make hard boiled eggs easier to peel, try one of these tips:
- As soon as the eggs are finished cooking, crack the shell and place them in cold water.
- Before boiling the eggs, poke one end with a needle.
- Add a teaspoon of salt to the water before boiling.
- When storing egg yolks, keep them moist by pouring one tablespoon of water over them.
- If raw eggs become mixed with hard-boiled, you can determine which are hard boiled by spinning the eggs. The hard-boiled will spin and the raw will wobble.
Flour
- To prevent bugs from getting into the flour, add a bay leaf to your flour container or store it in the freezer.
- Make your own cake flour by substituting two tablespoons of cornstarch for two tablespoons of all-purpose flour for every cup of flour called for in the recipe.
Honey
- If honey crystallizes, place the honey container in a pan or bowl of hot water and let it stand until the honey has melted. Then stir the melted honey until it is smooth.
- To allow honey to slide smoothly from a measuring spoon or cup, coat the measuring device with oil before pouring the honey in it.
Ingredient Tips - Fruits
Apples
- When cutting apples into slices or chunks, sprinkle them with lemon juice or lemon-lime soda to keep them from turning brown. They can also be soaked in apple juice to keep them from turning brown.
- Apples can be peeled before or after they are sliced but it is easier to peel them before slicing.
Bananas
- To ripen bananas quickly, place an apple with the bananas in a brown paper bag for approximately two days.
- Ripe bananas can be saved for baking purposes by mashing, placing them in a plastic bag, and freezing until you are ready to use them. You can also place the whole banana in a bag and freeze it in its skin.
Lemons
- When selecting, choose lemons that are heavy for their size and have smooth skins.
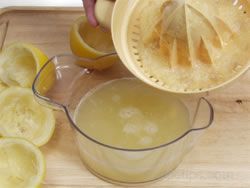
- Before squeezing juice from a fresh lemon, try one of these tips to produce more juice:
- Allow the lemon to reach room temperature and then roll it on a hard countertop using the palm of your hand. Roll it back and forth until you feel the skin loosening.
- To produce more juice from a lemon or other citrus fruit, place the fruit in a bowl of hot water before cutting and squeezing.
- Place it in the microwave for 10 seconds before squeezing
Raisins
- If raisins are dried out or sugary, put in a heatproof container and cover with boiling water. Let them stand for approximately 5 minutes, drain and pat dry. This process should plump up the raisins.
- After opening, seal tightly and store in the refrigerator to keep fresh.
Ingredient Tips - Vegetables
Carrots
- When selecting, choose carrots that are firm and not oversized. They should be bright orange to deep orange in color. Avoid any that have soft spots or other blemishes.
- When storing carrots, remove the tops because they will draw water from the carrots and cause them to wilt.
- If carrots wilt, cut one end off and stand them up in a glass of cold water to crisp them up again.
- Peeled carrots are sweeter because they have the slightly bitter tasting skins removed.
Cauliflower
- When selecting, choose cauliflower heads that are firm and compact. They should have green leaves surrounding the head. Avoid heads that seem loose or have yellowing leaves. Also avoid cauliflower heads that have florets that are starting to brown or have other blemishes.
- Once the florets are cut off the cauliflower, the stems can be chopped into pieces and then added to a fresh salad to provide a crunchy texture.
Celery
- When selecting, choose celery with firm, crisp stalks. Avoid celery that has leaves that have begun to yellow or turn brown.
- Revive wilted celery by placing it in cold water and refrigerating it for several hours or to speed up the process, place it in ice water for one hour.
Cucumbers
- When selecting, choose cucumbers that are firm and have tight, shiny skins. Avoid any that are not firm or have shriveled or blemished skin.
- If you don't like the large seeds in cucumbers, be sure to select smaller cucumbers, which will have smaller seeds. The smaller cucumbers generally have better flavor also.
Garlic
- When selecting, choose garlic that is plump and firm with paper-like skins that are tight and intact. Avoid any that are soft or that have begun to shrivel.
- Place garlic cloves in the microwave for 15 seconds and the skins should peel off easily.
- Keep peeled and mince garlic fresh by placing it in a small jar and pouring just enough olive oil over it to cover the garlic and then place it in the refrigerator. It will keep its fresh flavor for about a week.
- Don't throw out sprouting garlic. Instead, plant the cloves fairly close together in a pot or in the garden (if your climate is suitable at the time). The new shoots that appear will have a mild garlic flavor and can be used in the same manner as regular chives.
Greens
- When selecting, choose greens that smell fresh, have good color, and do not show sign of wilting. Avoid greens with thick or tough stems.
- Wash greens gently but thoroughly and then dry completely. Use a salad spinner (do not over pack) or gently pat dry with a tea towel to avoid breaking or bruising the greens.
- To store, loosely wrap small bunches in paper towels, place in plastic bags, and gently press excess air out of the bag before sealing. Do not over pack. Store in the crisper drawer of the refrigerator.
Lettuce
- When selecting, choose heads that are firm and have nice green leaves. Avoid heads that have leaves showing any discoloration.
- To remove the core from a head of lettuce, hit the core solidly on the top of the counter. This will separate the core from the head. The core can then be removed by giving it a slight twist and pulling it out.
Onions
- When selecting, choose firm onions that have dry paper-like skins and that seem heavy for their size. Avoid onions that are soft or spotty and any that have begun to sprout.
- When cutting onions and only half the onion will be used, use the top half and store the root end. The root end will stay fresh for a longer period of time.
- Tear saving tips: (Experiment with these tips and see what works best for you!)
- Slice under running water.
- Peel the onion, cut in half and let soak in water for approximately 10 minutes before cutting.
- Store in the refrigerator before cutting so the onion is cold.
- Light one or two candles in the area you are cutting the onion.
- Be sure to use a sharp knife.
- Have a fan blowing the fumes away from you.
- Try holding your breath while you are cutting the onion.
- To remove the onion odor from your hands, rub a piece of lemon in salt and then squeeze the juice on your hands, rub the juice in, and then rinse it off.
Mushrooms
- Store mushrooms, uncleaned, in a paper bag or their original container. Do not store in plastic or airtight plastic containers because they cause the mushrooms to retain moisture and decay faster.
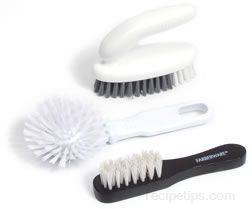
- When cleaning mushrooms, avoid using water because it will reduce their flavor. Use a brush to clean sand, grit and other debris from the pits and ridges.
Peppers
- Keep chili peppers fresh longer by storing them with the stems removed.
- If you are using chili peppers, be sure to keep exposed hands away from the eye area and other sensitive areas of the body, such as nose and lips. The chili oil that your hands are exposed to can cause severe irritation. Wash hands immediately after exposure or wear rubber gloves to protect against exposure.
Potatoes
- When selecting, choose potatoes that are nicely shaped and have smooth skins. Avoid any that have bruises or other blemishes, and any that have eyes that have begun to sprout.
- Do not store potatoes close to onions. The onions will cause the potatoes to rot faster.
- Place an apple in the bag with the potatoes to keep them from sprouting.
Tomatoes
- When selecting, choose tomatoes that have shiny skins that are light red in color. They should be firm and have an aroma similar to the tomato plant. Avoid any with blemishes and dull, dark red skins, which indicates that the tomato is overripe. If the tomato lacks aroma, it generally lacks flavor.
- If tomatoes are under-ripe, place them in a brown paper bag and store them overnight in a dark area, or try placing them in a covered bowl with an apple. The apple gives off ethylene gas, which hastens ripening.
- Firm up overripe tomatoes by placing them in a bowl of cold salt water and leaving them sit overnight.
Preparation Tips
Baking | Fruits | Vegetables | Miscellaneous
Preparation Tips - Baking
- Use a flour dredger or sifter to flour cake pans, cookie sheets, and work surfaces.
- To hold a mixing bowl in place when you are whipping or blending ingredients, place a damp cloth under the bowl.
- If sifting of dry ingredients is called for in a recipe, instead of sifting, add all the dry ingredients in a bowl and mix with a wire whisk.
- When baking, it is best to allow ingredients, such as eggs, butter, and milk, to become room temperature before mixing with other ingredients.
- When mixing batter for pancakes, muffins or cupcakes, mix the batter in a large liquid measuring cup with a spout. This will make it easier to pour the batter into muffin tins or pancake batter onto a hot griddle.
- Be sure eggs are fresh and cold when you have to separate the whites from the yolks.
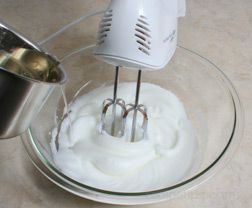
- Tips for whipping egg whites:
- Be sure there is no yolk in the whites.
- The whites should be at room temperature.
- The bowl and beaters must be clean.
- A pinch of salt added to egg whites will help them whip up more quickly.
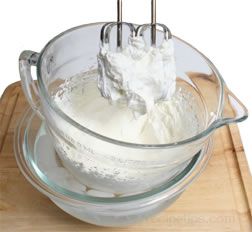
- When whipping cream, the cream, bowl, and beaters should be chilled to produce the best volume.
- Chill a glass or stainless steel bowl for whipping cream by filling a sealable bag with ice cubes and then placing the bag in the bowl for 5 or 10 minutes.
- When making a two-crust pie, moisten the edge of the bottom crust with water before placing the second crust on top. The moistened edge will help create a good seal once the two crusts are crimped together.
- Keep the crust of a custard pie from becoming soggy by carefully adding a raw egg in the shell of the pie crust. Slowly swirl the egg around the pie crust shell until the crust has all been coated with egg white. Once it is coated, pour the remainder of the egg use it in the filling.
- Prevent meringue from shrinking by adding it to the pie while the filling is still hot and making sure that it is touching the crust around all the edges.
- Rather than discarding pie crust scraps, lightly butter them, sprinkle with cinnamon and sugar, and bake until golden brown.
- For best results when making pastries, use whole milk rather than low-fat or fat free milk.
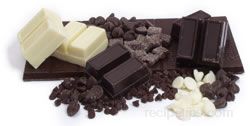
- White or milk chocolate make better chocolate shavings because they are a softer chocolate and will curl better.
- For cake-like brownies, increase the amount of eggs used. For chewier brownies, decrease the amount of eggs used.
- For baking recipes that call for oil, replace half or all the oil with applesauce to produce a low-fat version of the recipe. Reduce baking time to prevent the recipe from becoming too dry.
- To keep a layer cake in place on the cake plate, place a dab of frosting on the cake plate before adding the bottom layer. This will hold the cake in place while you are frosting it.
- When making powdered sugar frosting, add a pinch of baking powder to make the frosting creamier and keep it from cracking.
- Dust the surface of a cake with cornstarch to prevent the frosting from running off.
- Have drop cookie dough on hand and ready to bake by making up a large batch of dough, roll the cookies into balls and place on a cookie sheet. Place the cookie sheet in the freezer. When the cookies have frozen, take them off the cookie sheets, place in a freezer proof sealable bag and store in the freezer. When you want fresh baked cookies, just take them from the freezer, place them on a cookie sheet and bake. They do not need to be thawed.
- Use powdered sugar instead of flour when rolling out sugar cookies. The powdered sugar will add sweetness to the cookies and you won't have to worry about adding too much flour.
- If you have bread rising and your schedule is interrupted so that you will be unable to attend to the bread when it is done rising, you can slow down the rising process by placing the bread in the refrigerator.
Preparation Tips - Fruits
- Slice fruit immediately after removing from the refrigerator. It is firmer and easier to slice when cold.
- To chop dried fruit in a food processor, freeze the fruit first and they will chop better.
- When it is desirable to remove the white membrane from a peeled orange, the process can be simplified by first placing the unpeeled orange in boiling water for 5 minutes.
- Save the rinds from lemons, limes and oranges to use for citrus zest. Place the rinds in a sealable bag and store in the freezer until you need it.
- To prevent the seeds from getting into you citrus juices when squeezing fresh juice, place a piece of double thick cheesecloth over the cut end of the fruit and squeeze the juice through the cheesecloth. The seeds remain behind.
- Do not use fresh pineapple in a salad that contains gelatin. The fresh pineapple contains an enzyme that will prevent the gelatin from setting. Use canned pineapple instead.
- To keep apples, bananas, avocados, peaches and pears from turning brown, sprinkle with lemon or lime juice. Keep a spray mister with lemon juice or lime juice in the refrigerator so it is handy for when you need it.
- If only using half of an avocado, leave the pit in the half you are not going to use, wrap it in plastic, and store in the refrigerator. The pit will help slow down the discoloration. If the cut edge does become discolored, it can be cut off and the fruit underneath will be usable.
Preparation Tips - Vegetables
- Potatoes will cook faster if they are soaked in salty water before they are baked.
- Potatoes can be peeled a day ahead of cooking and then stored in the refrigerator. Place the peeled potatoes in a bowl of cold water that has had a few drops of vinegar added. Be sure potatoes are covered with water and then place in the refrigerator.
- When cooking potatoes to use in potato salad, add a little vinegar to the water when boiling the potatoes. The vinegar causes the potatoes to form a thin crust, which helps them hold their shape.
- Do not overcook potatoes that will be used for potato salad. Overcooked potatoes will turn the salad into mush.
- Boiled potatoes can be easily sliced in even thicknesses to use for potato salad or for frying by using a metal egg slicer.
- Slice mushrooms using a metal egg slicer.
- Do not peel mushrooms because the outer layer contains most of its flavor.
- To produce good tasting, crisp onions, slice or chop onions and place them in a bowl. Cover the onions with water and then add some ice to the water. Let the onions soak for 15 minutes to an hour and then drain before serving.
- For crispier fried onions, soak the sliced or chopped onions in milk before frying.
- To seed a tomato, cut it in half crosswise and squeeze to remove the seeds and excess juice.
- If you need to peel tomatoes before adding them to a recipe in which they will be cooked, cut them in half and place them face down on a microwave safe plate. Microwave the tomatoes for approximately 5 minutes and the skins should peel off easily.
- Tomatoes that have become too ripe and soft to use for sandwiches or salads can be chopped up with a little garlic added and then boiled for three minutes in the microwave. They can then be stored in the freezer to use later in casseroles, soups, stews or sauces.
- If you have a large crop of bell peppers or purchase more than you can use at one time, you can freeze them to use for future recipes. Slice, remove seeds, and chop into desired size pieces. Place them single layered on a cookie sheet and place in the freezer. Once they are frozen you can place them in a freezer proof sealable bag and store them in the freezer. When you are ready to use, remove the desired amount from the bag.
- Sautéing vegetables in oil or butter before adding them to a soup will seal in their flavor and help keep them firm after they are added to the soup.
- When peeling vegetables, peel over an open plastic bag and allow the peelings to fall into the bag. Clean up will be much easier.
- Use an ice cream scoop to remove the seeds from a squash.
- Do not cut salad greens with a knife because it may cause the greens to become discolored. It is best to gently tear the greens into pieces the size you desire.
- Dry lettuce and other salad greens before adding dressing by tossing a couple of paper towels with the greens in a large bowl. Once the towels have picked up the excess moisture, pull them out and throw them away.
Preparation Tips - Miscellaneous
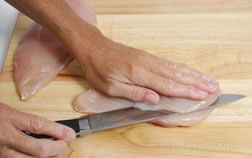
- When trying to cut thin slices or strips of raw meat, it is easier if you put the meat into the freezer for 30 minutes to an hour before cutting to help firm up the meat, or if the meat was frozen, slice it before it is completely thawed.
- Thaw frozen fish in milk to help remove the frozen taste and provide for a fresh fish flavor.
- To remove pin bones from a fillet of fish, lay the fillet, bone side up, across an inverted mixing bowl. The curve of the bowl will cause the bones to stick out, making them easy to find. Use a needle-nose pliers to pull the bones out.
- Cut hard-boiled eggs smoothly by dipping the knife into a glass of cold water or run it under cold water for a few seconds before making each cut.
- Sprinkle a little salt on garlic when mincing or chopping the cloves to prevent the pieces from sticking to your knife or working surface.
- To obtain more flavor from parsley, remove the stems and only use the leaves. Use a scissors to cut the leaves into pieces instead of chopping with a knife. Chopping generally causes the leaves to become mushy.
- For an easy way to pour out just the right amount of pancake batter, pour the batter into an empty, clean squeeze bottle, such as a ketchup or syrup bottle. Squeeze out the desired amount into the pan for the size pancake you want. This will also make a nice round pancake.
Cooking and Baking Tips
Cooking | Baking
Cooking Tips
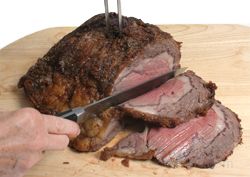
- Before carving meat, allow it to stand for 10 to 15 minutes after removing from the heat source to allow the juices to be redistributed through the meat. The standing period will result in firmer, juicier meat and will make carving easier.
- No roasting rack? If you don't have a roasting rack for roasting meat, you can use a layer of celery or onions to hold the meat off the bottom of the pan so it will not set in its juices as it cooks. The layer of celery or onions also provides an added benefit of additional flavor to the meat and pan drippings.
- When cooking burgers, create a small hole, about ½ inch wide, in the center of the burger before cooking it. The hole allows the burger to cook from the inside and outside, producing a more evenly cooked burger.
- Sprinkle a little flour in the pan before frying bacon to decrease the splattering of grease.
- When cooking chicken pieces, start with the dark pieces and then add the white chicken. The dark takes longer to cook than the white, so starting the dark first will assist in the white and dark getting done close to the same time.
- To remove fat from pan drippings before reducing the liquid, deglaze the pan and pour the liquid into a small metal mixing bowl. Place the bowl in an ice water bath and wait a couple of minutes for the fat to begin to solidify on the surface. Scrape the fat off the surface or twirl the bowl so the fat will collect along the edges and then it scrape off.
- Rub lemon juice on fish before cooking. This will help the fish maintain its color and add to its flavor.
- Watch shrimp closely for doneness when cooking. If they form a half-circle, they are done, and if they have coiled into a circle, they are overdone.
- Cook extra poached eggs and then store the extras in cold water in the refrigerator to be heated later. Heat the poached eggs anytime by cooking in the microwave for 10 to 15 seconds.
- When boiling potatoes or rice, add a tablespoon of butter or margarine to avoid having the water boil over while they are cooking.
- Adding a thin coat of oil along the top edge of a pot will prevent food from boiling over.
- A few drops of vinegar added to the water when boiling potatoes will help maintain their white color.
- To make fluffier mashed potatoes, add a pinch of baking soda with the milk and butter before mashing.
- When making rice or instant potatoes, use chicken broth in place of the water to add extra flavor.
- Add a few drops of lemon juice and a teaspoon of oil to rice when cooking. This will allow the rice to separate and not stick together after it is cooked. You can also try just adding a tablespoon of vinegar to the water to prevent rice from sticking.
- When boiling lasagne noodles, because of their size, it is best to add 1 tablespoon of oil to prevent the noodles from sticking together. Avoid using oil when boiling other noodles because the oil will prevent the sauce from sticking to the noodles properly.
- Undercook pasta by 1/4 to 1/3 of the suggested cooking time when it is going to be added to another dish that requires additional cooking time. It will finish cooking when cooked with the dish it is added to. If pasta is fully cooked, it may become overdone when cooked in the other dish.
- Toss pasta with a dry grated cheese, such as parmesan, before adding the sauce. The grated cheese will stick to the pasta and allow the sauce to cling to the pasta better.
- Fresh herbs added to soup may lose their flavor when cooked for a long period time. Add more herbs shortly before serving to boost the flavor.
- If your soup becomes too salty when you are preparing it, try adding a teaspoon of sugar and a teaspoon of cider vinegar to combat the saltiness. Another method to try is to add a raw potato to the soup to absorb some of the extra salt.
- To remove fat from soup or stock, use one of these techniques:
- Remove fat from soups by allowing a lettuce leaf to float on top of the soup. The lettuce will attract the fat and then the fat and lettuce leaf can be removed.
- Add ice cubes to the soup, stir to allow fat to collect on the ice cubes, and then remove before they have melted.
- Crumple up a piece of plastic wrap and skim the surface of the soup with it. The plastic wrap will attract fat from the surface.
- Allow the soup to cool, place it in the refrigerator for a couple of hours and when it is removed, the fat will have solidified on top and can then be easily scraped off.
- Add instant potatoes flakes to soup to thicken. Add small amounts at a time and stir. Continue to add small amounts of flakes until the soup is at the desired consistency.
- If your soup becomes too sweet from the addition of too much sugar or an ingredient added too much sweetness, try adding a little salt to tame down the sweetness or 1 teaspoon of apple cider or white vinegar. Be sure to taste test after each addition so that you do not change the taste of the soup too much or make it too salty.
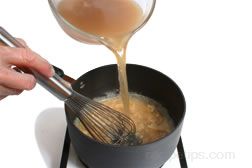
- The cooking water from most vegetables can be added to soups and gravies for extra flavor.
- Add a different flavor to a recipe by using juices, bouillon, or vegetable cooking water instead of the water that is called for in that recipe.
- Add a little milk to the water or a few drops of vinegar when cooking cauliflower to help it keep its white color.
- Do not add salt to the water when cooking sweet corn because the salt will toughen the corn. Add a little sugar to the water to boost the flavor.
- To cook a couple of pieces of sweet corn in a hurry, place two or three ears in a resealable plastic bag and add 1 tablespoon of water for each ear. Leave a slight opening in the bag and cook on high in the microwave for 2 minutes. Check for doneness and if not done, cook for an additional 30 seconds.
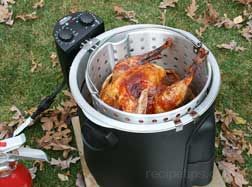
- When deep-frying french fries, do not overload the basket. Trying to cook too many at one time will result in greasy and soggy fries.
- Reduce the amount of grease splattering, when frying foods, by sprinkling the bottom of the pan with salt.
- When frying onions, speed up the process by adding 1/2 teaspoon of salt while frying.
- Prepare recipes that call for onions and garlic to be cooked in oil starting with the onions. Add the garlic at the end to help prevent it from burning and becoming bitter in taste.
- If gravy needs salting, try adding a little soy sauce instead of salt. The soy sauce will add saltiness and color to the gravy.
- Cook tomato sauce slowly on low heat to produce a sweet, mellow sauce. If boiled rapidly the tomatoes will become acidic.
- Reduce a sauce or liquid using a pan with a large cooking surface. This will speed up the reducing process.
- To save a curdled sauce, remove it immediately from the heat and plunge the bottom section of the pan into cold water to stop it from cooking any further. Then blend the sauce by stirring vigorously or placing it in a blender until it is smooth again.
Baking Tips
- When baking cakes or bars, place them on the middle rack in the oven.
- When baking cookies, place them on the top rack of the oven. If baking two sheets of cookies at one time, place them on different racks at different angles to allow proper air circulation. Switch racks about half way through the cooking time.
- Cookies will burn less easily if they are baked on a light silver cookie sheet rather than a dark colored sheet.
- If the outer edges of the cookies are getting browned and the center is not completely cooked, reduce the temperature 15 to 25 degrees. Your cooking time will increase slightly. Increasing the baking temperature would only brown the outer edges faster and the center of the cookie would still be underbaked.
- Allow cookie sheets to cool in between batches to kept cookie dough from melting and becoming too thin at the edges.
- Test doneness of bars, cakes, muffins, and quick breads by inserting a toothpick in the center of each. If they are done, the toothpick should come out clean or only have a couple of crumbs on them.
- If you have difficulty removing muffins or cakes from the pans, place the hot pan on a wet towel and then remove from the pan.
- To help phyllo dough cups keep their cup shape when baking, place approximately two tablespoons of baking stones or beans on a piece of aluminum foil, pull up the corners of the foil and twist together to form a small pouch. After placing the phyllo dough in the muffin cups, place a stone pouch in the middle of each one and then bake the dough. When done baking, remove the stone pouches and store to reuse.
- To eliminate messy hands when greasing a baking pan, use a small plastic bag to cover your hand. Place your hand in the bag and scoop out a portion of the shortening with the covered hand and spread the grease on the pan. When finished remove the bag and throw it away. Your hands should be free of any shortening.
- For golden brown, flaky pie crust, use a lightweight aluminum pie tin like the old fashioned type.
- When making caramel sauces, a problem that can occur is that the sugar will begin to crystallize because sugar has a tendency to want to turn back to its original crystalline state. If one sugar crystal forms it can cause a reaction that will quickly turn the entire sauce into a grainy consistency. Shown below are some tips to help prevent the sugar from crystallizing:
- Be sure all sugar crystals are dissolved in the sauce when first cooking. Stir the sauce until it comes to a boil and then do not stir the sauce while it is boiling. Stirring the mixture can cause the unstable sugar molecues to return to their cystalline form.
- Use a clean, flat pastry brush dipped in water to wash down the sides of the pan to prevent the sugar from sticking and crystallizing.
- Use a flat bottom wooden spatula for stirring because it will not conduct heat to your hand and the flatness of the bottom edge will assist with scraping the bottom of the pan and into the corners. When spatula is not being used for stirring it should be place in a glass measuring cup filled with water so that any sugar crystals that form on it can be washed off before they are reintroduced into the sauce.
- Check your recipe for ingredients that are interfering agents that help prevent crystal growth. Some interfering agents are corn syrup, honey, brown sugar, molasses, fats, cream, egg whites, cocoa, chocolate solids, lemon juice, and cream of tartar.
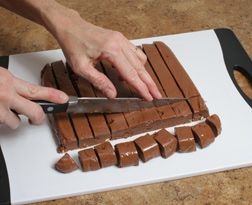
- When making candy that is cooked to a high temperature, be sure you have a surface that can take the heat without causing damage when it is poured out of the pan. A large cookie sheet lined with aluminum foil works well. Once the candy has cooled, the foil can be removed.
- To foil line a baking pan or sheet, turn the pan upside down and mold the aluminum foil to the bottom of the pan. After the foil is molded to the pan's shape, slip it off and turn the pan over. The molded foil should slip right into the pan and fit perfectly.
Miscellaneous Tips
Food | Equipment & Utensils | Cleaning
Miscellaneous Tips - Food
- When opening a new bottle of sauce, place a straw into the bottle, turn it clockwise and counter-clockwise, and then remove the straw. After removing the straw, the sauce should pour freely from the bottle.
- Keep covers from sticky ingredients, such as honey, syrup, and molasses, opening with ease by coating the threads with oil the first time the bottle is opened. Apply a little vegetable oil to a paper towel and wipe the threads of the bottle with the oil.
- For soft cookies that have started to dry out, re-soften by adding a piece of bread or a slice of apple to the container they are stored in.
- For crispy cookies that have started to get soggy, make them crispy again by placing them on a cookie sheet and heating in the oven at 300° for 3 or 4 minutes.
- To keep the cut edge of a cake from drying out, place half of an apple at the end where the cake has been cut in the cake pan.
- Use a hot, wet knife to cut cakes with sticky frosting and cheesecakes. Dip the knife in hot water and wipe with a paper towel after each cut.
- Freeze a frosted cake first by placing it in the freezer unwrapped. Once the cake is frozen, take it out and wrap it with plastic wrap or aluminum foil and then return to the freezer. When ready to thaw, let it thaw slightly, remove the wrap and then finish thawing.
- Cut both ends out of a can and use the can as a cookie cutter or to cut biscuits.
- To warm bread before serving, place the bread in a paper bag, seal it, and moisten a portion of the outside of the bag. Place it in a 350°F oven for 5 or 6 minutes. Bread will be warmed and ready to serve.
- To prevent meringue from sticking to the knife when you are slicing a meringue pie, lightly butter both sides of the knife.
- When having to remove that first piece of pie or cake, the piece will slid out easier if you cut an additional slice. Before trying to remove the first piece, make a cut as if you were cutting a second piece.
- To prevent ice crystals from forming on ice cream, cover the surface of the ice cream with a piece of plastic wrap or wax paper before closing the container.
- Crumbled brownies or cookies make a great topping for ice cream.
- If marshmallows have started to harden, place a slice of bread in the sack, seal it, and let it set for a couple of days. The marshmallows will soften to their original texture.
- Use thin pretzel sticks to spear hors d' oeuvres instead of toothpicks.
- Salads that are soft or in liquid form when prepared and then refrigerated to firm, can be remolded after they have been partially eaten to give them a fresh look. Microwave just enough to liquefy the salad and then pour into a smaller bowl and place back into the refrigerator.
- If a baked dish needs to be covered with aluminum foil while it is cooking or is going be covered to transport somewhere, spray the foil with cooking spray to help prevent the food from sticking to the foil.
- When reheating leftovers in the oven, check to see if it is heated throughout by sticking a table knife in the center of the dish. Leave it inserted for 15 to 30 seconds. Pull out and test on the back of your hand. If the knife is hot, the leftovers are hot.
- When heating items in a dish in the microwave, cover the dish with a damp paper towel rather than plastic wrap. The paper towel absorbs splatters, does not collapse and will not melt.
- To dispose of used cooking oil, open up 4 or 5 plastic grocery bags, place them inside of each other, and when oil has cooled, pour it into the center of the layered grocery bags. Tie the bags shut and dispose of properly.
Miscellaneous Tips - Equipment & Utensils
- To preserve your wooden cutting board, occasionally rub it down with a couple of drops of oil. This will also help prevent food from sticking to the board.
- Prevent the cutting board from moving around while in use by placing a piece of the cushioned mesh shelf liner under it. The liner holds the board in place and can be rolled up for easy storage when not in use.
- To prevent new wooden utensils from absorbing food odors, soak them overnight in white vinegar before using.
- To quick dry metal strainers and sifters, place them in a warm oven for 2 minutes. Use oven mitt when removing.
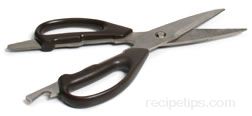
- Kitchen shears can be sharpened by cutting through a piece of steel wool.
- Boil vinegar in the bottom of a new frying pan before using it. This will help prevent food from sticking.
- Do not use metal utensils when cooking with non-stick cookware. To prevent scratching the non-stick surface, use wooden or plastic cooking utensils.
- Protect the surface of non-stick cookware from being scratched during storage by placing protective sheets between stacked pans. Use materials such as paper plates, paper towels, sheets of bubble wrap or sheets of thin cardboard.
- Make cleaning cooked-on splatters from the inside of the microwave easier by first boiling a cup of water in the microwave for a couple of minutes. Then let it set for a couple of more minutes to allow condensation to form. The condensation will help loosen the cooked on splatters and make clean up much easier.
- Check oven temperatures frequently with an oven thermometer. If temperatures are not accurate, adjust oven temperature setting until the oven thermometer shows the correct temperature you are checking. Learn to adjust the oven settings for the correct temperatures. You could also have a professional come in to recalibrate the oven.
- Check scales for accuracy by weighing several different items that the actual weight is known. Choose items that have packaging that will not affect the weight, such as a chocolate bar or a stick of margarine. You can also weigh nine pennies, which should weigh 1 ounce.
Miscellaneous Tips - Cleaning
- To rid a cutting board of food smells, such as fish or onions, cut a lemon or lime in half and rub the board down with it.
- Clean stuck-on food from cookware by soaking it in baking soda and water for 10 minutes. After soaking, wash as normal. Baking soda can also be used as a scouring powder on the cookware.
- To make your copperware shine, cut a lemon in half, sprinkle it with salt, and rub the surface of the copperware.
- To make stainless steel shine, rub it down with lemon peel. You can also soak it in club soda until the fizz is gone. After either process, wash in soapy water and dry.
- To clean darkened aluminum cookware, boil a quart of water with 2 teaspoons of cream of tartar for about 10 minutes.
- Make cleaning the stovetop easier by covering unused burners with a baking sheet or aluminum pie tins.
- Clean up grease or oil spills by sprinkling flour over the spill. The flour soaks up the spill and can then be easily scraped up and disposed of. This prevents the grease or oil from being spread around while trying to wipe it up with a paper towel or rag.
- Remove odors from your hands by rubbing them with lemons. Washing hands with a couple of tablespoons of mouthwash will also remove the odors.
- After grating cheese, grate a raw potato to clean the cheese out of the holes.
- For plasticware that has been stained, place in a gallon of warm water, which has one cup of bleach added to it. Let it soak in this solution for at least 20 minutes. Take out and rinse well, and then wash as you normally would with hot soapy water.
- To get rid of smells in your microwave, cut half a lemon up into several small pieces and place in a cup of water. Add a couple of whole cloves. Place this in the microwave and boil for 5 minutes.
- If your meat grinder has pieces of meat stuck in it, run a piece of bread through it to remove the pieces before you wash it.
- To freshen a smelly garbage disposal, grind up some lemons, oranges, or grapefruits. Save lemon and orange rinds in a plastic bag in the freezer to use for this purpose. When the disposal begins to smell, take a rind from the freezer and throw it down the disposal.
- Use an open box of baking soda in the refrigerator to absorb food odors. Replace it with a fresh box every few months and pour the old box down the kitchen drain to freshen it.
|


