Loading

Cake Preparation

Provided By


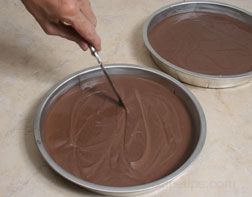
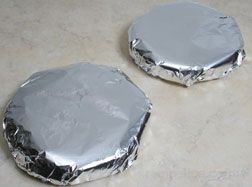
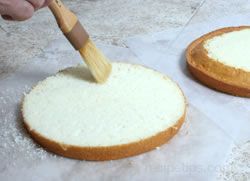
Proper cake preparation is the basis for a well decorated cake, but before you begin to prepare the cake the proper cake pan preparation should be done. Check your cake recipes for instructions on how to prepare the cake pans because preparation may vary for different cakes.

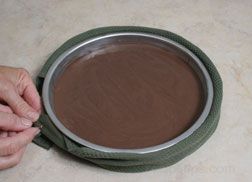
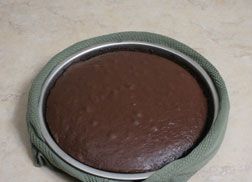
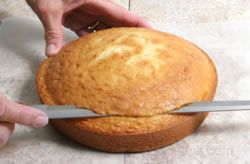
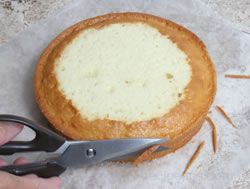
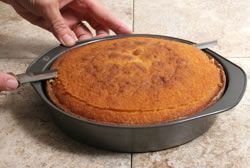
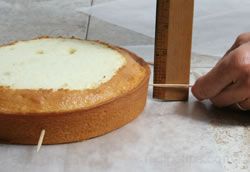
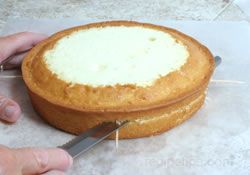
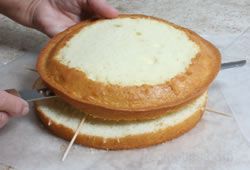
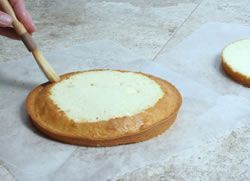
When you begin the cake decorating process, it is best to start out with a cake that is level and has a flat top. It is important that each layer of a layered cake is as flat as possible and even in thickness. There are a couple of steps that can be taken to help the cake bake with a flat top. If the cake does bake with a domed or rounded top, you can still level it to create a flat cake.

Share this!
Facebook


The information below will help you prepare the cake properly for decorating.

Baking a Flat Cake | Cake Baking Tips | Freeze Cake Before Decorating | Leveling-Trimming-Torting


Baking a Flat Cake


Prepare the cake pans according to the directions on the cake recipe and then follow the steps below for creating a flat top on the cake.

  • Pour the cake batter into the prepared cake pan. Use a knife to cut through the batter back and forth a couple of times. This will remove air bubbles in the batter.


  • Another method to remove the excess air bubbles is to pick up the cake pan with the batter in it and give the bottom of the pan a couple of solid taps on the counter. This will settle the batter and help remove the air bubbles.

  • Supplying moist heat for the cake to bake in will allow it to bake more evenly, which will create a flatter top on the cake.

  • Use an old terry cloth bath towel cut in half lengthwise or a heavy kitchen towel and wet it thoroughly. Check to be sure it is long enough to wrap around the entire pan. Wrap it around the cake pan and pin it to secure it in place. Bake as instructed by the recipe.
  • Using these suggestions will help produce a cake that is fairly flat on top so that little or no leveling will be necessary.

Cake Baking Tips

How to prevent the center from falling:

  • Measure the ingredients carefully. Too much sugar or baking powder can cause the center of the cake to fall. Too much liquid can cause the sides and the top to cave in but the problem is not detected until the cake is removed from the oven.
  • Do not overbeat the sugar, fat, and eggs before adding the flour.
  • Do not undercook. Be sure to check for doneness before removing the cake from the oven. Do not just trust the suggested cooking time.
  • Do not disturb the cake during the baking process. A jolt or a cold draft of air can cause the cake to cave in if it hasn't cooked long enough to set yet.

How to prevent the center from forming a peak:

  • Do not overbeat the batter when adding the flour. Mix just enough to get the flour combined with the other ingredients.
  • Do not use too hot of an oven. Too high a temperature will cause the crust to form on the cake too quickly and this will cause it to form a peak. Placing a pan of water in the oven as you bake the cake will produce some steam, which will help prevent the crust from forming too quickly or wrap the cake with a wet towel as instructed above.


Freezing the Cake Before Decorating

It is a good practice to bake the cake at least a day ahead of when you want to decorate it. This allows you enough time to freeze the cake before handling it. Freezing the cake helps tighten the crumb and keeps it moister after decorating. A frozen cake is also easier to work with when it comes to trimming and cutting. Leveling and torting a cake will produce fewer crumbs when the cake is frozen and the layers will be easier to handle.

  • When freezing a cake, be sure that it is completely cooled before wrapping.

  • Wrap the cake tightly in plastic wrap and then wrap it again in foil before placing it in the freezer.


  • Once the cakes are wrapped and completely sealed, they are ready to be placed in the freezer.

  • If you do not have time to freeze the cake overnight, freezing it for at least 2 or 3 hours will help when it comes time to decorate it. Remove the cake from the freezer just before you are ready to work with it.


Leveling, Trimming, and Torting the Cake

Be sure to freeze the cake as shown above before you start leveling, trimming, or torting the cake. It will make the cake easier to work with when cutting.


Leveling and Trimming

  • If you have baked the cake and it has a domed or rounded top it can be still be flattened by leveling the top of the cake.


  • Using a long serrated knife carefully cut just the rounded surface off the top of the cake. Be sure to cut level across the cake by gently sawing back and forth with the serrated knife.


  • Lift the dome off the cake and set aside. Don't throw the domes away - they are great to nibble on while you finish your cake decorating!
  • After leveling the cake, trim off any crusty edges of the cake. You can use a serrated knife or a kitchen scissors works well also.


Note:
There are also cake levelers that can be purchased for leveling the cake. This tool can also be used for cutting the cake into layers.

  • If the cake has risen above the cake pan and all sides are at least level with the top of the pan, the cake can be leveled while still in the pan. Use a serrated knife that is at least as long as the cake is wide. Run the knife along the top edges of the pan as you cut across the entire width to slice the domed part off from the cake.


Torting


  • Torting is the term used for cutting the cake into layers. To make sure the cake is cut into even layers, mark the cake where you are going to cut.

  • Use a ruler and measure up from the bottom of the cake. Insert a toothpick half way up the cake if making two layers. Insert one third and two thirds of the way up if cutting into 3 layers.

  • Insert the toothpicks at the 12, 3, 6, and 9 o'clock positions around the cake for each layer being cut.
  • Using a long serrated knife, begin cutting the top layer of the cake at the 3 o'clock position (the 9 o'clock if you are left-handed). Cut in a back and forth sawing motion with the knife placed on top of the toothpick.

  • Using the other hand to hold and rotate the cake as you cut, turn the cake counterclockwise as you are cutting, keeping the knife level and use the toothpicks at each position as your guide.


  • After you have cut through the entire cake, carefully remove the layer by using the flat side of the knife and the palm of your hand to lift the layer off. If the layer feels flimsy you can use a metal spatula for more support when lifting the layer off. Place it on a piece of wax paper or parchment paper.


  • Before assembling the layers, brush the excess crumbs off the surface of the layers using a soft pastry brush. This will minimize the amount of crumbs that can get into the frosting.
Note: Square cakes can be torted in the same manner as a round cake. If you have a loaf cake that you want to layer, cut it lengthwise. With the knife blade horizontal, begin cutting on the right end of the loaf and cut across the entire length of the cake. If you are left-handed begin slicing on the left end of the loaf.
Loading

Cake Preparation Reviews

There currently aren't any reviews or comments for this article. Be the first!
E-mail: 
Advertisement
Reproduction in whole or in part without written permission is strictly prohibited.
© Copyright 2024 Tecstra Systems, All Rights Reserved, RecipeTips.com