


Standard Loaf Pan | Bloomer | Cob or Boule | Coburg | Cottage
Molded Tin or Split Pan | Baguette | Épi | Fougasse | Braided | Ring | Flat Breads
|
After the dough has been punched down, kneaded, and then has rested briefly, it is ready to be shaped. (It is important to remember that some breads may require two or more cycles of rising and punching before the dough is shaped and allowed to rise for the final time, so always follow the recipe instructions.) There are numerous varieties of bread shapes baked in containers or on a flat surface (see "Bread Shapes"). When shaping the dough, it is important to handle it carefully and not overwork the dough. Shape and work the dough on a floured surface and after shaping, allow it to rise a final time. Some breads are slashed, which not only creates a decorative effect, but provides a means for some of the carbon dioxide gas to escape resulting in a loaf that retains an even shape. Slashing also prevents the bread from splitting and cracking while baking. To ensure proper results, always follow the instructions on the particular bread recipe for the exact requirements for shaping and slashing the dough and for the correct time for the final rising (proofing) period. |
Standard Loaf Pan
| Bread dough can be shaped for a loaf pan simply by pushing the dough into an oval shape that is approximately the length of the pan. |
|
| The dough will conform to the shape of the pan during the second rising period. | 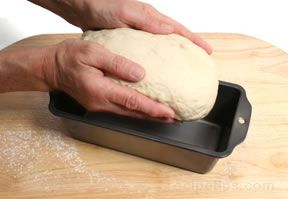 |
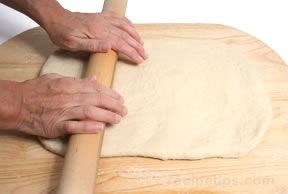
| A second method that can be used is to flatten the dough into a rectangular shape that is about the same width as the longest dimension of the loaf pan. Flatten the dough by hand or with a rolling pin. |
|
| Roll up the dough similar to a Swiss roll. | 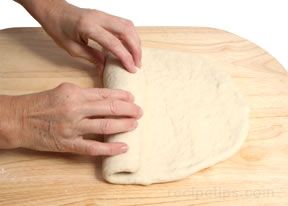 |
| When placed into the loaf pan seam-side down, the dough will conform to the shape of the pan during the second rising period. | 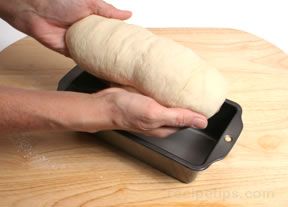 |

Bloomer
|
Bloomer refers to a bread shape that is cylindrical, with slightly tapered ends, but flat on the bottom with several diagonal slashes across the top. | |
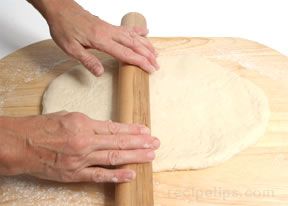
| To create a bloomer, roll out the dough (with a rolling pin) into the shape of rectangle with rounded corners. The longest dimension of the dough should be about 14 inches and the dough should be about 1 to 1½ inches thick. |
|
| Starting from one of the sides with the longest dimension, roll up the dough so that the final width of the loaf is about 4 or 5 inches. The ends should be tucked and smoothed. | 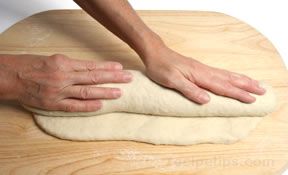 |
| Place the dough onto a lightly greased baking sheet, cover with a kitchen towel, and allow the dough to rise for the final time. Cut diagonal slashes across the top about 1½ inches apart (usually about 6 slashes) before placing the dough into the oven. | 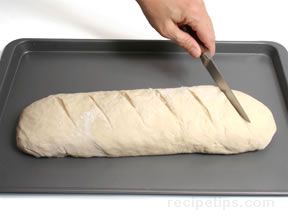 |
Cob or Boule
|
Cob is a term that usually describes rounded loaves in Britain, while boule is a term that describes similar bread shapes in France. | |
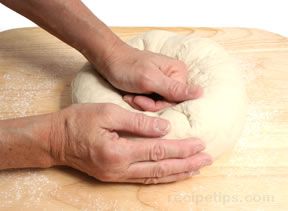
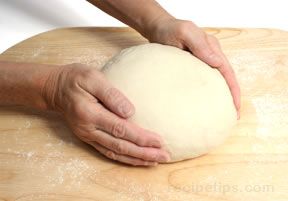
| Rounded loaves are fairly easy to create: simply push the dough into a rounded form, push down gently into the center of the dough, and then flip the dough over to the other side. |
|
| With both hands cupped over the dough, rotate the dough in small increments while further shaping and smoothing the surface. |
|
| Cob or boule shape after baking. | 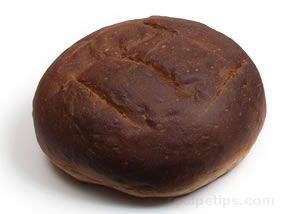 |
Coburg
|
A Coburg is similar to a cob except that it has a cross slashed into the top. | |
| Create a cob shape, place the dough onto a lightly greased baking sheet, cover with a kitchen towel, and allow the dough to rise for the final time. Slash the dough down the center creating a deep score that divides the dough into halves. |
|
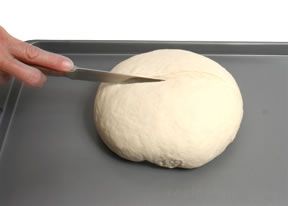
| Slash the dough again perpendicular to the first score, dividing the dough into quarters and then bake. | 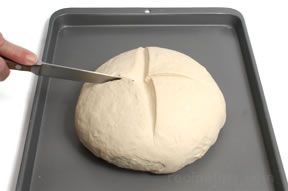 |
Cottage
|
A cottage shape is a large, rounded shape similar to a cob or boule, but with a smaller round of dough placed on top. It is thought that the unusual shape was a result of the need to be as efficient as possible with the small baking space available in the ovens of earlier times. | |
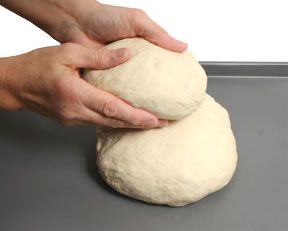
| Divide the dough into two pieces with one piece being twice the size of the other. | 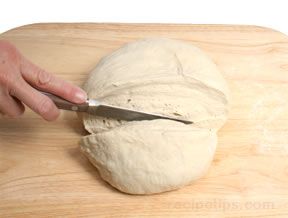 |
| Shape the two pieces of dough into rounds. Place the larger round onto a lightly greased baking sheet and then place the smaller round on top of the larger one. |
|
| Use two fingers to create a hole through the center of the top round and continue through the bottom round. | 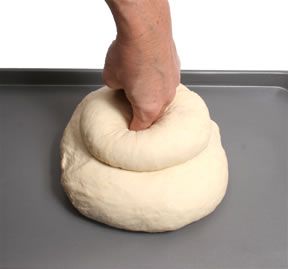 |
| A wooden dowel or handle of a wooden spoon also work well to create the hole. The hole welds the dough of the two rounds because some of the dough of the top round is pushed into the bottom round. Cover the dough with a kitchen towel and allow the dough to rise for the final time before baking. | 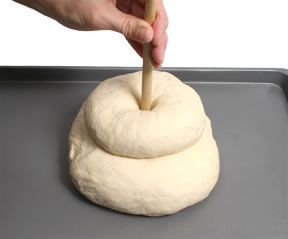 |
| Cottage loaf after baking. | 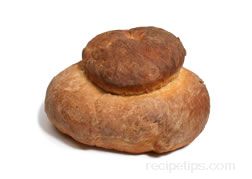 |
Molded Tin or Split Pan
|
A molded tin refers to a rectangular bread shape that has the appearance of being split down the length of the loaf. | |
| One method for creating the shape is to use two portions of dough that are placed next to each other in the bread pan. The two pieces of dough should each be about half the width of the bread pan. Smooth the tops of the halves into a rounded form and then allow the dough to rise for the final time. When baked, the halves appear to be two very narrow rectangular loaves that are joined together. | 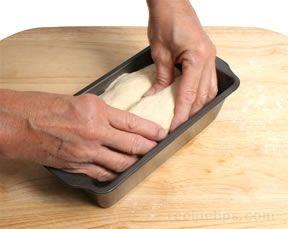 |
| A simpler method of creating the loaf is to use one piece of dough that is rounded on the top and then cut a deep slash down the length of the dough. When baked, the bread will have the appearance of two halves. | 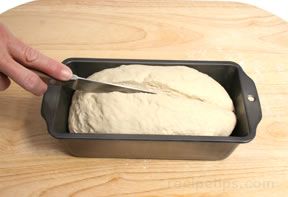 |
Baguette
|
Baguette, which is the French term for "stick" or "little rod," is a long rounded shape that has become a popular name for a number of breads with a similar shape. A French baguette can be up to 2 feet in length, 2 to 4 inches in diameter, and weigh 9 ounces or more. | |
| The baguette shape is created by first flattening the dough with the palms of your hands on a floured surface or by gently flattening the dough with a rolling pin. |
|
| While grasping the dough along the longest dimension, fold the dough into thirds (the two sides folded toward the center) similar to folding a sheet of paper to fit into an envelope. | 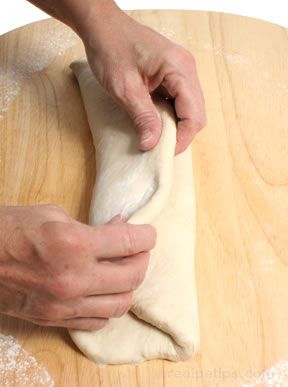 |
| Using your fingers, push into the center of the dough along its entire length to create a long cavity. |  |
| Close the cavity by bringing the front half of the dough up and over the cavity and onto the top of the other half of the dough and then seal the seam. | 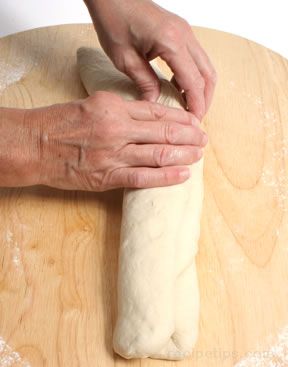 |
| With the seam side down, roll the dough back and forth with your hands. Begin in the center and while rolling the dough, move your hands outward along the length of the dough in order to gently stretch the dough to the desired length. Make sure the diameter is consistent along the length of the dough and then smooth the ends of the dough before the final rising. | 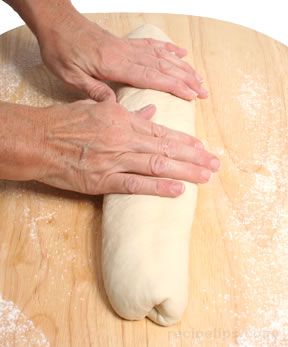 |
| Transfer the dough to a baking sheet or a baguette tray, straighten and smooth the dough, cover with a kitchen towel, and allow the dough to rise for the final time. | 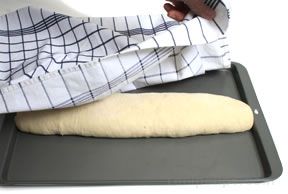 |
| Before placing the dough into the oven, slash the dough diagonally every 2 or 3 inches along the length of the dough. | 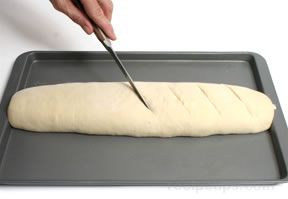 |
Épi
|
Épi is a French bread shape that resembles an ear of wheat and is quite easy to make. | |
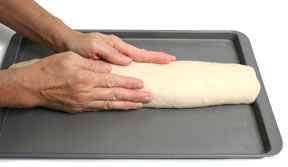
| The shape is formed by first creating a baguette shape, but without the diagonal slashes. Place the dough onto a lightly greased baking sheet. |
|
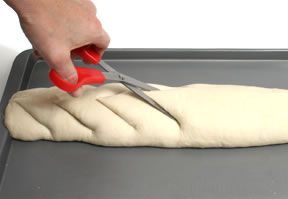
| Use a scissors to cut into the top side of the dough every 2 to 2½ inches along the length of the baguette. The diagonal cuts should penetrate the dough about three-fourths of the way to the bottom. The cuts create flaps in the top side of the dough. |
|
| Push the flaps to the sides of the baguette, alternating sides with each flap of dough. Cover the dough with a kitchen towel and allow it to rise for the final time. When baked, the flaps form individual servings along the length of the bread, which can be easily broken off when the bread is served. | 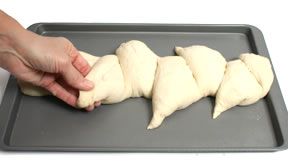 |
| Épi after baking. | 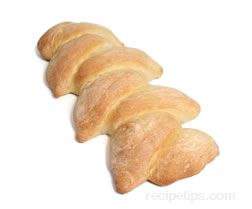 |
Fougasse
|
A fougasse shape refers to a flattened bread shape with elongated holes, which give the bread the appearance of tree limbs. Fougasse is a popular bread in France and is often compared to focaccia bread of Italy. | |
| The distinctive shape is created by first flattening the dough to about 1 inch thick. |
|
| Place the dough onto a lightly greased baking sheet and push and shape the dough into a form similar to a long triangle that is curved at the points. | 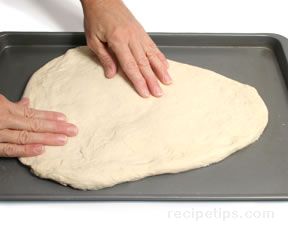 |
| Cut diagonal slits through the dough about 2 or 3 inches apart on both the left and right sides, leaving about a 1 inch strip of dough in the center and around the perimeter. | 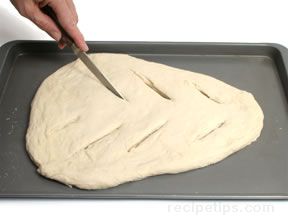 |
| Using your fingers, enlarge the slits into elongated holes and continue to push and smooth the dough until you are satisfied with the shape. Cover the dough with a kitchen towel and allow it to rise for the final time. | 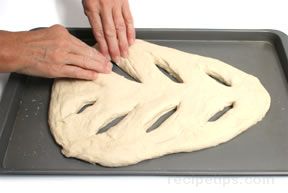 |
| Fougasse after baking. | 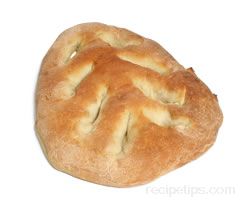 |

Braided
|
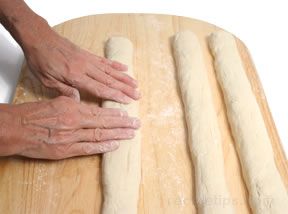
Braided bread is made of strands of dough woven together to form a braided shape. 3 to 6 strands of dough are common for several varieties of braided bread and some may incorporate as many as 12 strands. For a simple braid, use 3 long pieces of dough. | |
| Divide a batch of dough into 3 equal parts. On a floured surface, roll each of the pieces of dough back and forth with your hands. Begin in the center and while rolling the dough, move your hands outward along the length of the dough in order to gently stretch the dough to the desired length. Make sure the diameter is consistent along the entire length of each strand and that all 3 strands of dough are about the same diameter and length. |
|
| Place the 3 ropes of dough parallel to each other on a lightly greased baking sheet. Beginning in the center and moving toward one of the ends, braid the strands of dough by lifting the first strand over the middle strand, the third strand over the first strand, and the middle strand over the third strand. Repeat the same procedure for the opposite end of the dough strands, braiding from the center toward the end. | 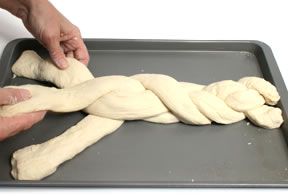 |
| Seal both ends of the dough. | 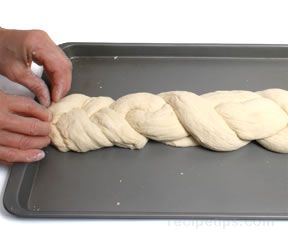 |
| Allow it to rise for the final time before baking. (Cover the dough with a kitchen towel.) | 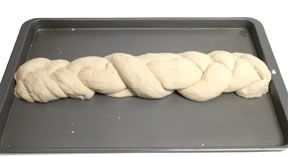 |
Ring
|
A ring shape can be used for a variety of bread recipes and is easy to create. It is often used for several types of holiday breads, especially at Christmas and Easter. |
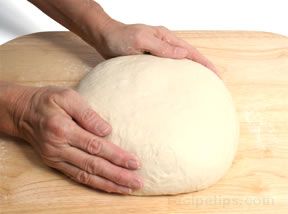
| Begin by forming the dough into a ball. |
|
| Flatten the ball of dough slightly. It may be easiest to place the dough onto a lightly greased baking sheet before shaping because it may be difficult to transfer the dough to the baking sheet after the dough is shaped. | 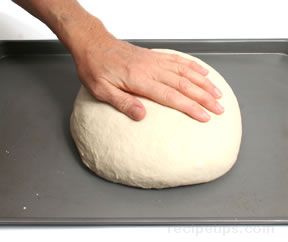 |
| Plunge 2 or 3 fingers into the center of the dough to make a hole. | 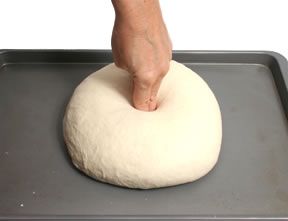 |
| Widen the hole by gently pushing the dough outward in all directions. | 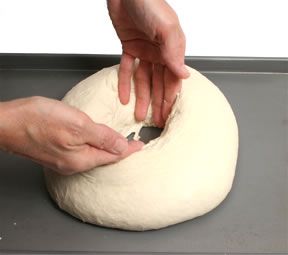 |
| Run your fingers around the inside of the circle to smooth dough as the circle expands. | 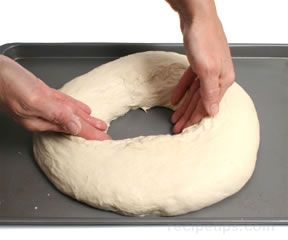 |
| Smooth the top and outside of the ring to make the ring of dough as neat and evenly formed as possible. Cover the dough with a kitchen towel and allow it to rise for the final time before baking. | 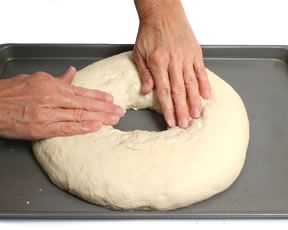 |
| Ring shape after baking and decorating. | 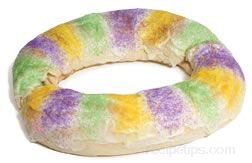 |
Flat Breads
|
Flat breads come in many shapes, thicknesses, and sizes. Thicker flat breads, such as focaccia are usually leavened while thin, pancake-like flat breads, such as chapatis, are often unleavened. Many flat breads have a rounded shape, while others may have a freeform shape or even a triangular shape, such as parathas. |
| Many varieties of leavened flat breads can be formed simply by flattening the dough with your hands or with a rolling pin. | 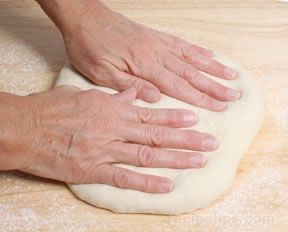 |
| Some flat breads, such as the Italian carta di musica or "music paper" bread, are very flat so a rolling pin is required when shaping the dough. |
|


