


General Guidelines for Rotisserie Grilling of Turkey
Rotisserie Grilling Using a Charcoal Grill
Rotisserie Grilling Using a Gas Grill | Turkey Doneness
|
Rotisserie grilling requires three key components: The spit assembly, a means to turn the spit, and a heat source for cooking. The spit refers to a device consisting of one or more metal bars onto which meat or other foods are skewered. There are two types of spits that are used most often. The first one is a long skewer that is pushed through the food. The skewer may resemble a heavy round bar depending on the size of the rotisserie unit and the total weight that must be supported. After the meat has been skewered, two prongs (or "forks") are attached to each side of the meat to hold it in place. The spit, or skewer, is placed on brackets that allow the food to be suspended above, or in front of, a heat source. A second type of spit is a split rod assembly in which two narrow skewers are pushed through the food and are attached to gears on both ends of the rotisserie unit. Because two skewers are used, there is no need for the use of additional hardware (such as the fork attachments used with the single skewer assembly) to prevent the meat from slipping on the skewers while rotating. With the use of a mechanical or manual device, the spit rotates slowly at a consistent speed. The constant rotation of the rotisserie allows meat to cook evenly. The juices within the meat are distributed equally resulting in tender, self basted meat. The meat develops a smoked flavor and a perfect crispy crust.
Rotisseries are built in a variety of sizes ranging from models able to accommodate a small chicken to large models used for roasting very large primal cuts of meat or whole animals such as a lamb or pig. Some rotisseries are built as optional attachments for outdoor charcoal grills and many outdoor gas grills are equipped with rotisseries as a standard feature. There are also a variety of indoor electric countertop rotisseries, which consist of a self contained oven-like cabinet with a heating element in the back. The food roasts as it rotates on a spit in front of the heat source. The units come with temperature controls, timers, and a drip pan for collecting any melting fat. Keep in mind that some countertop units may not be large enough to cook a large turkey. Before using a rotisserie, it is important to read the instruction manual included with the rotisserie. Make sure that the unit is used correctly and that safety instructions are always followed. If the rotisserie unit will be used with a charcoal or gas grill, it is important that the rotisserie is designed specifically for the particular grill that is being used as the heat source. |
General Guidelines for Rotisserie Grilling of Turkey
|
In order to properly grill a turkey using a rotisserie, the unit must be positioned in such a way that the heat source is never directly under the bird. The indirect heat will allow the interior portions of the meat to cook thoroughly before the exterior becomes overdone. When setting up for rotisserie grilling using a charcoal or gas grill as the heat source, the grill must be preheated before rotisserie grilling can begin. (Refer to the article, "Grilling Turkey" for details on preheating the grill.) The best results are achieved when a rotisserie ring is used because it allows the spit to be positioned at the perfect height in relation to the heat source. |
| If a turkey is not too large, it can be grilled using a standard size rotisserie unit that is often included with an outdoor gas grill or with a unit that attaches to a charcoal grill. A 12 to 14 pound bird is often the maximum weight that can be accommodated on a standard rotisserie unit. | 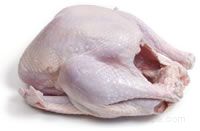 |
|
The following points are among the most important when rotisserie grilling a turkey.
It is often easiest to position the bird on the spit before trussing because it is less difficult to handle. If the turkey is not trussed, it will flop about as the spit rotates and it will not be possible to balance the rotisserie unit. A few simple steps are all that are necessary to properly truss the turkey before it is rotisserie grilled.
|
| Although rotisserie grilling is very similar to oven roasting, the process does not heat the interior of the turkey as quickly as oven roasting, which is why it is important that a turkey intended for rotisserie grilling not be stuffed. The slower cooking time may not kill harmful bacteria (that may be present in the stuffing) as rapidly as with oven roasting. | 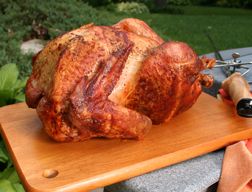 |
|
Approximate Cooking Times and Safe Internal Temperatures Allow 10 to 15 minutes cooking time per pound, which means that a 14 pound turkey may require 3 to 4 hours of cooking time on the rotisserie, so plan accordingly. Do not rely on time estimates to determine proper doneness. Always use a meat thermometer for this purpose. Focus on the internal temperature of the turkey to determine doneness rather than appearances in order to avoid foodborne illness. The breast meat must reach an internal temperature of 170ºF and the thigh meat must reach an internal temperature of 180ºF. |
Rotisserie Grilling Using a Charcoal Grill
| When rotisserie grilling on a charcoal grill using indirect heat, the fire is built on the side of the kettle or in a ring around the perimeter, away from the location where the turkey is to be positioned. The meat is cooked by radiant heat rather than direct heat (as if in an oven). None of the hot coals should be directly under the meat. A drip pan is placed under the meat to catch the melted fat that drips from the meat as it cooks (a disposable aluminum pan works well). Because of the extended cooking time necessary for rotisserie grilling, fresh charcoal must be added every 30-40 minutes to maintain the proper cooking temperature. Keep in mind that most rotisserie units that attach to charcoal grills are not able to accommodate a turkey larger than 12 to 14 pounds. | 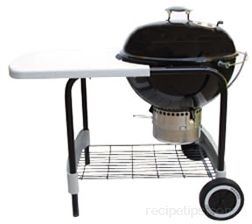 |
| The following steps may be used for rotisserie setup on a charcoal grill. |
|
Rotisserie Grilling Using a Gas Grill
| The best gas grills for use in rotisserie grilling are models with front and back burners or models that have three burners arranged in a line front to back. All of the burners should be ignited to allow the grill to preheat before the turkey is placed on the rotisserie. When the grill has preheated, all of the burners except for the rear burner are shut off. The spit is positioned over the front or center burner so that the turkey is not directly over the heat source (the rear burner). If the grill has only two side-by-side burners, set both of the burners on low. When a drip pan is placed on the grate, the turkey will be shielded by much of the direct heat of the burners. Keep in mind that most rotisserie units that are included with gas grills are not able to accommodate a turkey larger than 12 to 14 pounds. | 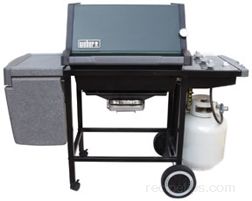 |
| The following steps may be used for rotisserie setup on a gas grill. |
|
|
The minimum temperature recommended for cooking turkey is 170ºF for the breast meat and 180ºF for the thigh meat. (During the resting period, the temperature of the meat will rise an additional 5ºF to 10ºF). Any stuffing that was cooked inside the turkey must be cooked to a minimum temperature of 165ºF; however, a stuffed bird should not be cooked on a rotisserie. Remember, using a reliable meat thermometer is the only sure method to verify the correct doneness. |
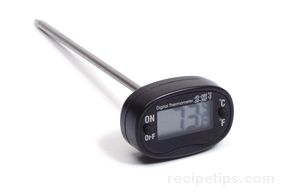 As stated before, rather than relying on a cooking time chart or a pop-up gauge inserted into the turkey by the processor, it is always best to use a reliable meat thermometer to determine proper doneness. A time chart does not allow for the many variables that often influence doneness. A chart should be used as a guide only and cannot substitute for the accuracy of a good meat thermometer. To accurately check the temperature of the turkey, the thermometer must be pushed through the thickest part of the meat and away from any bones (bones conduct heat).


