
|
Thawing | Cleaning | Stuffing | Brining | Marinating | Rubs | Cutting There are two different methods that are commonly used in order to properly and safely thaw a frozen turkey: the refrigerator method and the cold water method. A third method, thawing in the microwave, is sometimes used when quick defrosting is necessary. Refrigerator Method Placing a frozen turkey in the refrigerator is the best and safest method for thawing. The turkey should be kept in its original wrapper during the thawing process. Thawing the bird in the refrigerator may take a long time, especially if the turkey is a large size, but it is absolutely the safest method for thawing. The cool temperature of the refrigerator (usually no higher than 40°F) discourages the rapid growth of harmful organisms in the turkey as it thaws. 24 hours for every 5 lbs. defrosting time should be allowed to properly thaw the turkey. This time may vary because of the individual temperature settings of different refrigerators. Recommended Refrigerator Thawing Time
Cold Water Method Thawing a frozen turkey in cold water is another good defrosting method. As with thawing in the refrigerator, the bird should be kept in its original wrapper and immersed in cold water. Make sure the water is very cold and if the original wrapper has any punctures or tears in it, the turkey should be placed in another plastic bag and sealed. The turkey should be placed breast side down and it should be completely covered with water. The water should be changed every 30 minutes. This method is much faster than thawing in the refrigerator (usually 8 to 10 times faster), but it can be annoying having to change the water every 30 minutes. At least 30 minutes defrosting time per pound should be allowed when using the cold water method. Once the turkey is thawed, either cook it immediately or place it in the refrigerator until you are ready to roast it. Recommended Cold Water Thawing Time
Microwave Method An alternative to refrigerator and cold water thawing is defrosting in the microwave. This may work in a pinch, but it is not highly recommended because many microwave ovens do not defrost evenly. While waiting for the bird to fully defrost, bacteria may grow quickly in areas where the turkey is already defrosted. It is important is follow the manufacturer's instructions to ensure that the microwave oven is used properly for defrosting. The turkey should be roasted immediately after defrosting in the microwave.
After the turkey has thawed, the packaging is removed. The neck and the giblets are usually found inside the body cavity so these can be removed and discarded, or if they are to be used, they should be washed with cold water and patted dry with paper towels. The turkey should be thoroughly washed inside and out with cold water and then patted dry. Proper food handling practices must be followed during the preparation of the turkey in order to avoid possible problems with food poisoning.
For the best results, the stuffing should be prepared just before the turkey will be stuffed and the turkey should be stuffed just before it is ready to go into the oven. This will reduce the risk of bacterial growth. Some cooks make the mistake of preparing the stuffing and placing it in the turkey well in advance of roasting the bird in order to save time, but this is a dangerous practice. Even if the stuffing is to be baked in a separate dish, the ingredients for the stuffing should not be mixed together until just before the dish will be placed into the oven. There are, however, some steps that can be taken to save time such as chopping the vegetables or preparing dried, cubed bread for the stuffing base. This makes it easy to quickly prepare the stuffing ingredients just before the turkey is to be cooked. The total quantity of stuffing that is prepared may not fit properly in the turkey. In this case, the extra stuffing can be cooked in a baking dish. Many cooks prefer to place all of the stuffing in a baking dish because an unstuffed turkey does not require as much time to cook to the proper temperature. Listed below are some important points to remember concerning stuffing:
Brining a whole turkey is a simple process that results in moist and flavorful meat, although it usually tastes saltier than turkey prepared with other methods. A large stainless steel or glass container is required to accommodate the turkey and the brining solution. It is important that the container or pot be non-corrosive, otherwise the salt that is used may cause a chemical reaction with the container. A 16-pound turkey requires about 2 pounds of table salt and 2 gallons of water. Kosher salt may also be used and may be preferable since it doesn't contain the additives that are found in table salt. Regardless of the type that is used, the salt should be dissolved in the water before placing the turkey into the container. The turkey should be completely submerged with the brining solution. Other flavorings can be added to the solution including various herbs, spices, or sugar. The container should be covered and placed in the refrigerator about 6 hours. After the required soaking time, the turkey is removed from the container, thoroughly rinsed under cold water, patted dry, and placed back in the refrigerator overnight to allow the surface to dry thoroughly. It is then removed from the refrigerator and roasted. The brining process breaks down and extracts some of the proteins from the meat, allowing liquid to be absorbed into the turkey. When the turkey is cooked, the proteins coagulate, preventing the liquid from escaping.
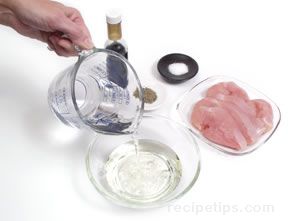
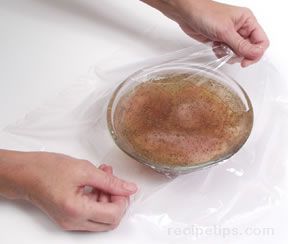
Soaking a whole turkey or turkey parts in a marinade is a good method for adding flavor as well as to help tenderize the meat. A proper marinade should contain an acidic ingredient such as vinegar or wine, oil such as olive oil, and seasonings such as herbs and spices. Citrus fruit juices may be used instead of the vinegar or wine to provide the acidic ingredient that is necessary to soften the tissues of the meat. There are several important points to remember when using a marinade:
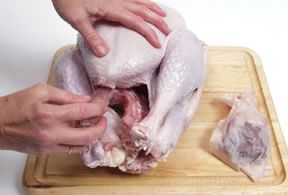
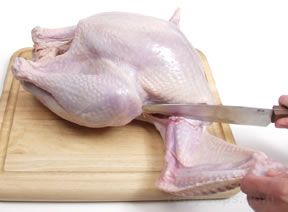
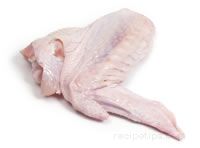
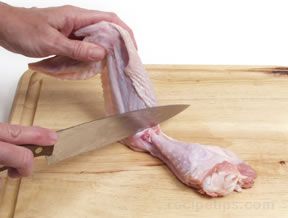
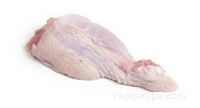
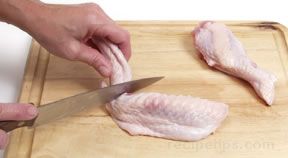
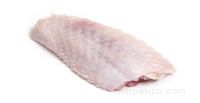
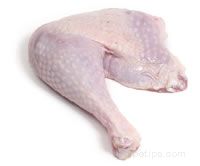
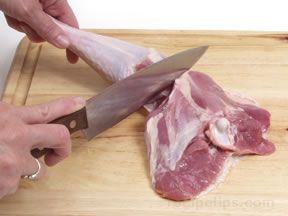
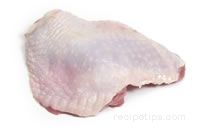
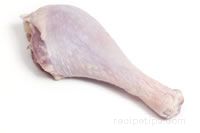
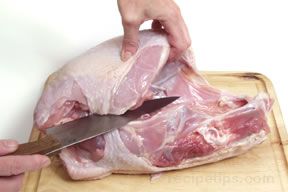
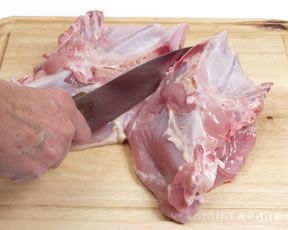
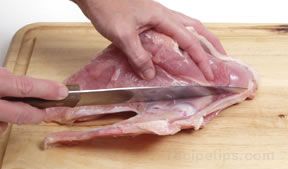
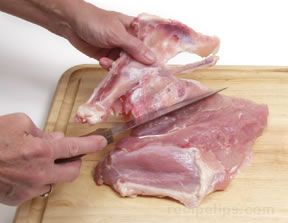
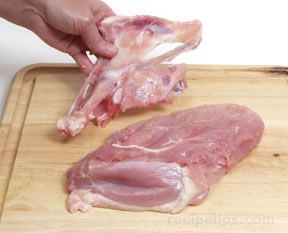
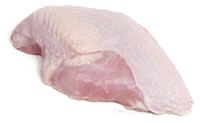
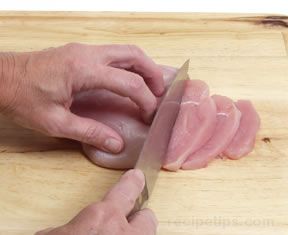
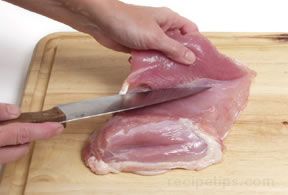
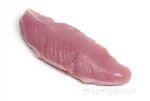
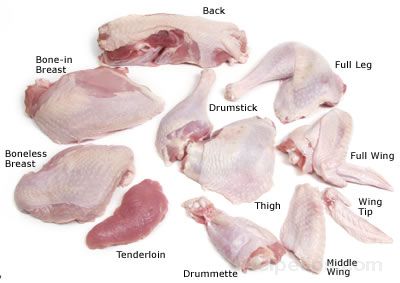
An additional option for flavoring turkey is with the use of a rub. A rub is basically a dry mix of herbs and spices that are applied to the raw meat and are allowed to permeate and flavor the meat over a period of time, usually overnight in the refrigerator. An endless variety of rubs can be prepared for turkey depending on the flavors that are desired. A rub mixture can be patted onto the turkey, but the moisture from the meat can cause the dry ingredients to stick to your hands. The best results often occur when the ingredients are sprinkled evenly on all sides. When turkey is grilled, a rub can provide a flavorful crust on the surface and help to seal in the moisture, especially if the skin has been removed from the turkey. Turkey parts such as breasts, legs, or wings can be purchased already cut and packaged at most food stores, but it is usually more economical to purchase a whole turkey and cut it up at home. The turkey should be well chilled, which will allow it to be cut up more easily. A sharp knife is essential and a heavy-duty kitchen shears is helpful.
| |||||||||||||||||||||||||||||||||||||||||||||||||||||||||||||||||||||||||||||||||

Loading
Turkey Preparation Guide


Provided By
RecipeTips
RecipeTips


Loading
There currently aren't any reviews or comments for this article. Be the first!


Advertisement


Advertisement