|
Lefse Equipment | Lefse Recipes | Lefse Storage | Lefse Tips
Lefse is a Scandinavian flatbread made with potatoes. The dough is rolled very thin and then fried on a hot grill. It is enjoyed in many ways. Traditionally it is buttered, sprinkled with sugar, and then rolled up and eaten as a sweet treat, or it is just spread with butter and rolled up to be eaten in accompaniment with some type of savory food, such as meat and vegetables. It is also enjoyed with brown sugar or cinnamon sprinkled on it. Some even spread peanut butter or jelly on it. It is traditionally served during Thanksgiving and Christmas but can be enjoyed anytime of the year.
There are many different recipes for lefse but they all have the basic ingredients of potatoes, butter, cream or milk, and flour. Some recipes call for instant potatoes rather than real potatoes. Starting with a good recipe is essential to success. Some recipes will be easier to work with than others but it basically takes practice to make good lefse. Provided below is information on the type of equipment to use and two different types of recipes, one using real potatoes and one using instant potatoes.
Lefse Equipment
There is special lefse equipment that will assist in the lefse making process but this equipment is not an absolute requirement. There are basic kitchen tools that can also be used. The equipment needed for making lefse is shown below.
|
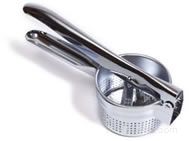
Potato Ricer
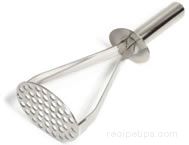
Potato Masher
|
|
Potato Ricer or Masher
Once the potatoes are cooked, they need to be riced or mashed.
The potato ricer forces the potatoes through small holes in the ricer, which is a good way to eliminate any lumps in the potatoes. The potato masher also does a good job of mashing the potatoes so they do not have any lumps but it is a little more labor intensive than the ricer. Either tool can be used to prepare the potatoes.
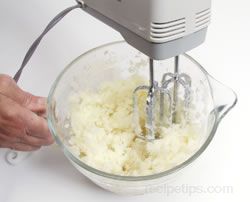
An electric mixer can also be used to mash the potatoes. |
 |
|
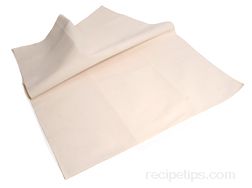
Pastry Cloth
A well seasoned pastry cloth will aid in the rolling process. The dough needs to be rolled out very thin and a seasoned pastry cloth will help prevent the dough from sticking when it is time to transfer it to the grill. If you do not have a pastry cloth, a well floured surface will also work. |
 |
|
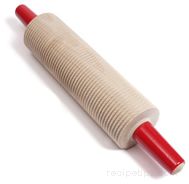
Grooved Rolling Pin
A grooved rolling pin works well for rolling the dough out nice and thin. It also provides the traditional markings on the lefse. Care needs to be taken when using the grooved rolling pin that dough does not stick in the grooves. This will cause problems when rolling the dough. A smooth rolling pin can also be used if that is what you have available. |
 |
|
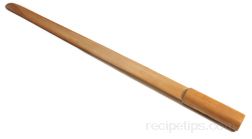
Lefse Turning Stick
This is a very long thin stick that can be found ranging from 3/4 inch to 1 1/2 inches wide. The stick is generally about 24" long. It has a thin tapered edge which makes it easy to slide under the lefse when lifting to transport to the grill and for flipping it over when cooking it. If you do not have access to a lefse turning stick, a utensil such as a pancake turner could be used but it will be more difficult to handle and turn the thin lefse without tearing the dough when using this type of tool. |
 |
|
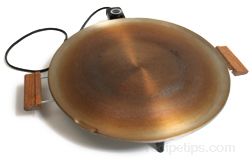
Lefse Grill
This is a flat, round grill design especially for frying lefse. Because it is flat, without any sides, it makes it easier to turn the lefse when frying it. It is generally made of aluminum but is also available in with non-stick surface. The non-stick surface may make it more difficult to handle the lefse because the lefse will have a tendency to slip around more, making it hard to get under it properly when trying to turn it. The grill has a temperature control gauge that allows the unit to heat up to 500°F, which many recipes call for the lefse to be fried at 400°F to 500°F. If you do not have a lefse grill, an electric frying pan that can heat up to 450°F can also be used but it will be harder to turn the lefse when frying because of the sides on the pan and you will be restricted to what size you can make the lefse. |
Lefse Recipes
Lefse Recipe-Real Potatoes | Lefse Recipe-Instant Potatoes
Preparing Potates | Mixing Dough | Rolling Out Lefse | Frying Lefse
| Lefse Recipe with Real Potatoes |
Ingredients: |
 |
- 5 lbs. of potatoes
- 1 c. (2 sticks) butter or margarine
- 1 c. Half & Half
|
|
- 2 tbsp. sugar
- 2 tbsp. salt
- 4 1/2 c. flour
|
 |
|
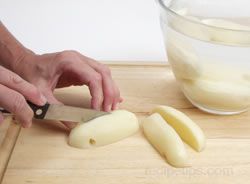
Preparing Potatoes
Peel the potatoes and cut in half. If the potato is extra large, cut in half again. Be careful not to cut the potatoes too small. If they are cut too small the will be too moist when cooked. Try to cut the pieces so they are as consistent in size as possible so that they will cook evenly.
|
 |
|
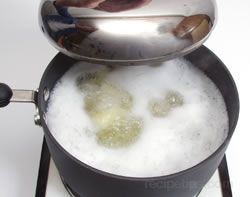
Place in a large saucepan and cover with water. Add 1 tablespoon of salt. Bring to a boil reduce heat to low, cover, and simmer for 15 to 30 minutes until tender. Check at 5 minute intervals because cooking time will vary depending on type, size and quantity of potatoes being cooked. |
Potatoes are done when a fork can be inserted to the center and removed without resistance. Do not overcook the potatoes because this will make them too moist. When done, drain potatoes in a colander to be sure they are well drained. |
 |
|
While the potatoes are still hot, mash them by using a potato ricer, potato masher, or an electric beater on low speed. Blend until smooth.
Note: If you have a hand masher, it is helpful to first mash the potatoes by hand and then if desired, finish mashing with an electric mixer or use a ricer. Also, working with half the batch at a time makes mashing and mixing the dough easier. |
|
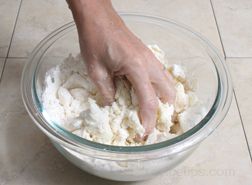
Mixing Lefse Dough
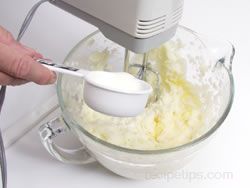
Working with half a batch, stir in 1/2 cup of softened butter (not melted). Add the 1 tablespoon of sugar and 1/2 tablespoon of remaining salt. Then pour in 1/2 cup of Half & Half and mix thoroughly.
Repeat with the second half of the potatoes. |
|
 |
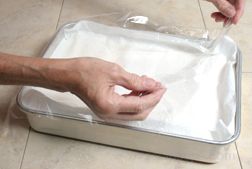
After mixing both batches thoroughly, place the potato mixture in a large rectangle cake pan or roasting pan and pat into the pan evenly. Place a paper towel over the potatoes and then cover with plastic or foil. Place in the refrigerator overnight or for at least 10 to 12 hours. The paper towel will protect the potatoes from moisture by absorbing condensation that may form when they are refrigerated. |
|
 |
Note: The potato mixture can be left in the bowl it was mixed in to refrigerate, but when it comes time to mix in the flour, it will be easier to work with the potatoes in the pan. It is easier to divide the potato mixture into thirds when mixing in the flour before rolling and frying the lefse. Having them in a rectangle cake pan or roasting pan makes it easier to divide into 3 even batches. |
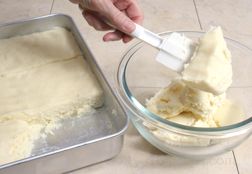
| After the potatoes have been refrigerated overnight, remove them from the refrigerator and divide the dough into 3 even batches. Remove one batch and place in a mixing bowl. Place the remaining batches back in the refrigerator until ready to use. |
|
 |
| Add 1 1/2 cups of flour to the potato mixture by hand. Continue to work the mixture by hand until it is mixed thoroughly and has a smooth, even texture. |
|
 |
 |
|
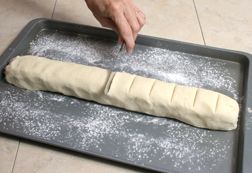
Rolling Out Lefse
Remove the dough from the bowl and place on a large lightly floured cookie sheet. Shape the dough into a roll that is approximately 2 inches in diameter. Score into 12 even sections.
|
Note: When you are ready to begin rolling out the dough, cut off one section to use for the first piece of lefse. After rolling, if this section is the size you want the lefse pieces to be, use the sections as scored. If it is too big or too small, adjust the scores on the roll of dough accordingly. |
 |
|
Turn the lefse grill on to begin preheating before starting to roll out your first piece of lefse. Set grill at 400°F.
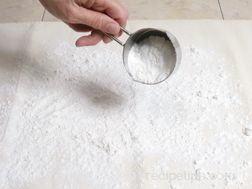
Prepare the work surface by sprinkling with flour. It is best to use a covered lefse board or a pastry cloth. Use approximately one half cup of flour and sprinkle the surface with flour so that it covers an area slightly bigger than the size of the lefse pieces you are going to be rolling. |
 |
|
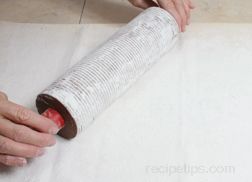
Use the rolling pin to work this flour into the surface and to coat the rolling pin. Roll the flour until it is worked into the surface of the pastry cloth. If using a cover on the rolling pin, be sure that is well seasoned with flour also. Brush excess flour off the rolling pin before beginning to roll out the lefse. |
 |
|
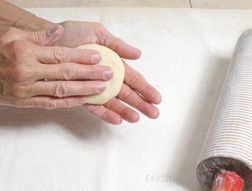
Once the flour is worked into the surface you can begin rolling a piece out. Take one section of dough and flatten into a small disc. |
 |
|
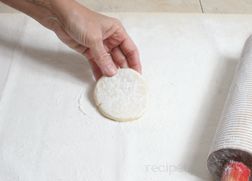
Place a little more flour in the center of the pastry cloth and place the flattened disc on the flour to coat the under side and then turn the disk over and begin to roll. |
|
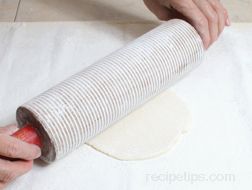
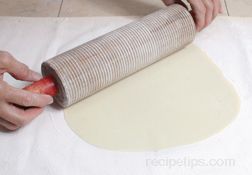
Start rolling from the center out, rotating around the disc with each stroke. Roll out similar to rolling out pie crust. Try to keep the shape in a circle as you roll. If using a grooved rolling pin, make sure dough does not get stuck in the grooves. |
|
 |
|
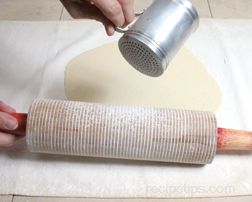
If the dough does stick to the rolling pin, remove it immediately to prevent further problems with dough sticking. Dust the rolling pin with a little more flour if dough starts to stick.
Note: Be careful not to over use the flour when rolling the dough out. Too much flour can cause the lefse to be tough, dry, and crack around the edges when frying. |
|
 |
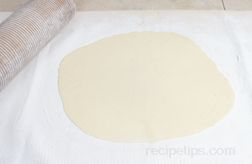
| Continue to roll out the dough until it is very thin and an even thickness. You will be able to see the lefse stick through the dough when it is thin enough. |
|
 |
| When done rolling, the lefse should be fairly round in shape. Each piece may not be perfectly round or exactly the same in size. After rolling a few pieces out, you will begin to master the technique. |
|
 |
 |
|
Frying Lefse
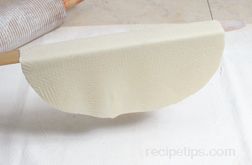
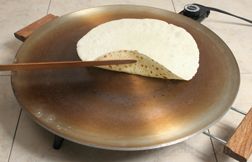
Carefully slide the lefse stick under the center of the rolled out dough. Insert all the way across the circle until the stick comes out the opposite side and then lift the piece from the work surface. |
 |
|
Gently lift the rolled out lefse and place half on the preheated grill and quickly unfold the remaining half onto the grill to get it to fry evenly. |
 |
|
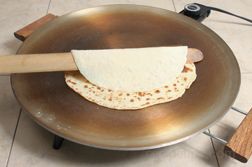
Allow the lefse to cook on one side, checking often to see if it is beginning to brown. The lefse will begin to bubble slightly and brown spots will form on the bottom side as it is frying. |
Turn the lefse once it has browned as desired. Some prefer their lefse browned only until speckled with light spots and others like theirs cooked until the spots are a darker brown. |
| Use the lefse turning stick again and pick up through the middle. Flip the lefse over and use the lefse stick to unfold. |
|
 |
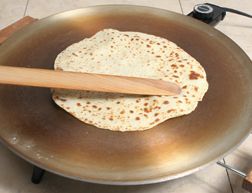
| Fry the second side in the same manner as the first. If lefse bubbles up while frying, press them down gently so the lefse cooks evenly. |
|
 |
|
Cook until browned as desired. Check doneness often because it does not take long for it to fry on each side. |
|
 |
Note: Start the temperature of the grill at 400°F. If while frying, you feel the lefse is taking too long to cook or is cooking too fast, adjust the temperature of the grill accordingly. Generally, you have time to get the next piece rolled out while it is cooking on the first side. If the lefse is getting done on the first side before you get the next one rolled out, turn the grill down a little. If you get the next piece rolled out and you have to wait for a couple of minutes before it is ready to turn over, turn the grill up a little. |
 |
|
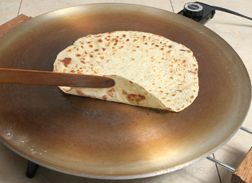
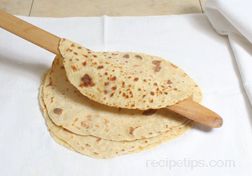
When the lefse is done, use the lefse stick to lift it off the grill and place it flat on a clean smooth towel. |
 |
|
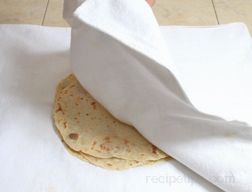
Cover the lefse with another towel and then continue to fry the remaining lefse dough in the same manner. |
 |
|
Before beginning to fry the next piece, brush the excess flour off the grill. Use a soft dry cloth, folded into several layers to protect from the heat. This will prevent you from ending up with an accumulation of burnt flour on the grill. |
 |
|
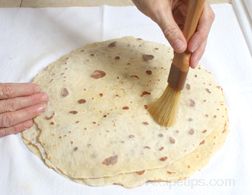
As you get a piece of lefse done, place it on top of the last piece and cover again with the dry towel. If the pieces of lefse seem to have an excess of flour on them after frying, lightly brush them off after removing them from the grill. You can brush them off with your fingers or a pastry brush also works well. |
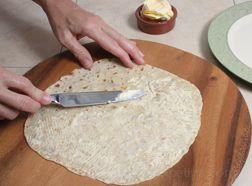
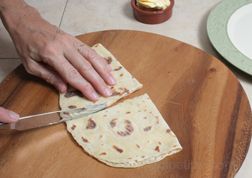
| When completely cooled, the lefse is ready to eat. Spread butter on one side of the lefse. |
|
 |
| After buttering the one side, fold the lefse in half with the buttered side in and then cut the folded piece in half. |
|
 |
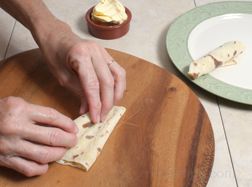
| Roll the lefse up and serve. Some people prefer to roll smaller pieces. To make smaller pieces, butter on one side as shown and do not fold in half. Cut the flat piece of lefse through the middle and then cut through the middle again in the opposite direction to for 4 quarters. Roll up each quarter piece for serving. |
|
 |
 |
|
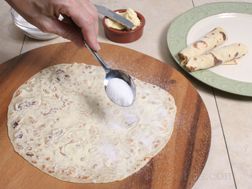
The lefse can also be sprinkle with sugar, if desired. Butter as shown above and then before folding in half, sprinkle one half with sugar. Other ingredients, such as cinnamon, brown sugar, peanut butter, and jelly, are some times spread on the lefse rather than sugar.
Fold the lefse in half by folding the side with only butter over the sugared half. |
 |
|
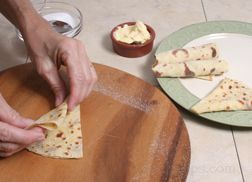
Cut the folded piece of lefse in half as shown above. Each half of lefse can then be folded in half again and served as a flat piece. Or, it can be rolled up as shown above.
If not ready to serve, see below for Lefse Storage. |
| Lefse Recipe with Instant Potatoes |
Ingredients: |
| |
- 9 c. instant potato buds
- 2 tbsp. sugar
- 2 tbsp. salt
- 1 c. (2 sticks) butter or margarine
|
|
- 1 c. Half & Half
- 6 c. water
- 4 1/2 c. flour
|
 |
|
Mix the above ingredients in two batches. It will make it easier to handle.
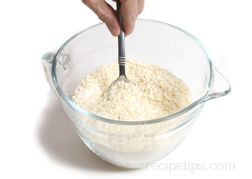
Mix 4 1/2 c. of potato buds in a mixing bowl with 1 tablespoon of sugar, and 1 tablespoon of salt. Set aside while heating the water, butter, and Half & Half. |
 |
|
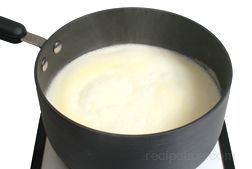
Combine 1/2 c. of butter, 1/2 cup of Half & Half, and 3 c. water in a saucepan and bring to a boil. These ingredients can also be placed in a microwave safe bowl and brought to a boil in the microwave. |
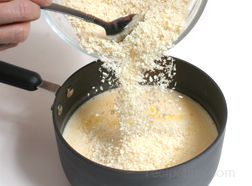
| Once the water, half & half, and butter are boiling, remove from the heat and add the dry ingredients. |
|
 |
|
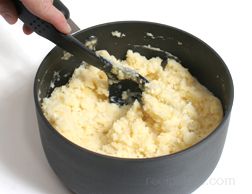
Stir just until the mixture is well blended.
Repeat this process in the same manner for the second batch. |
|
|
| When both batches are done, place them in a rectangle cake pan or roasting pan and pat down evenly. Place a paper towel over the potatoes and then cover with plastic or foil as shown above.
The paper towel will protect the potatoes from moisture by absorbing condensation that may form when they are refrigerated. |
|
 |
|
Place the potatoes in the refrigerator overnight or for at least 10 to 12 hours.
Continue the lefse making process in the same manner as instructed above for lefse made with real potatoes, starting with mixing in the flour. |
Lefse Storage
| Be sure the lefse is completely cooled before storing or it will form condensation once it is packaged and this will cause the lefse to become soggy. |
 |
|
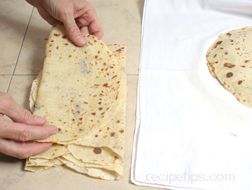
Once cooled, fold pieces in half and stack them on top of each other with alternating folded edges. Alternating the folded edges will allow a little air circulation to help prevent moisture build up. Stack 6 pieces for each package.
The lefse can be stored in a sealable plastic bag, wrapped in plastic wrap or wrapped in aluminum foil |
 |
|
If the lefse is still just a little warm when you want to package them and place them in the refrigerator, you can add a paper towel to the top and bottom of the bag before sealing. The paper towels will absorb any moisture that forms and help keep the lefse from becoming soggy.
Once the lefse has been refrigerated and cooled completely, the paper towels could be removed. |
 |
|
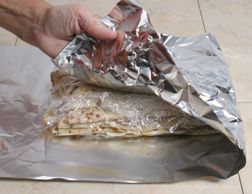
Stored the lefse in the refrigerator for approximately a week. If longer storage is desired, place in a freezer proof plastic bag or wrap tightly in plastic wrap. For extra protection, wrap the plastic wrapped lefse in aluminum foil also.
If you would like to be able to take one piece out of the freezer at a time, place wax paper between each piece of lefse so that they do not freeze together. |
 |
|
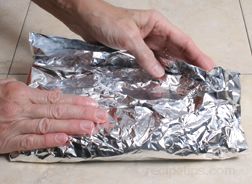
Be sure the aluminum foil is wrapped tightly around the lefse on all sides. The lefse can be stored in the freezer for up to 6 months. |
Thawing Lefse
When thawing frozen lefse, remove from the freezer and place it in a sealable plastic bag if it is not already in one. Place a dry paper towel on the bottom and top of the lefse inside the bag. Place in the refrigerator to thaw. The paper towels will help absorb any moisture that forms as the lefse thaws. Once the lefse has thawed completely, the paper towels can be removed from the bag. |
Lefse Tips Thawing Lefse
- When finished rolling out the lefse, scrape off excess flour from the pastry cloth and then fold the cloth and store in a plastic bag until ready to use again. Do not wash after each use. This will keep the pastry cloth well seasoned and it will help prevent the dough from sticking when it is rolled out. If the pastry cloth has oil or grease spots, it should be washed in hot water to rid it of these stain because they can become rancid after a period of time.
- If the lefse is dry around the outer edges when frying and cracks easily, there may be too much flour mixed in the potatoes. Try cutting back on how much flour you add to the next batch. Reduce flour by 1/4 to 1/2 cup. If this makes the lefse too sticky and hard to roll, try adding a little more flour back in.
- If the lefse dries out, sprinkle a cotton dish towel lightly with water and wrap the lefse in it and place in a plastic bag. This will soften the lefse and then the dish towel can be removed.
- When purchasing a lefse turning stick, keep in mind that the wider sticks make handling the lefse easier when transporting and flipping.
- Be sure to protect the surface that the lefse grill is setting on because the grill gets very hot. Place a large wooden cutting board or some other type of heatproof material under the grill to protect the countertop.
- Rub the rolling pin with flour to help prevent the dough from sticking while rolling.
- Add a little more flour to the work surface after rolling each piece to help prevent the next piece from sticking.
|


