


Flour Used as a Thickening Agent | Frying | Deep-Frying | Baking
Flour Used as a Thickening Agent
|
Flour is one of the most often used thickening agents when cooking foods such as sauces, gravies, soups, stews, and gumbos. Two thickening agents prepared with flour - a roux and a beurre manié - are among the most popular methods for using flour as a thickener. A roux is a flour and fat combination that is cooked before it is used as a thickener, and beurre manié is a flour and fat paste that is not cooked before it is used. Preparing a Roux Roux is a thickening agent made from cooked flour and fat and is used to thicken sauces, gravies, and soups. It is cooked to varying degrees to create a white, yellow, or brown, depending on how long the mixture is cooked and how it will be used. The roux can be used immediately when preparing sauces or soups or it can be cooled, wrapped, and stored in the refrigerator for later use. All-purpose flour is most commonly used for a roux. It has moderate levels of starch and protein, so the thickening power is also moderate. (The more starch content of the flour, the more thickening power.) It is important to remember that different types of flour have different starch to protein ratios and therefore have different degrees of thickening power. Flour with a high starch content, such as cake flour, has more thickening power than flour with a high protein and low starch content, such as bread flour. Clarified butter is the most common type of fat used by professionals when making a roux, especially when preparing a delicate white sauce. When using clarified butter, the resulting sauce is smoother. Whole butter is also commonly used, but the sauce may require skimming during preparation to remove impurities that float to the surface. Other fats, such as oils or even pork fat, are occasionally used for a roux, especially for heavier brown sauces, soups, stews, and gumbos. The accepted standard for the quantities of flour and fat to use for a roux is a ratio of 6 parts flour to 4 parts fat by weight. The quantity of liquid that will be added to the roux must also be considered when preparing the roux as well as the desired thickness of the resulting sauce, gravy, or soup. Use the following as a guide for preparing a roux: For every cup of liquid that will be added to the roux, add:
Using above figures as a guide, 2 cups of a medium thickness sauce would require 3 tablespoons of flour and using the 6 to 4 ratio of flour to fat, 2 tablespoons fat would be required.
|
|
Preparing a Roux for a Velouté Sauce Although easy to make, a roux must be made correctly in order to successfully prepare many types of sauces. Overcooking or undercooking the roux will affect the flavor of the final dish, therefore it is important to use a heavy-bottomed saucepan so that heat is conducted evenly. It also prevents the roux form burning, which would ruin the flavor of the sauce or soup. Described below are the steps necessary for preparing a roux used in a velouté sauce.
|
| Heat 2 cups of chicken stock in a saucepan until very hot, but not boiling. | 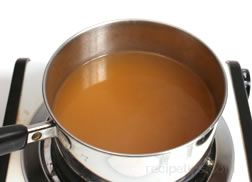 |
| In another saucepan (a heavy-bottomed pan works the best), melt 2 tablespoons butter over moderate heat. | 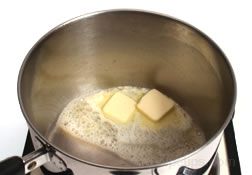 |
| Add 3 tablespoons of all-purpose flour. | 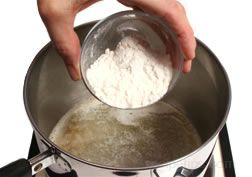 |
| While stirring for 2 to 3 minutes, the mixture should bubble and foam and the color should gradually darken the longer the roux cooks. A light yellow to golden yellow color is typical of a roux that will be used for most types of sauces. It is important that the flour not burn, but it should be cooked thoroughly so that the resulting sauce will not attain a pasty, floury flavor. | 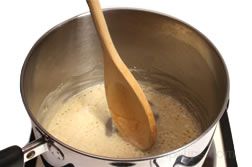 |
| After the roux has reached the correct doneness, remove the pan from the heat to allow the roux to cool slightly. | 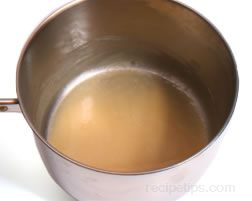 |
| After the short cooling period, pour 2 cups of stock into the pan (chicken stock is used here for a chicken flavored velouté sauce). | 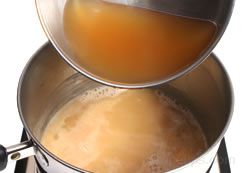 |
| Return the pan to moderate heat and vigorously whisk the liquid into the roux. Reduce the heat to a low simmer and continue stirring until the sauce becomes smooth. | 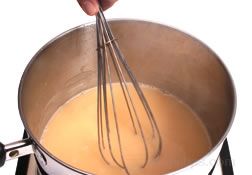 |
| When the sauce is ready to serve, stir in 2 tablespoons cream and season with salt and pepper to taste. Depending on the type of stock used, the velouté sauce can be used as an accompaniment for meat, poultry, fish, or vegetables. | 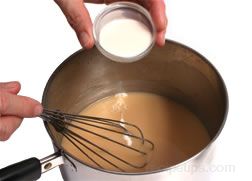 |
|
Preparing Beurre Manié A beurre manié is a paste prepared with equal quantities of flour and butter that are kneaded together. It is used as a thickener that can be stirred into a hot sauce or soup. Unlike a roux in which the flour and butter are cooked first before adding hot liquid to create a sauce, beurre manié is not cooked first and is added to the sauce or soup at the end of the cooking time in order to adjust the thickness. The beurre manié is added in small increments to the sauce or soup so that it can be well incorporated before adding more to achieve the desired consistency. Described below are the steps used to prepare beurre manié. |
| Measure equal quantities of flour and butter and place them in a bowl. | 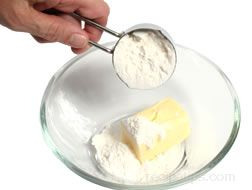 |
| Stir the ingredients to blend well using a small spatula, spoon, or fork or use your fingers to knead the flour and butter into a smooth paste. | 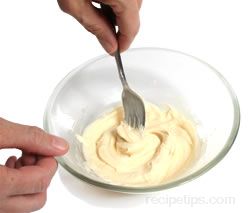 |
|
Using Beurre Manié as a Thickener |
| When preparing a sauce or gravy, drop small quantities of the beurre manié into the pan to thicken. It is best to use a teaspoon to add the beurre manié in small increments. | 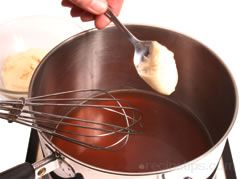 |
| Vigorously whisk the beurre manié into the hot liquid until it is well incorporated. Continue adding one teaspoonful at a time until the sauce or gravy is thickened to the desired consistency. | 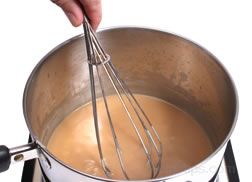 |
| Note: Unused beurre manié can be stored in a covered dish or jar for up to two weeks in the refrigerator. |
| Flour is often used as a coating for foods that are fried. Pieces of meat, poultry, and fish are often pan-fried with a flour coating. If properly fried, flour-coated food develops a crisp, flavorful crust, and an interior that is tender and juicy.
Chicken pieces are among the most popular foods that are coated or dredged in flour before pan-frying. When pan-frying, a heavy skillet with deep sides is generally used. The chicken pieces can be coated with plain flour or with flour that has been combined with other dry ingredients and seasonings, such as crumbs, salt, herbs, and spices. | |
| After the chicken pieces are coated with the flour, they should be placed on a rack to dry, which may require 20 to 30 minutes. Allowing the pieces to dry will provide for more even browning of the chicken. | 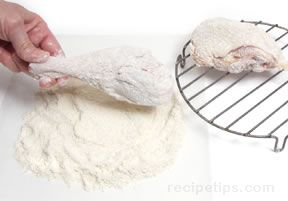 |
| After the chicken has dried, heat 5 or 6 tablespoons of oil in a heavy skillet over medium-high heat until the oil is very hot, but not smoking. Place the chicken pieces skin side down in the hot oil, one piece at a time. Leave enough space between the pieces so that the pan does not become too crowded, which will allow the pieces to cook and brown more evenly. Lower the heat to medium. |  |
| Continue to cook over medium heat, turning until all sides are golden brown and the meat is thoroughly cooked. | 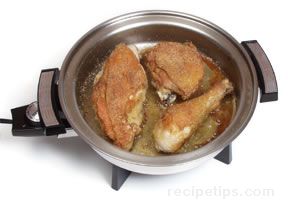 |
|
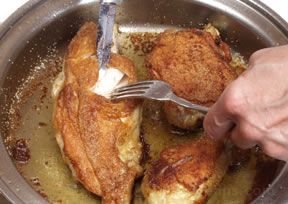
To check for doneness, cut through the thickest part of the chicken to make sure the meat is opaque throughout. (To ensure that the chicken has reached the proper doneness, it is best to use a meat thermometer, which should read 170°F in the breast meat and 180°F in the other pieces.) As the pieces finish cooking, they should be removed from the pan and placed on a paper towel to allow the grease to drain before serving. |
 |
| Deep-frying, also known as deep-fat frying, is a process of immersing food in a pan containing hot oil, which cooks the food quickly, producing a crispy surface covering a tender and moist interior. For the best results as well as for ease in handling, it is best to use small pieces of meat, fish, poultry, or vegetables. Foods are often covered with flour and seasonings before deep-frying, which provides a crispy, brown crust on the food.
Any cooking oil can be used for deep-frying provided it does not smoke or burn at temperatures that may reach as high as 375°F. Oil low in saturated fat is best to use because the food will absorb a small quantity of oil during the cooking process.
Checking the Temperature of the Oil |
| A temperature between 350°F and 375°F is an ideal range for deep-frying. The correct temperature can be determined with the use of a candy thermometer. | 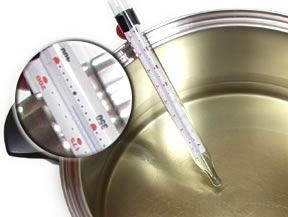 |
| Another method that can be used is to place a cube of bread into the oil and if it browns in 45 to 50 seconds, the oil is at the correct temperature. | 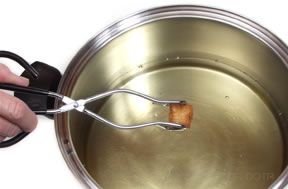 |
|
Deep-Frying Flour Coated Foods | |
| The pieces of food (such as the onion rings shown) should be dried with paper towels prior to coating with flour. The food should be as dry as possible before it enters the hot oil. | 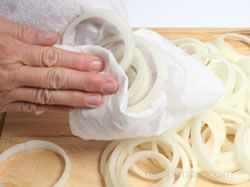 |
| The food can be floured and seasoned while the oil is heating. Usually enough moisture remains (after drying) for the flour to stick to the food. Some foods, such as onion rings, are often dipped in batter after being dredged in flour. | 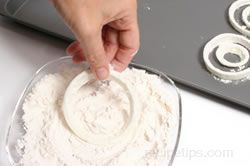 |
| Insert a few pieces of the floured food into the hot oil using a tongs or metal spatula, being careful to not overcrowd the pieces. After the food enters the hot oil, the temperature of the oil may drop slightly, so it may be necessary to increase the heat for a short time to return the oil to the proper temperature. Turn the food so that both sides brown evenly. | 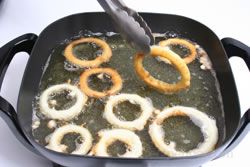 |
| The cooking time will vary depending on the size of the food pieces being cooked. When the pieces are golden brown remove them from the oil and place them on a paper towel to allow the grease to drain. Check for doneness by cutting open one of the pieces. | 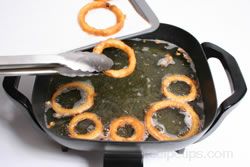 |
|
Deep-frying is a safe process for cooking food if the proper equipment is used and common safety rules are followed:
|
| Flour is often the main ingredient in thousands of baked items, such as bread. A standard white bread loaf is one of the easiest of the basic breads to prepare. For the inexperienced home cook, preparing basic white bread is a good way to gain confidence in bread making and for becoming familiar with the characteristics of flour when it is combined with other ingredients to form bread dough.
The greatest portion of the ingredients consists of all-purpose or bread flour and the other ingredients are simply yeast, salt, and water. A variety of white breads can be made with these same basic ingredients. The differences in taste and texture of various white breads using the same four ingredients, depends on the ratio of the flour to the other ingredients, the kneading and rising time, how the dough is baked, and so on. Preparing Basic White Bread |
|
Mixing |
|
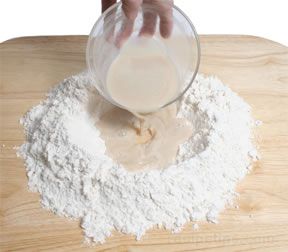
Begin by blending 2 teaspoons of active dry yeast into a half cup of warm water (95º to 115ºF). Allow it to sit for 5 or 6 minutes or until the yeast begins to bubble and foam. While the yeast is activating, combine 3½ cups all-purpose or bread flour and 1½ teaspoons of salt. After mixing the flour and salt on a flat work surface, create a well in the center of the dry ingredients and then pour the yeast liquid into the center of the well. |
 |
| Slowly stir the liquid, picking up some of the flour from the inside walls of the well. Continue drawing in flour until a paste forms. Then add water in small increments and continue drawing in the flour. No more than one cup of water should be necessary. |  |
| When about a third of the flour remains on the sides of the well, pull the remaining flour into the center and quickly incorporate it into the dough. Add small quantities of water to the dough if it is too dry. |  |
|
Kneading |
| Begin the kneading process by folding the dough in half. Using the heel of your hand, press firmly on the dough while pushing the dough away from you. Excessive force is not necessary because the dough will gradually become easier to work the longer it is kneaded, which warms and stretches the gluten. |  |
| Fold the dough back towards you and repeat the kneading process. Turn the dough a little each time as you continue to knead it. If the dough is sticky, sprinkle it with a small quantity of flour during the kneading process. A pastry scraper can be used to remove any pieces of dough that may stick to the work surface while kneading. | 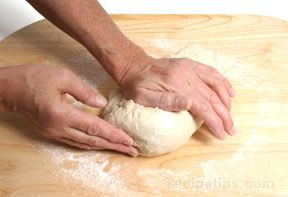 |
|
Rising and Punching |
|
Continue kneading until the dough is smooth and elastic, which usually occurs in about 10 minutes. Place the dough into a lightly oiled bowl, cover it with a damp kitchen towel or a oiled plastic wrap, and allow it to rest for 2 hours or until the dough has doubled in size. |
 |
| Punch down the dough and allow it to rest for 5 to 10 minutes. |  |
|
Shaping and Proofing |
| If baking the bread on a baking sheet, place the dough directly on the greased sheet and shape it into a round or rectangular form. | 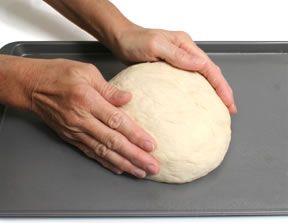 |
| Proof the dough until it is about double in size, which requires 30 to 45 minutes. | 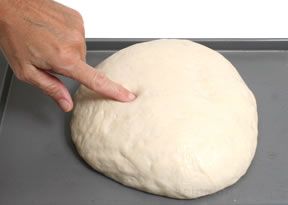 |
|
Baking |
|
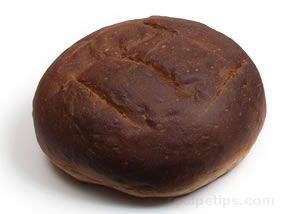
Bake in a preheated, 425ºF oven for 40 to 45 minutes. Check the bread for doneness by tapping on the bottom: A hollow sound indicates that the bread is done, while a dull sound indicates an underdone loaf. Remove the bread from the loaf pan or baking sheet and cool on a wire rack to prevent the bottom from becoming soggy. |
 |
|
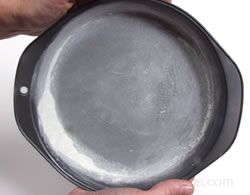
Pan Preparation Flour is also used in baking as a means to prevent foods from sticking to bakeware. A baking pan is usually greased with butter or shortening and then it is dusted with flour before the dough or batter is added to the pan. | |
 |
 |


