


|
Grinding or milling various types of flour in the home can be accomplished with only a few basic tools. Some tools make the job easier and some types of flour are easier to create depending on the type of grain or other substance that is used. Some of the tools that can be used for home flour milling include: mortar and pestle, manually and electrically operated coffee mills, spice mills, seed grinders, small electric grinders, food blenders, and food processors as well as almost any type of homemade device that will pound or grind grain into a powder. Because most types of flour are readily available it may seem pointless to grind flour at home, but the advantage is that only what is needed is produced. The resulting flour is fresh and full of flavor and none of the nutritional qualities are lost since all of the components of the grain or seed are included in the flour. |
Grain Preparation
Creating Flour with a Mortar and Pestle | Creating Flour with a Coffee Mill
Creating Flour with a Seed Grinder | Creating Flour with a Small Electric Grinder
|
Some grains may require some preparatory steps before they can be milled into flour. Quinoa is one such grain that often requires some preparation before it is used as a whole grain in recipes or before it can be milled into flour. A powdery resin called saponin covers quinoa seeds, which must be rinsed off before the seeds are used. If the seeds are not rinsed properly, the resin will produce a bitter flavor that can be very unpleasant. Quinoa sold in the United States (including imported quinoa) is washed and well processed, so the saponin usually is not an issue, but it is still a good idea to give the seeds a quick rinse before cooking. If the seeds are rinsed, they must also be thoroughly dry before they can be milled into flour. |
| Quinoa seeds should be cleansed in a large bowl containing cold water. Rub the seeds briefly in the water to loosen the resin. | 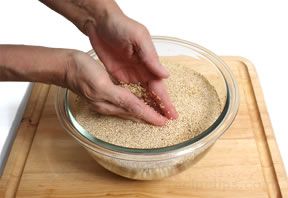 |
| Strain the water from the quinoa. Use a fine mesh strainer because the seeds are so small. As a final rinse, the strainer should be positioned under cold running water until the water runs clear. | 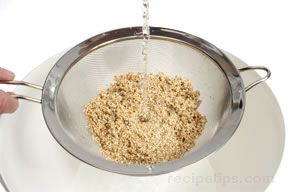 |
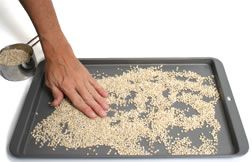 The quinoa must be dried thoroughly after washing. The seeds can be spread onto a layer of paper towels so that excess moisture will be absorbed. After the excess moisture has been absorbed, spread the quinoa onto baking sheets and allow it to air dry. The baking sheets should be placed in a warm dry area with good air circulation, otherwise problems may occur. The quinoa may soften and expand significantly before it has completely dried. It is often beneficial to place the baking sheets in a low oven for the best results. An oven preheated to 150ºF is an excellent environment to speed the drying of the quinoa and to ensure that the seeds do not become mushy before grinding them into flour. Do not attempt to grind the quinoa into flour until it is completely dry. The quinoa must be dried thoroughly after washing. The seeds can be spread onto a layer of paper towels so that excess moisture will be absorbed. After the excess moisture has been absorbed, spread the quinoa onto baking sheets and allow it to air dry. The baking sheets should be placed in a warm dry area with good air circulation, otherwise problems may occur. The quinoa may soften and expand significantly before it has completely dried. It is often beneficial to place the baking sheets in a low oven for the best results. An oven preheated to 150ºF is an excellent environment to speed the drying of the quinoa and to ensure that the seeds do not become mushy before grinding them into flour. Do not attempt to grind the quinoa into flour until it is completely dry. |
Creating Flour with a Mortar and Pestle
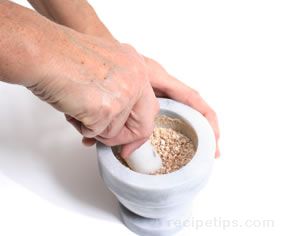
| Using a mortar and pestle is one of the simplest methods for making flour, but it is also rather labor-intensive. It is used to grind only small quantities of grains or seeds. When using a mortar and pestle, it is usually best to make flour out of softer substances (such as the buckwheat grains shown) in order to make the process much easier. A mortar and pestle is most often constructed of hardwood, stone, marble, granite, pottery, or a combination of materials. | 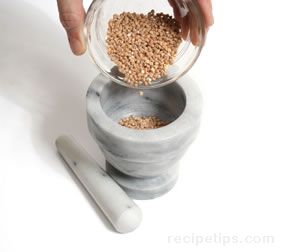 |
|
After adding the grain to the mortar, use the pestle to smash the grain against the bottom and sides of the mortar. Continue this process until the grain is ground to the desired consistency. |
 |
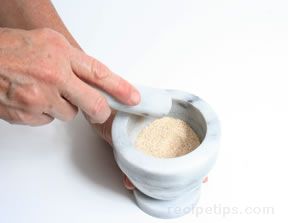
| Using a mortar and pestle can actually produce flour that is quite fine, but only small quantities of grain or seeds can be ground at one time. The amount of time required to grind a larger quantity may not be worth the effort. |
 |
Creating Flour with a Coffee Mill
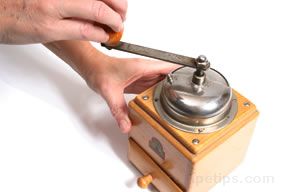
| A manually operated or electric coffee mill is a useful tool for creating flour. Compared to the mortar and pestle method, it is a much easier and faster method for grinding grains and seeds. It is also able to grind harder kernels, such as rice, with relative ease. | 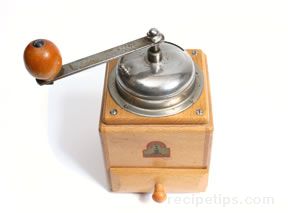 |
|
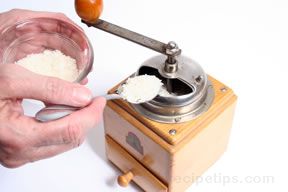
Simply add the grain (such as the rice shown) through the opening in the coffee mill, close the lid on the opening, and begin turning the crank. The grain is quickly ground through a series of gears and the resulting flour falls into a small containment area at the bottom of the grinder. |
|
|
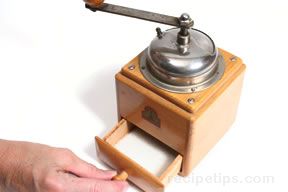
On a manually operated coffee mill, the containment area is usually a small drawer that can be pulled out to retrieve the flour. A coffee mill creates excellent flour, although with some models it may not be possible to adjust the level of fineness since coffee is usually not ground as finely as most types of flour. |
 |
Creating Flour with a Seed Grinder
|
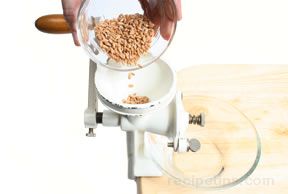
A seed grinder is another useful tool for grinding grains and seeds into flour. Like a coffee mill, it uses gears for grinding, but it usually is capable of grinding grain to a much finer consistency if desired. Some manually operated models can be adjusted to produce varying degrees of fineness. Many models (such as the one pictured) can be attached to a tabletop or countertop with the use of a built-in clamp. Manual seed grinders have an appearance that is very similar to a manually operated meat grinder. |
 |
| The grain or seeds (such as the spelt grain shown) are simply poured into the grinder. |
|
| When the handle is cranked, the flour empties through the side of the grinder and falls into a small bowl placed below the grinder. If the resulting flour is not as fine as desired, the setting can be adjusted to create flour that is more finely ground. | 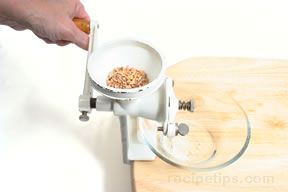 |
| A seed grinder can produce flour with a very powdery, fine consistency. It is able to grind very small grains and seeds that may otherwise be impossible to grind using other methods. | 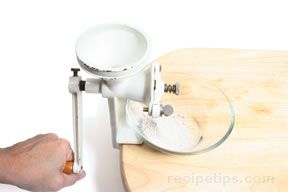 |
Creating Flour with a Small Electric Grinder
| Small electric grinders/choppers can also be used for grinding grains or seeds to create flour. They are easy to use and grind foods quickly. Some models are similar to a small food processor. A sharp blade spins at high speed and is able to chop most food items that will fit inside the grinding compartment. |  |
| The grain or seed (such as the barley shown) is poured into the grinder and the cover is placed on top and locked into place. Small grinders and larger food processors all have a safety feature that does not allow the blade to spin unless the cover is properly locked into place. The motor can then be switched on to allow the blade to spin or pulse in order to chop and grind the food. | 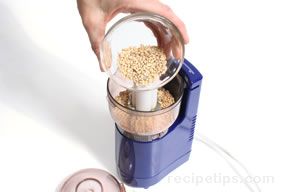 |
| Some small grinders, such as the one shown, are activated with the lid only. When the cover is properly positioned it can be twisted so that a tab on the cover slides into a groove in the grinder mechanism, which activates the motor. As soon as the tab on the cover is released from the switching mechanism, the motor stops. |  |
| The blade can be pulsed by turning the motor on and off in quick succession to allow more control over the degree of fineness. Flour or meal that is coarsely ground can be created with only a few pulses of the motor while additional pulses results in an increasingly fine consistency. | 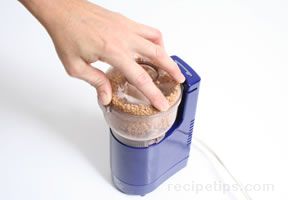 |
| Allowing the blade to spin continuously creates very finely ground flour. |  |


