
|
Boiled | Coddled | Poached | Fried | Scrambled | Omelet | Frittata | Shirred | Roasted
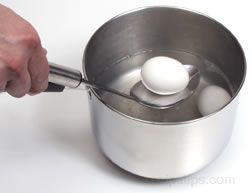
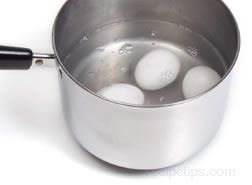
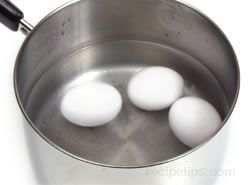
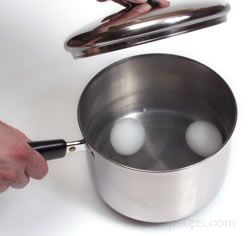
Using the term "boiled" when referring to cooking eggs in the shell can be misleading, because eggs referred to as "hard-boiled" or "soft-boiled" should never be cooked at a full boil for the entire length of the cooking time. Eggs cooked in the shell with heat that is too high or with a cooking time that is too lengthy, will become tough and rubbery and a dark line may form between the yolk and the white. The following steps can be used for cooking eggs in the shell:
Use the following cooking times as a guide for the desired
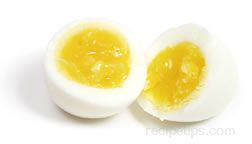
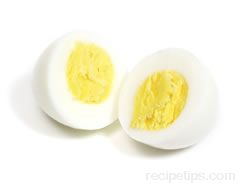
Hard-cooked Yolk
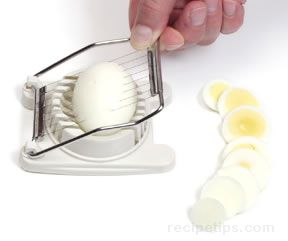
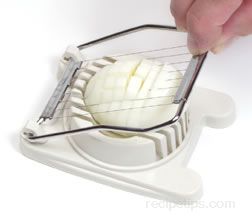
Hard-cooked eggs can be served whole or they may be cut and sliced. An egg slicer can be used to prepare evenly sliced sections that can be used in salads or as a garnish. The egg slicer is a tool that consists of a tray hinged to a cutter that has a series of wires. The egg is placed on its side in the tray and the cutter is closed down over the egg, producing slices of equal thickness. The egg can be rotated and sliced a second and third time in order to chop the egg.
An egg wedger may also be used and is similar to the slicer in design except that the egg sits upright instead of on its side. The cutting tool produces equal wedges instead of slices. The wedger can also be used to cut only the top portion of the egg to create a decorative design and to produce a cavity at the top which can be filled with other ingredients. Hard-cooked eggs can also be cut in half the long way so that the solid yolk can be removed from the two halves. The yolk is then blended with other ingredients such as mayonnaise, mustard, and seasonings and the mixture is stuffed back into the yolk cavity of the egg halves and served. This is known as stuffed eggs or deviled eggs. A coddled egg is cooked more slowly than a boiled egg, but basically yields the same results, except that the egg is a bit more tender. The following steps can be used for coddling eggs:
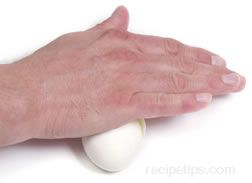
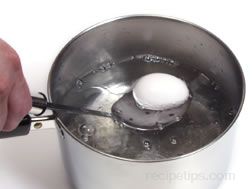
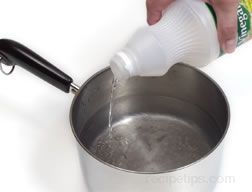
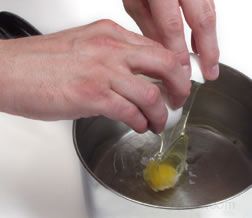
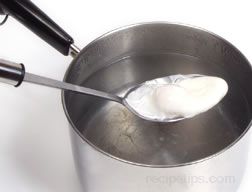
To stop the cooking process, run cold water over the eggs. It is best to use older eggs for coddling because they peel easier. Soft-cooked coddled eggs are often served in an egg cup and eaten directly from the shell because they are difficult to peel. Another method used for coddling eggs involves the use of a special porcelain dish with a screw top. The egg, without the shell, is placed in the dish, the cover is screwed on, and the dish is placed in a pan of heated water. When the cooking process is complete, the dish is removed from the water and is used to serve the egg. A poached egg is one that is cooked in simmering water without the shell. Unlike a boiled or coddled egg that benefits from the use of an older egg, a poached egg is best when a very fresh egg is used. This is because the fresh egg, when placed into the heated water, will not spread out like an older egg, yielding better results with the shape and texture of the egg. If an older egg must be used, it can be simmered in the shell for a few seconds so that the white is just slightly congealed. When the egg is broken into the simmering water, it will not spread out as much. One tablespoon of vinegar added to the water will also help with coagulating the white to keep it from spreading too much. The following steps can be used for poaching eggs:
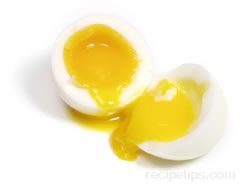
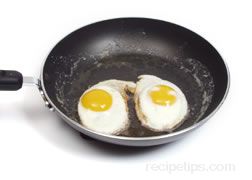
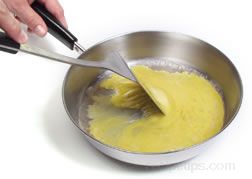
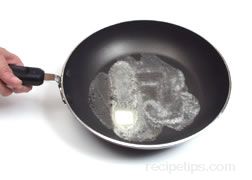
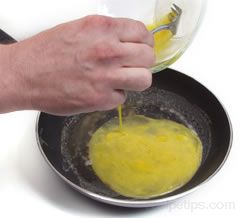
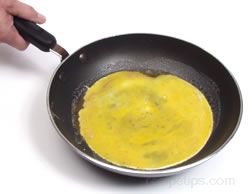
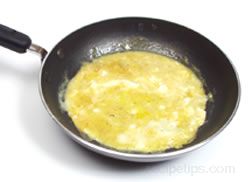
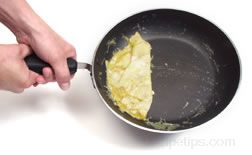
Another method for poaching eggs involves a metal egg poaching form which makes the process almost foolproof. The metal form is a shallow, oval, slotted container with an attached handle. The egg is broken into the form which is then lowered into simmering water. The metal form or poacher is convenient to use and creates a pleasing shape. Using fresh eggs or older eggs is less of a concern when using the metal poacher. Regardless of how the eggs are poached, the water should be at a simmer and not a full boil. If metal poaching tools are used, several can be placed in the pan at one time. If the forms are not used, several eggs can also be poached at one time, but more care must be taken when breaking the eggs over the water so that each egg has its own space in the pan. Frying is another popular method of cooking eggs and it is easy to do. Butter or cooking fat is heated in the bottom of the pan. Whole eggs are cracked and opened over the pan. The eggs should be opened as close to the bottom of the pan as possible so that they maintain a pleasing shape and do not spread out too much. The eggs are cooked until the whites are firm and the yolk is runny or firm, depending on how they are desired. There are several methods used to finish cooking the eggs. They can be left unturned and can be basted with the hot fat. A few drops of water can be added and the pan can be covered to steam cook the eggs. The eggs can also be finished by carefully turning them over using a spatula once they have firmed up on the bottom. The eggs are then cooked until the yolks are at a desired doneness, such as over easy (runny yolk), over medium (soft yolk), or over hard (firm yolk). Scrambling is a method of preparing an egg in which the white and the yolk are blended together and cooked in a sauté pan.
An omelet is usually made with 2 or 3 eggs and is cooked very quickly in a sauté pan. The bottom of the pan should be about 7 to 8 inches in diameter so that the eggs will be no more than ¼" in height in the pan. A nonstick pan works very well, but the professionals use an iron pan with a long handle that can be exclusively used for omelet making. A properly seasoned iron pan can be cleaned after each use by simply wiping it with a clean cloth or paper towel. Salt is then rubbed on the pan and wiped clean after each use. The salt treatment helps prevent eggs from sticking to the pan the next time it is used.
Additional ingredients, such as herbs, can be added to the eggs before they are cooked without changing the way the basic omelet is cooked. Other ingredients, such as cheese or finely chopped meats, can be added just before finishing the cooking process. The extra ingredients will probably require that a spatula be used to fold the omelet in the pan rather than trying to roll it over by jerking the pan. The extra ingredients can also be placed on top of the plain omelet when it is served. A Frittata is an Italian version of the French omelet. It is open-faced and is not folded over like a French omelet and the preparation is also a bit different. A French omelet is cooked very quickly on high heat and any other ingredients such as cheese or vegetables are placed on the omelet just before it is folded over. A frittata is cooked more slowly and any additional ingredients are stirred into the eggs and cooked at the same time. A frittata is substantial enough to be served as a lunch or dinner entree. Shirred eggs are prepared as a broiled or baked egg dish. Eggs are placed in small buttered dishes referred to as ramekins and broiled until the white is set, but the yolk remains liquid. The eggs may also be baked, but the cooking time is longer and the eggs may become tough and rubbery if cooked too long. Variations of the basic shirred egg may include the addition of herbs, cheese, and/or cream. A roasted egg is prepared using two different cooking processes. It is first hard-cooked in simmering water and then it is placed in the oven and roasted in the shell. It is removed from the oven when the shell becomes brown. This method is used to prepare eggs traditionally served during the Jewish Passover.
|

Loading
Egg Cooking Guide


Provided By
RecipeTips
RecipeTips


Loading
There currently aren't any reviews or comments for this article. Be the first!


Advertisement


Advertisement