|
Selecting the Pumpkin | Preparation | Pumpkin Puree | Pumpkin Pie | Storing the Pie
Selecting the Pumpkin
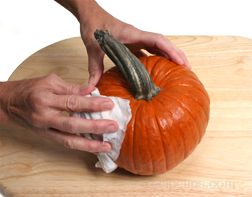
When selecting a pumpkin for making a homemade pumpkin pie, be sure to choose a small pumpkin that is a variety specifically grown for eating, such as sugar, cheese, or milk pumpkins. They may also be called pie pumpkins and generally weigh from 2 to 4 pounds. Do not select the Jack-O-Lantern variety, which is not as sweet and has flesh that is tough and stringy. Select one that has good orange coloring and is heavy for its size. It should be firm, free of blemishes and have its stem intact. Pie pumpkins will yield approximately 1 cup of puree per pound of pumpkin.
Once the pumpkin has been purchased, it can be stored in a cool, dry area for approximately a month. Do not store in temperatures below 50°F. Do not refrigerate fresh pumpkins or wrap in plastic.
Pumpkin Preparation
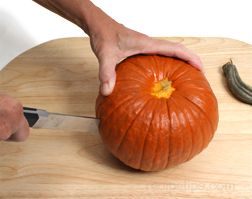
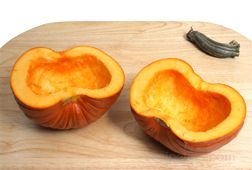
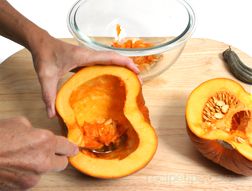
Preparing Homemade Pumpkin Puree
Preparing Homemade Pumpkin Puree - Article Only
 |
|
- Preheat the oven to 350°F.
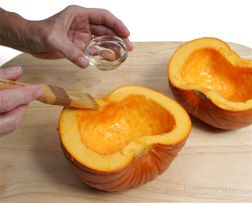
- Coat the cut surface of the pumpkin halves with vegetable oil.
|
 |
|
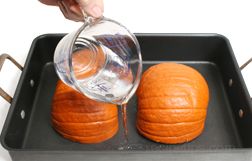
- Place pumpkin halves cut side done in a roasting pan. Add 1 cup of water to the pan.
|
 |
|
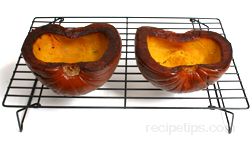
- Place the pumpkin in the preheated oven and bake for 60 to 90 minutes.
- The pumpkin should be baked until the flesh is very tender. Poke with a fork to check for doneness.
|
Note: The pumpkin halves can also be cooked in the microwave. Place the halves in a microwave-safe dish, add 1 cup of water and cover. To fit properly in the microwave-safe dish, the halves may have to be cut into smaller pieces. Place in the microwave oven and cook on high for 15 minutes. Test for doneness by poking with a fork. If not completely tender, return to the microwave and continue to cook for 5 minute intervals, checking tenderness after each interval. |
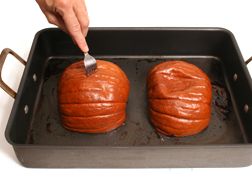
- When the pumpkin has cooked to proper tenderness, remove from the oven and place on a cutting board or cooling rack. Allow to cool until it can be handled comfortably.
|
|
 |
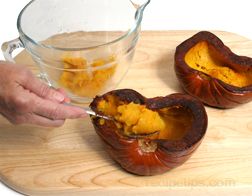
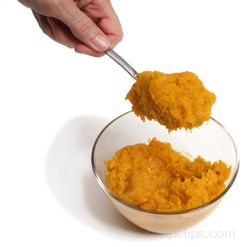
- Scrape the flesh out of the pumpkin halves and discard the skins. Place pumpkin flesh in a large bowl.
|
|
 |
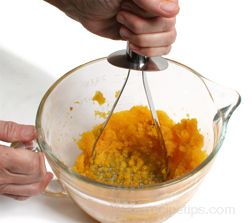
- Mash the pumpkin by hand using a potato masher. Mash until all the pumpkin is a smooth consistency.
|
|
 |
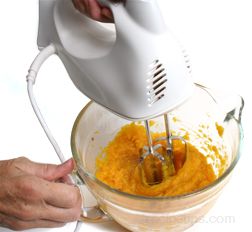
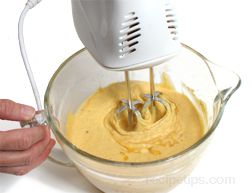
- Another method that can be used to puree the pumpkin is to mix it with a hand mixer. A blender or food processor can also be used.
|
|
 |
 |
|
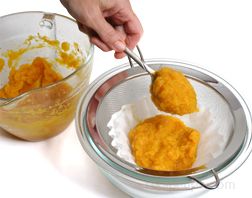
- Drain moisture from the puree by placing it in a sieve lined with paper towels or a double layer of coffee filters. Be sure the sieve is placed in a bowl to catch the liquid as it drains from the pureed pumpkin.
|
 |
|
- Cover the puree with plastic wrap. Place in the refrigerator and allow puree to drain for at least 2 hours. Drain overnight if possible.
|
 |
|
- After draining, the puree should be about the same consistency as commercially canned pumpkin and can be used in any pumpkin recipe calling for canned pumpkin.
- If the puree will not be used immediately, place it in an airtight container and store in the refrigerator for 24 hours. For longer storage, freeze the puree in measured quantities. Mark the container with the date, contents and quantity. Freeze up to 3 months.
|
Making Homemade Pumpkin Pie
Making Homemade Pumpkin Pie - Article Only
The recipe below is for a traditional pumpkin pie. The pumpkin puree can also be used in any pumpkin recipe calling for commercially canned pumpkin. A 15 oz. can of pumpkin is equal to 1 3/4 cups of pumpkin puree.
| Traditional Homemade Pumpkin Pie |
Ingredients: |
 |
- 1 single pie crust, 9 inch
- 1 1/2 c. pumpkin puree
- 1 1/2 c. heavy cream
- 1/2 c. brown sugar
- 1 tbsp. flour
- 1/2 tsp. salt
- 1 tsp. ground cinnamon
|
|
- 1/2 tsp. ground ginger
- 1/4 tsp. ground nutmeg
- 1/2 c. light corn syrup
- 3 eggs, beaten
- 1 tsp. vanilla
- whipped cream for serving
|
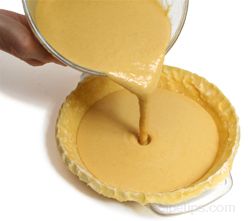
- Have the single 9-inch pie crust prepared and chilled. Preheat oven to 350°F.
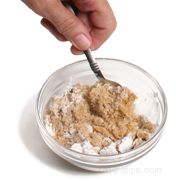
- Combine flour in with the brown sugar and stir until they are evenly distributed.
|
|
|
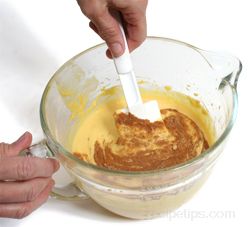
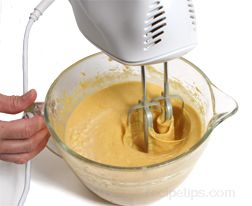
- Add the brown sugar and flour mixture to the pumpkin puree and heavy cream. Beat until well blended.
|
|
 |
- Add the salt, cinnamon, ginger, and cloves. Stir into pumpkin mixture.
|
|
|
- Add corn syrup and beat until well blended.
|
|
|
 |
|
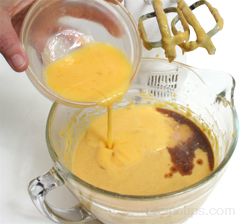
- Add the beaten eggs and vanilla to the mixture.
|
 |
|
- Beat the eggs and vanilla into the mixture until thoroughly mixed.
|
|
|
|
- Place the pie in the preheated oven and bake for 50 to 60 minutes.
- Check after 30 minutes to see if it looks like the crust is going to brown too much. If so, place a piece of foil over the pie. Remove the foil for the last 10 minutes of baking time so crust will finish browning.
|
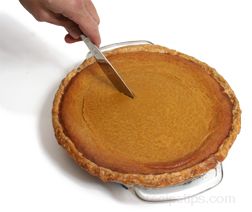
- To check for doneness, insert the tip of a table knife in about 1 inch from the center of the pie. The knife will come out clean if the pie is done.
- Or, gently shake the pie and if about an inch of the center jiggles a little, the pie is done. The center will set from the heat of the pie after it is removed from the oven. If more than just the center jiggles, continue to cook and check for doneness at 5 minute intervals.
|
|
|
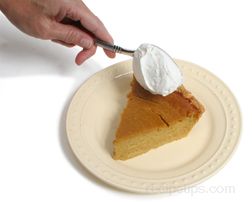
- When the homemade pumpkin pie is done, remove it from the oven and allow it to cool completely before serving. Serve with a spoonful of whipped cream on each slice.
|
|
 |
Storing Pumpkin Pie
Storing Pumpkin Pie - Article Only
Refrigerate:
Whole and leftover homemade pumpkin pie should be stored in the refrigerator. Allow the pie to cool completely (approximately 2 hours) and then cover with plastic or place in an airtight container. The pie can be stored in the refrigerator for up to 3 days.
Freezing:
It is not recommended to freeze baked pumpkin pies. Freezing can affect the quality of the pie, causing it to become watery when thawed. The filling can become heavy and no longer have a custard-like texture. It would be better to freeze the pie crust and the homemade pumpkin puree separately and then preparing the pie just before it is needed. Thaw pie crust and puree in the refrigerator. |