|
There are many creative ways in which the edges of a pie can be finished. Shown below are some common ways to trim the edge of a pie, but don't hesitate to use your imagination.
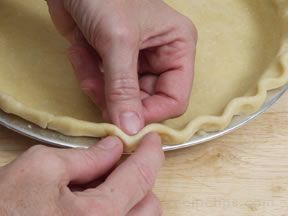
Fluted Pinched Edge
- Trim crust overhang to 1 inch. Fold overhang under and pinch to make the edge stand up.
|
|
|
- With the thumb and index finger of one hand, pinch the outside edge of the crust while pressing from the inside with the index finger on the other hand.
- Repeat the fluting at ½" intervals around the entire edge of the crust.
|
|
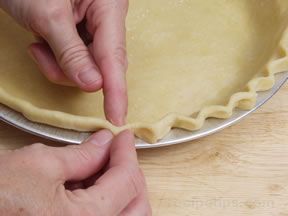 |
Scalloped Edge
- Trim crust overhang to 1 inch. Fold overhang under and pinch to make the edge stand up.
|
|
|
- With the thumb and index finger of one hand, loosely pinch the outside edge of the crust while pressing from the intside with the thumb on the other hand.
- Repeat the pattern at approximately 1-inch intervals around the entire crust to produce a scalloped edge.
|
|
 |
Scalloped Forked Edge
- Create a scalloped edge according to the instructions above.
- After the scalloped edge is finished press a fork in the center of each scallop for additional decoration.
|
|
 |
Pressed Rope Edge
|
- Trim crust overhang to 1 inch. Fold overhang under and pinch to make the edge stand up.
|
 |
- Press the side of your thumb, at an angle, into the dough along the edge of the pie plate. Pinch the dough between the thumb and knuckle of the index finger. Then place the thumb in the imprint made by the index finger and pinch again in the same manner.
- Continue to pinch the dough around the edge of the pie plate by placing the thumb in the imprint of the index finger each time.
|
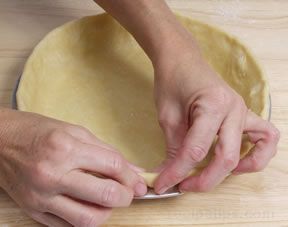
Imprinted Scalloped Edge
|
- Trim crust flush with the edge of the pie plate. If using a glass pie plate, trim crust overhang to about 1/8 inch past the outer rim to allow for slight shrinkage.
|
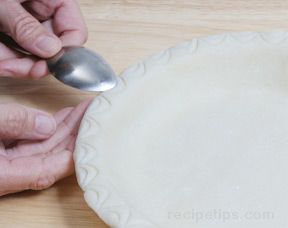 |
- Using an inverted spoon make a scalloped imprint the depth of the rim around the entire edge of the pie plate. When pressing the spoon in the crust to make the imprint, be careful that you do not cut all the way through crust.
- Make a second imprint inside the first imprint. The second imprint should be about ½ the depth of the first. Continue around the entire edge of the crust.
|
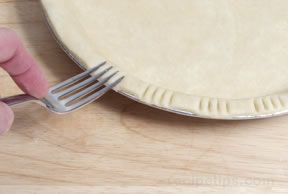
Forked Edge (Full & Partial)
|
- Trim crust flush with the edge of the pie plate. If using a glass pie plate, trim crust overhang to about 1/8 inch past the outer rim to allow for slight shrinkage.
|
|
- Using the tines of a lightly floured fork, press the edge of the crust to the rim of the pie plate.
- Partial imprinted edge - Imprint around the edge of the crust, making fork imprints at 3/4-inch intervals.
|
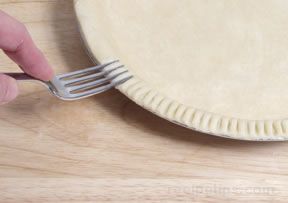 |
- Full imprinted edge - Continue around the entire edge of the crust, making the fork imprints evenly spaced.
|
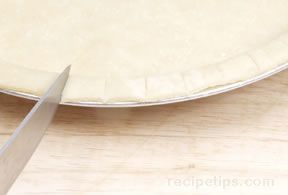
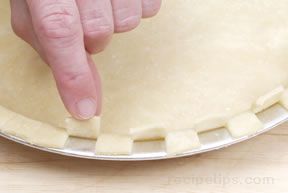
Checkerboard Edge
- Trim crust flush with the edge of the pie plate. If using a glass pie plate, trim crust overhang to about 1/8 inch past the outer rim to allow for slight shrinkage.
|
|
|
- Make cuts through the dough all around the rim of the pie plate at approximately ½ inch intervals.
|
|
|
- Lift every other square up and inward to form a checkerboard pattern around the rim.
|
|
 |
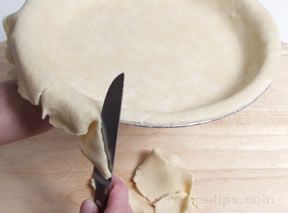
Leaf Edge
- Use a double crust recipe, roll out first crust, and place it in a pie plate. Trim crust flush with the edge of the pie plate. If using a glass pie plate, trim crust overhang to about 1/8 inch past the outer rim to allow for slight shrinkage.
|
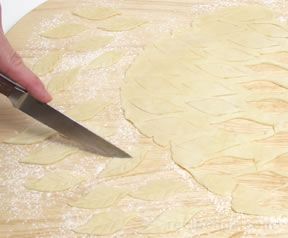
- Roll out the remaining dough to 1/8-inch thickness. Cut out approximately 25 leaf shapes that are slightly longer than 2 inches and wider than ½". Use a paring knife to cut out the shapes or a cookie cutter can be used if you have one that is the appropriate size.
- Make veins in the leaves using a paring knife or some other small knife. Be careful not to cut through the crust. It may be helpful to use the dull side of the knife.
|
|
|
- Moisten the rim of the pie crust with water. Apply the leaves by pressing them on the moistened rim, slightly overlapping each one.
|
|
|
- Apply leaves until the entire rim is covered.
- Patterns other than leaves can also be used to decorate the rim of the pie crust. Be careful in selecting a pattern that you do not choose one that is too large.
|
|
 |
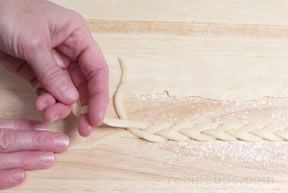
Braided Edge
|
- Use a double crust recipe, roll out first crust, and place it in a pie plate. Trim crust flush with the edge of the pie plate. If using a glass pie plate, trim crust overhang to about 1/8 inch past the outer rim to allow for slight shrinkage.
|
|
- Roll out remaining dough in a narrow long strip that is 1/8 inch thick and cut at least six long strips 1/4 inch wide. Place 3 of the strips on a lightly floured surface and begin to braid them together.
|
|
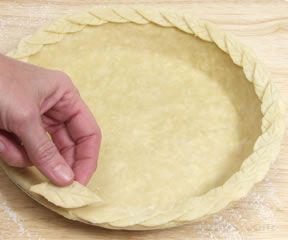
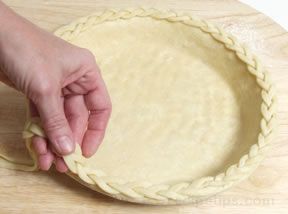
- Braid the strips until the braid is long enough to fit all around the edge of the pie crust. If the braid needs more length, moisten the ends of the braided dough and attach 3 more strips of dough. Moisten the edges of the crust and carefully place the braid around the rim.
|
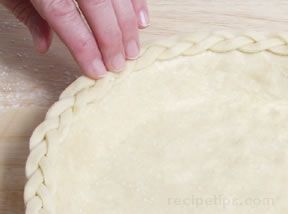 |
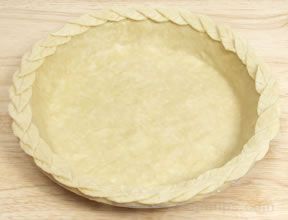
- Place the braid around the entire crust. Press braid lightly to the rim of the crust to hold it in place.
| |


