|
See More Information on Making Homemade Ice Cream:
Types of Homemade Ice Cream | Homemade Ice Cream Freezing Methods
Safety & Storage of Homemade Ice Cream | Tips on Making Homemade Ice Cream
Vanilla Custard | Strawberry | Cookies 'N' Cream
There are two basic types of recipes for homemade ice cream: one type being a custard style that is made with eggs and the other type that does not contain any eggs. Both will provide you with a delicious treat and either one can be flavored with your favorite ingredients. See Types of Homemade Ice Cream for different types of ice cream recipes. There are several methods that can be used for freezing the homemade ice cream. See Homemade Ice Cream Freezing Methods for three different methods that will give you some choices in how you can create this delicious treat. Some basic equipment and ingredient choices are provided below.
Basic Equipment
|
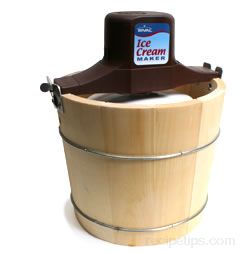
Ice Cream Maker
Uses Ice in Freezing Process
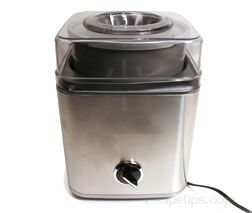
Ice Cream Maker
Uses Cooling Liquid in Freezing Process
|
 |
Ice Cream Maker
Today there are basically two types of Makers available: Ice cream makers with manually operated churns and makers with motorized churns. The churn converts the cream and ingredients into ice cream while it is held within an insulated container. When the unit is manually operated or an electric units turned on, the ice cream can rotates, the dasher inside does not move. Newer models of ice cream makers contain built-in freezer units that keep the churned ice-cream cold without pre-freezing the insulated container as is required on some models. Some models require the use of ice and salt, and some use a freezer bowl that has a double insulated wall containing cooling liquid that is frozen before using in the unit.
Additional features available on some models:
- Removable containers that are 1-1/2 quarts or larger in size
- Electronic timers
- Lids with openings to allow extra ingredients to be added while churning
- Removable pieces for ease of cleaning
- Stainless steel housing
Ice cream makers are used to not only produce ice cream but also frozen yogurt, frozen beverages and ice milk.
|
 |
|
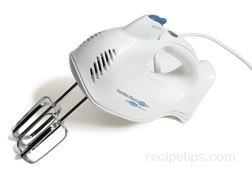
Hand Held Electric Mixer
A hand held electric mixer can be used when ice cream is made using the "still freezing" method. Using the "still freezing" method requires beating the ice cream several times during the freezing process. I fork can also be use but the mixer is much faster and produces better results. The beating replaces the churning action of the ice cream makers. |
 |
|
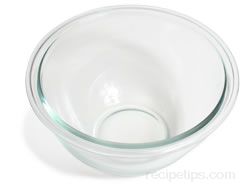
Glass Bowl
A glass bowl is used for mixing ingredients and chilling the ice cream mixture before freezing.
|
|
Heavy Saucepan or Double Boiler
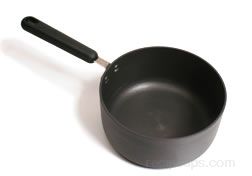 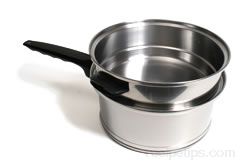
A heavy saucepan will be required when making custard based ice cream and also for scalding milk or half and half used in non-custard type ice cream. |
|
|
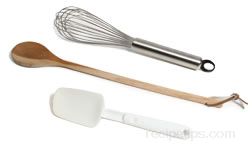
Stirring Utensil
A spatula, wooden spoon, or non-scratch type of spoon will be needed for stirring when making the ice cream mixture and for removing the ice cream from the ice cream can. A non-scratch type utensil is best so that the ice cream can does not become scratched. |
|
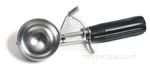
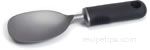
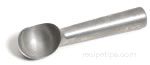
Ice Cream Scoop
 |
 |
 |
Lever Type
Ice Cream Scoop |
Spade Type
Ice Cream Scoop |
Ice Cream Scoop with
Defrosting Liquid in Handle |
An ice cream scoop will be needed when it comes time to serve the ice cream. There are many different models of ice cream scoops available. They can be made of molded plastic or stainless steel and some have a quick-release handle to aid in removing the ice cream from the scoop. Some models are made of metal with a hollow area running through the inside that contains anti-freeze, which warms with the touch of your hand, thus warming the metal and assisting in scooping ice cream that is hard to scoop. |
 |
|
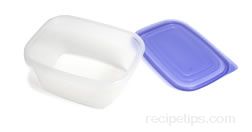
Storage Container
When the ice cream making process is completed, the ice cream will need to be stored in the freezer to be frozen into a more solid state before serving. Be sure the container has an airtight lid and that it will fit into the freezer space. A shallower container will allow the ice cream to freezer more quickly. |
|
Miscellaneous Equipment
There are many other pieces of equipment that you may need when preparing some of the flavoring ingredients that will be added to the ice cream, such as knives, pans, bowls, measuring utensils, mashers, colanders, blenders and food processors. This will vary depending on required preparation of the ingredients. |
Basic Ingredients
| Ingredients |
| Cream |
Whipping cream will give your ice cream a smooth texture and creamy taste. Heavy cream works well to give vanilla ice cream a rich flavor but may take away from the flavor of other ingredients when adding flavorings. If using heavy cream be sure the ice cream does not get over churned because the heavy cream can start to create a buttery texture and taste in the ice cream. |
| Milk |
There are many varieties of milk available in the supermarkets today. There is whole, 2%, 1%, and skim milk readily available. Avoid using skim milk when making ice cream because its low fat content will produce a light watery flavor that lacks any richness to it. Other milks that can be used that are becoming more readily available are soy milk, rice milk and goat's milk. |
| Eggs |
Eggs are used when making custard style ice cream. The eggs allow the fats and water to mix together better, which adds richness to the ice cream. They also allow the ice cream to hold up better against melting. |
| Sweetener |
Most generally sugar is used for sweetening because it dissolves quickly. It adds texture and gives ice cream its sweet taste. Other sweeteners that can be used are brown sugar, maple syrup, honey, |
| Cornstarch |
Some custard style recipes may call for cornstarch to be added. The cornstarch helps reduce the chance of the custard curdling and it will thicken it faster, reducing the cooking time. |
| Flavorings |
Vanilla is the flavoring added to most all ice cream recipes. After that the choices are endless. Some ideas for flavorings are fruits, chocolate, flavored syrups, cookies, brownies, peppermint candies, candy bars, spices, and nuts. Just enjoy creating your own unique flavor with some of your favorite sweets. |
| Note: There are many varieties of ice cream recipes. The ingredients listed above are the more common ingredients. Don't be afraid to try new and interesting recipes calling for different ingredients. You may find a new favorite recipe! |
|