|
Sweet Corn Preparation | Cooking Corn on the Cob | Grilling Sweet Corn | Freezing Sweet Corn | Tips
| Sweet Corn |
|
Corn is a tall cereal plant consisting of strong jointed stems supporting large ears containing kernels. Out of the different types of corn grown, sweet corn is one of the most popular varieties for human consumption. Sweet corn is a good source of vitamin A, magnesium, and potassium, and is often considered to be a vegetable, rather than a grain. This confusion is probably due to the fact that it is eaten fresh like a vegetable. When harvested at the proper ripeness, the kernels of sweet corn are tender and have a sweet, juicy taste. The three types of sweet corn that are readily available are white corn (white kernels), yellow corn (yellow kernels), and a hybrid of both white and yellow, often referred to as peaches and cream or butter and sugar corn. Sweet corn can be processed into syrup, sugars used as sweeteners in soft drinks, starch, and cereals. |
| Uses:
During the summer months when it is available fresh, it is most often cooked and eaten on the cob. Sweet corn is also cut off the cob and eaten as a vegetable side dish or added as an ingredient to other dishes, such as soups, stews, casseroles, and salads. The corn can be cut from the cob, raw or cooked, and then preserved by canning or freezing for future use. |
|
At Their Best:
Sweet corn is at its best during the late summer months to early fall. An exception to that is in Florida where sweet corn is harvested from fall to spring. To receive the best flavor from sweet corn, it should be eaten as soon as possible after it is picked because the sugars will begin to convert to starches as soon as it has been picked. |
|
How to Buy:
When selecting, look for husks that have good green coloring with pale colored silk. To check the freshness, pull the top of the husk away from the ear and pierce a kernel with your fingernail. If the kernel releases a slightly cloudy juice it is typically a fresh batch. If the kernels are dented or discolored, the corn is not fresh. Avoid sweet corn with dried or dark colored silk or discolored husks. Buying sweet corn from a road side stand may result in corn that has lost much of its sweetness from being exposed to high temperatures. The high temperatures will rapidly convert the corns sugar to starch, causing it to lose some of its sweet flavor. |
|
Storage:
To store corn, leave the corn in the husk and refrigerate as soon as possible. If corn has been husked, place it in a plastic bag and store in the refrigerator. It is best to eat it as soon as possible. Corn cut off the cob can be frozen for 6 months to a year. |
| Varieties: |
|
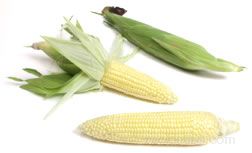
Yellow Sweet Corn
|
The largest portion of the different varieties of sweet corn are yellow sweet corn. All the kernels on the cob are yellow in color. The size of the cob and the corn's taste will vary between different varieties. Most commercially grown sweet corn is yellow. |
|
White Corn
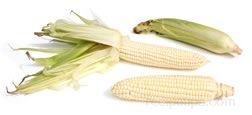 |
White sweet corn varies from the others in that it has all white kernels. Its flavor is not as sweet as the yellow corn and the peaches and cream corn. It is used in the same manner as yellow corn. White sweet corn is not generally grown for commercial use. It is more often found at local markets. |
|
Peaches and Cream Corn
|
Peaches and Cream corn, also referred to as butter and sugar, differ from the other varieties in that it contains both white and yellow kernels. White and yellow kernel sweet corn is not generally grown for commercial use. It is more often found at local markets. |
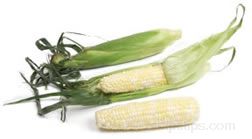
Sweet Corn Preparation
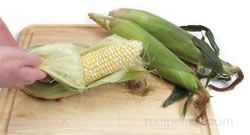
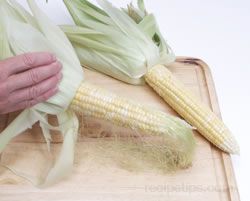
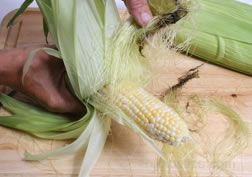
Shucking - Removing the Husk from the Sweet Corn
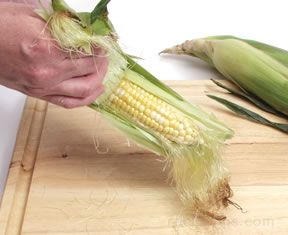
| Shuck the corn by peeling back the husk and completely removing it. |
 |
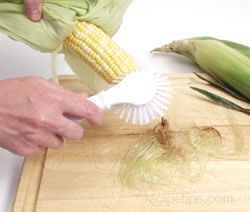
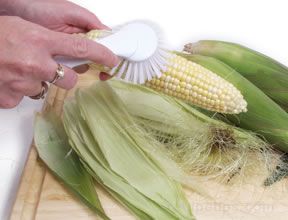
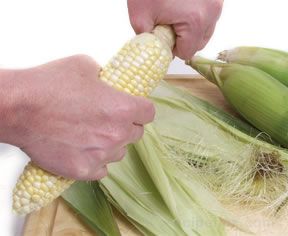
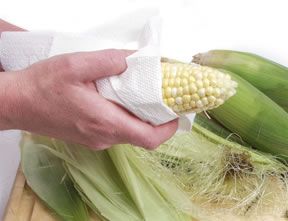
| Remove the thin silk that runs along the kernels of the corn. Remove excess silk with a vegetable brush or with a damp paper towel. |
 |
| Break or cut off any remaining corn stalk. The corn is now ready to cook. |
 |
|
Tip: Remove silk when shucking corn by using a damp paper towel for collecting the silk. Moisten the paper towel and hold the towel against the cob, moving the towel down the cob and allowing the silk to stick to the towel. This method works well for removing small strands of silk that often adhere to the cob after the leaves are removed. This method protects the kernels by not having to use other methods of removal that cause damage. |
 |
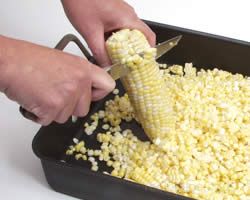
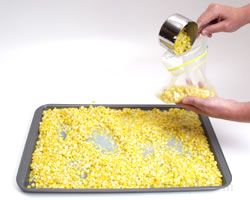
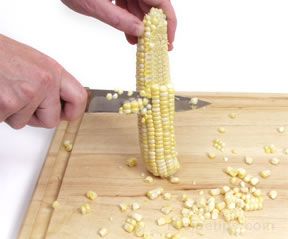
Removing Kernels from the Cob
The sweet corn kernels can be removed from the cob and cooked as a side dish or added as in ingredient in other dishes. The kernels are also cut off the cob to be canned or frozen so they can be stored for future use.
| Remove kernels by standing the ear of corn upright on a cutting board. Using a sharp utility or chef's knife, cut the kernels straight down along the corn cob to free numerous rows of kernels at the same time. |
 |
Cooking Corn on the Cob
Stove Top | Microwave
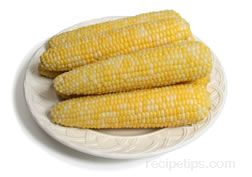
The most popular way to eat sweet corn is on the cob. It is generally husked before cooking but can be cooked using methods that call for the husks to be left on. When boiling sweet corn, avoid adding salt to the water because it will cause the corn to toughen when it cooks. Also, it is important to cook the corn only until it is tender. Overcooking will cause the corn to lose its sweet flavor and will cause the kernels to become tough. The instructions below show several methods that can be used for cooking corn on the cob.
Stove Top:
Boiling - Method 1 | Boiling - Method 2 | Boiling - Small Quantities
|
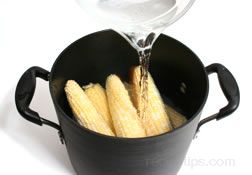
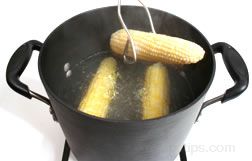
Boiling - Method 1
This method works well when cooking larger quantities of corn on the cob.
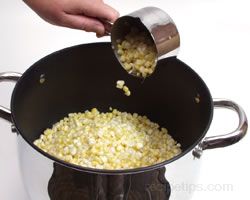
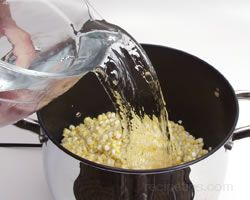
Place shucked corn into a large pot and cover with cold water. |
 |
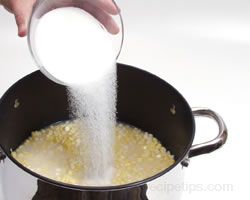
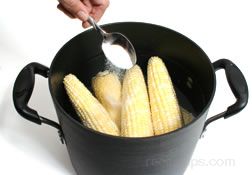
| Add a tablespoon of sugar to keep corn sweet and tender. |
 |
|
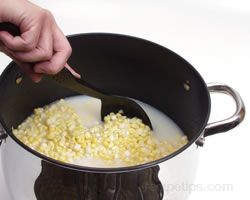
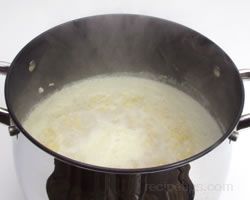
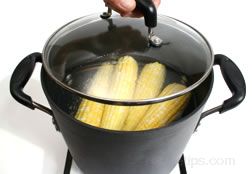
Cook corn over high heat and when water comes to a rapid boil, the corn is done. Do not overcook. |
 |
|
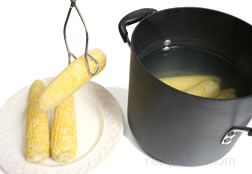
Remove from the heat, drain, and serve. Corn can stand in the hot water (away from heat) for 5 or 10 minutes. |
 |
|
Boiling - Method 2
This method also works well when cooking larger quantities of corn on the cob.
Add enough water to a large pot to cover corn when it is added. Be sure you do not add too much so that the water overflows when the corn is added. Add a tablespoon of sugar if desired.
Bring the water to a full boil and then add the corn to the water. |
 |
| Allow the water to come back to a boil and then cover and turn off the heat. Allow the corn to stand in the hot water for 5 to 7 minutes. Do not overcook. |
 |
|
Remove finished corn from the cooking water and serve while warm. |
 |
|
Boiling - Small Quantities
This method works best when cooking smaller quantities of corn on the cob.
Place water in a deep skillet. Add at least an inch of water but do not add too much that the water will overflow when corn is added. Add approximately 1/2 tablespoon of sugar to the water. Do not add salt. |
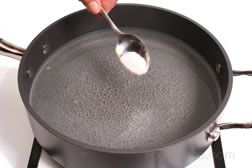 |
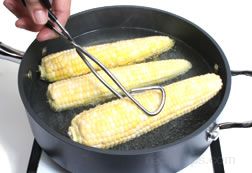
| Bring the water to a boil. Place shucked corn into the skillet. The corn does not have to be completely covered. |
 |
|
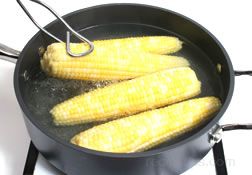
Allow the water to come back to a boil and then cook the corn for 5 to 7 minutes, depending on desired tenderness. Turn once half way through cooking time. Do not overcook. |
 |
|
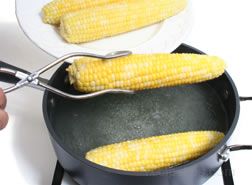
Remove corn from the cooking water and serve while warm. |
 |
Microwave:
Microwave - Husks On | Microwave - Baking Dish | Microwave - Individually Wrapped
Microwaving corn on the cob is a quick simple method to use when cooking only a few ears of corn. The cooking time will vary slightly depending on the strength of the microwave. Microwaving eliminates the time necessary to boil the water for cooking the corn on the stove top but if microwaving more than 3 or 4 ears, it may be just as fast to use one of the boiling methods.
|
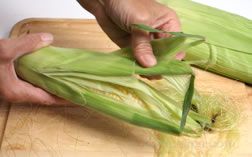
Microwave - Husks On
Pull back the husks about three quarters of the way down the ear and then remove the silk. |
 |
| After the silk is removed, pull the husks back up around the ears. |
 |
|
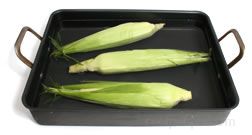
Place the ears in a pan of water and allow to soak for 20 to 30 minutes.
Place wet corn on a paper towel in the microwave. Microwave on high from 3 to 5 minutes. Turn cobs and microwave an additional 3 to 5 minutes, depending on desired tenderness. |
 |
|
After the corn is done cooking in the microwave, remove the ears and allow to stand for 1 minute before serving. |
 |
| When ready to serve, remove the husks from the ears of corn. Husks should be easy to remove. Serve with butter and favorite seasoning. |
 |
|
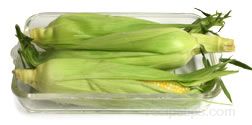
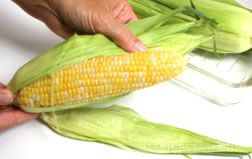
Microwave - Baking Dish
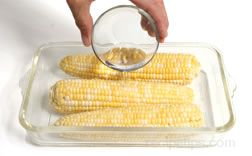
Place husked ears of corn in a baking dish that is microwave safe and add some water, approximately 2 to 3 tablespoons. |
 |
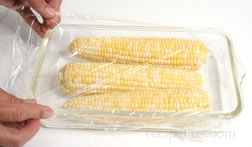
| Cover ears of corn tightly with plastic wrap. Microwave for 6 minutes and then remove from the oven. Pull back the plastic wrap, being careful of any steam escaping, and then turn ears over. Replace the plastic wrap and return the corn to the microwave to cook for an additional 5 minutes. |
 |
|
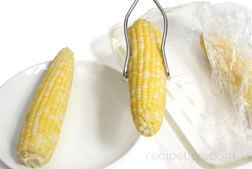
When done, allow corn to stand in the microwave for 2 or 3 minutes. Remove from the microwave and carefully remove the plastic wrap.
Remove the corn from the baking dish and serve while warm. |
 |
|
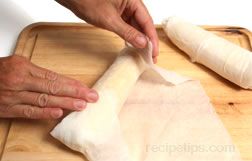
Microwave - Individually Wrapped
Rinse ears of shucked corn and wrap each ear in a damp paper towel or wax paper.
Microwave on high for 3 or 4 minutes. Turn cobs and microwave for an additional 3 to 4 minutes, depending on desired tenderness. |
 |
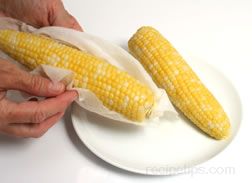
| When the corn is done, allow it to stand for 1 minute before eating. Remove the paper towels or wax paper and serve while warm. |
 |
Grilling Sweet Corn
Husks On - Method 1 | Husks On - Method 2 | Husks Off - Method 1 | Husks Off - Method 2
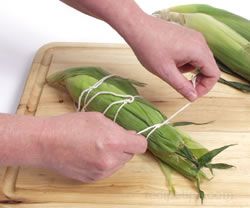
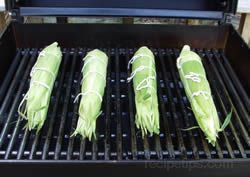
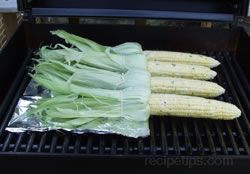
Husks On - Method 2
- Using a kitchen scissors, trim excess silk from the end of the corn.
- Soak corn in cold water for a minimum of 1 hour.
- Before placing on grill, shake to remove excess water.
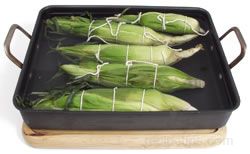
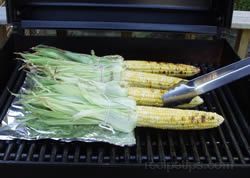
- Grill for approximately 25 to 30 minutes, turning frequently.
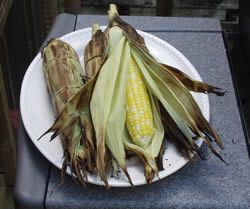
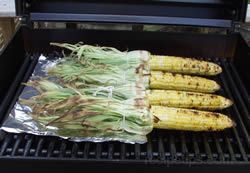
- The husk and any remaining silk is removed after grilling. Use heat resistant gloves to protect your hands.
|
Husks Off - Method 1
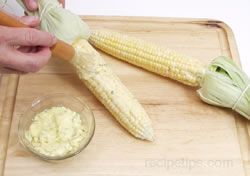
Shuck the corn as shown above by peeling back the husk and completely removing it. Remove the thin silk that runs along the kernels of the corn. Remove excess silk with a vegetable brush or with a damp paper towel. Break or cut off any excess corn stalk. |
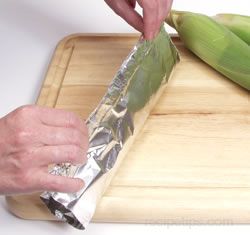
| Wrap each individual ear in aluminum foil. Spread softened butter on the ear and then season as desired. |
 |
| After spreading butter and seasoning, wrap each ear tightly with the foil. |
 |
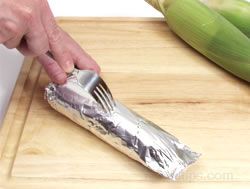
| Puncture the foil to allow excess steam to escape while grilling. |
 |
|
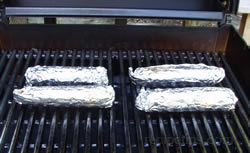
Place the foil wrapped corn on the grill directly over medium heat. Cook for 20 to 30 minutes, turning frequently throughout cooking time. |
 |
|
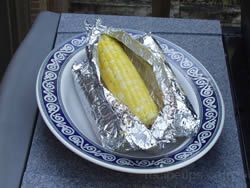
Remove corn from the grill and carefully open the foil wrap. Check corn for doneness. If it is not done, wrap the ear back up and place it back on the grill for 4 or 5 additional minutes. |
 |
Freezing Sweet Corn
Tips
- Do not add salt to the water when cooking sweet corn because the salt will toughen the corn. Add a little sugar to the water to boost the flavor.
- Sweet corn will lose its sweetness much faster if stored at room temperature compared to storing in the refrigerator. Do not husk before storing in the refrigerator. Husk just before preparing. It is best to eat it as soon as possible after it has been picked.
- Two to three medium ears of corn are equivalent to approximately 1 pound, depending on ear size. Two medium ears equal approximately 1 to 1 1/2 cups of kernels.
- If harvesting your own sweet corn, it is best to pick it early in the morning and eat it as soon as possible. If not cooking it soon after it is picked, store in the refrigerator until ready to cook.
|