|
How to Make a Gingerbread House
Making a Gingerbread House with Kids | Making the Gingerbread House
Constructing the Gingerbread House | Decorating the Gingerbread House
Storing the Icing
Gingerbread houses are fun to make and a chance to use your creative abilities. The different types of houses that can be made are only limited to your imagination. It is especially popular at holiday times and can be a fun activity for the kids. It is fun for them to be able to use their imaginations when it comes to decorating. Making a gingerbread house is a project that generally takes a couple of days to accomplish. It is best to construct the house first and decorate it another day. The house can be constructed and then stored and decorated several days later, depending on your schedule. Be sure to allow plenty of time when constructing and decorating so that you are able to enjoy the experience.
Making a Gingerbread House with Kids
Making a gingerbread house is especially popular at holiday times and can be a lot of fun for the kids. It is fun for them to be able to use their imaginations when it comes to decorating. Listed below are some suggestions on how to make the experience of making a gingerbread house a fun activity when working with kids.
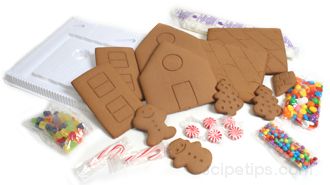
- Using a gingerbread house kit will reduce the amount of time before the kids can get started decorating. Sometimes waiting for the house to be baked and constructed can make the kids overly anxious and cause stress for everyone.
- If you are working with fairly young kids and are constructing a house from scratch you may want to limit how much they help with the baking and constructing. They will have a tendency to get bored with these activities and by the time the house is ready for decorating they may be tired of the whole project.
- When working with older children, try to give them jobs you know they can handle so they don't get frustrated if something goes wrong. Also, prepare yourself for the fact that everything may not turn out perfect.
- Take your time! Bake the pieces one day, construct the house another day, and decorate on a third day. Make sure when you do work on it that you have plenty of time and are not going to be rushed. If you don't have time to construct the house on the day immediately following the baking of it, then wait for a day that you will have time. The baked pieces can wait to be constructed. The same holds true for when it comes to decorating.
- PAINT SHIRTS! Save yourself from the laundry blues by using paint shirts for each of the kids, especially when using food coloring, chocolate, and other candies that leave stains.
- When it is time to decorate, be sure everyone is well rested and that you have plenty of time. You may want to try to work out a simple plan with the kids on how they want to decorate and maybe give different jobs to each child. But, just remember that the best made plans don't always work the way we intend them to. Don't be surprised when the kids get bored with the whole project and you are left to finish.
- Give the kids the freedom to use their imaginations and HAVE FUN!
Making the Gingerbread House
Baking the Gingerbread Dough | Alternative Methods for Making a Gingerbread House
A gingerbread house can be constructed using many different styles, from very simple to very elaborate. It is best to keep it simple for your first try to allow yourself a chance to become familiar with some of the techniques and to find out what works best for you. There are many different recipes for the gingerbread itself, which are very similar to the recipes used for gingerbread men but the recipes for the gingerbread houses generally contain more flour for stability. Royal icing is generally used as the glue to hold the house together and is also used for decorating. The icing can be tinted to different colors and candies, sprinkles, and colored sugar can be used for additional decorations. The content below contains basic information on how to make a simple gingerbread house.
Baking the Gingerbread Dough
| Gingerbread Dough |
Ingredients: |
 |
- 6 c. flour
- 1/2 tsp. baking powder
- 2 tsp. ginger
- 4 tsp. cinnamon
- 1/2 tsp. ground cloves
- 1/2 tsp. nutmeg
- 1/2 tsp. salt
|
|
- 1 1/2 c. light brown sugar
- 1 1/2 c. butter, softened
- 2 eggs
- 1 c. molasses
- 1 tbsp. water
|

|
|
- Divide the dough in half. Place each half into a gallon plastic bag and roll with a rolling pin to flatten or flatten into disks and wrap in plastic.
- Seal the bags and place both halves in the refrigerator to chill the dough for at least 2 hours. It can be stored in the refrigerator for up to 3 days before using.
|
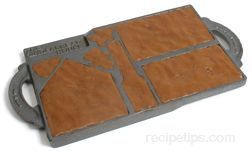
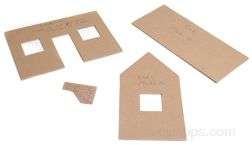
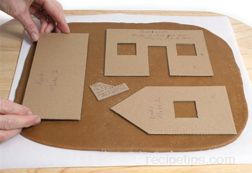
- While the dough is chilling it is a good time to cut out the pattern for your gingerbread house if you don't already have it cut. Cut the pattern out of thick paper or cardboard. Cardboard works best because of its stability.
|
 |
|
- Mark the different pieces with the number that you need to cut of each and any other notes in regard to cutting the pieces, such as whether or not to cut out windows and doors on all pieces.
|
 |
|
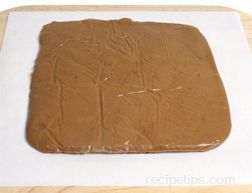
- After the dough is chilled, remove one package from the refrigerator and place it on a work surface lined with parchment paper or wax paper.
|
 |
|
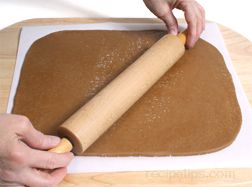
- Lightly sprinkle the dough with flour and then roll out into a rectangle with a lightly floured rolling pin until the dough is 1/4 inch thick.
|
 |
|
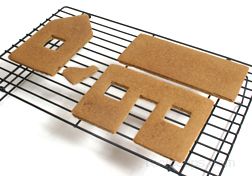
- Use the cardboard templates to cut out the pattern pieces in the dough. Leave at least one inch in between the different sections. Place as many pieces as you can fit on the dough.
|
 |
|
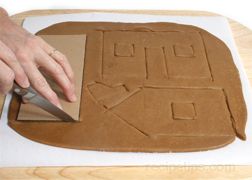
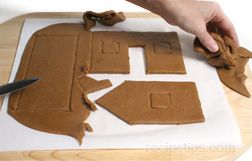
- Carefully cut the dough along all the edges of the pattern pieces and cut the outlines for the windows and door. Be sure to apply enough pressure to cut through the dough but you do not want to be cutting through the parchment paper.
|
 |
|
- Cut out the pieces that will fit on this piece of dough and then peel away the unwanted areas.
|
 |
|
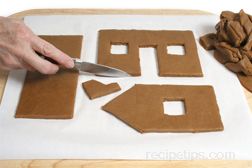
- Gather the scrap pieces to roll out again to cut more pieces. After peeling off all the unwanted sections, touch up any rough edges by using the blade of the knife to smooth or pat into shape.
|
|
|
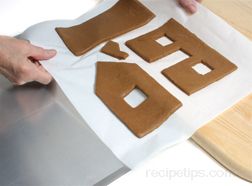
- When the pieces are ready, lift the parchment paper up and transfer it to a cookie sheet.
|
- Place the cookie sheet in an oven preheated to 350°F and bake for 10 to 15 minutes or just until the edges start to brown. Rotate cookies sheets once through the baking time so the pieces bake more evenly.
- Remove them from the oven and allow the pieces to sit on the cookie sheet for about 5 minutes before removing. This will allow them to firm up slightly and make it easier to remove them without damaging them.
|
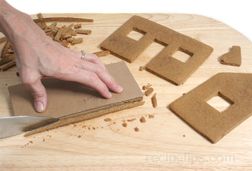
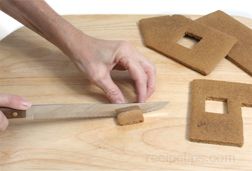
- If the baked pieces have spread during baking, lay the pattern pieces over them and trim them to the size of the pattern. It is best to do this while the gingerbread is still warm to help prevent the pieces from cracking. When the pieces are warm, they are softer and easier to cut. Be sure to place them on a flat solid surface when trimming.
|
|
 |
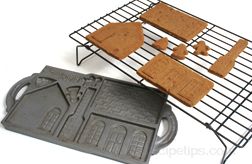
- After doing any necessary trimming, place them on a cooling rack. Allow them to cool completely before you begin constructing the gingerbread house.
|
|
|
- If the pieces have cooled before you trim them, use a serrated edge knife and cut using a sawing motion to help prevent breakage.
|
|
|
- Cut the remaining pattern pieces from the other section of dough and bake in the same manner.
|
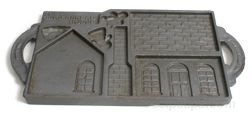
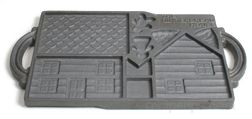
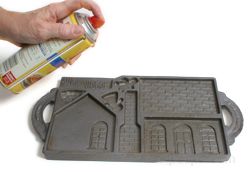
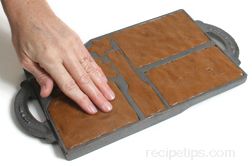
Alternative Methods for Making a Gingerbread House
Constructing the Gingerbread House
| Decorating Icing (& glue for constructing) |
Ingredients: |
| |
- 3 pasteurized egg whites
OR 1/4 C. meringue powder plus 1/2 c. water |
|
- 1/2 tsp. cream of tartar
- 1 tsp. almond extract
- 4 c. powdered sugar
|
 |
|
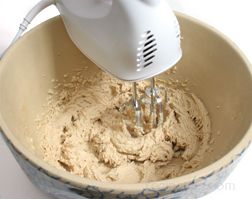
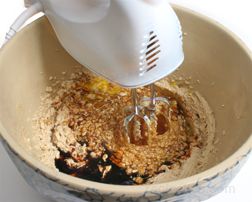
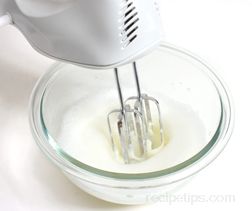
- Combine the egg whites or meringue powder and water with the cream of tartar and beat until it becomes foamy.
|
|
|
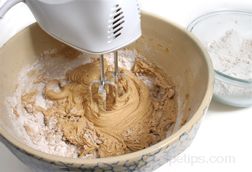
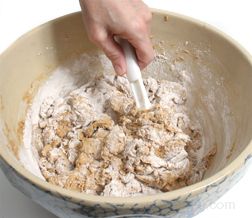
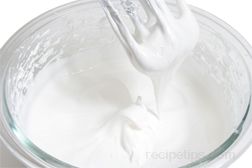
- Add about two thirds of the powdered sugar and beat into the egg mixture. Gradually add the remaining powdered sugar and almond extract and continue to beat on high until the icing holds a stiff peak.
|
- If the icing seems too runny, add a little more powdered sugar. If the icing seems too thick, add a teaspoon of water at a time until it is at the desired consistency.
|
|
|
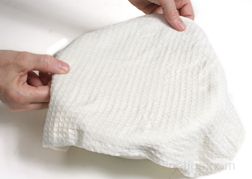
- If you are not ready to use the icing immediately, dampen a dish towel and place it over the bowl of icing to keep it from drying out. Remove the towel to take some of the frosting out to work with and then replace the damp towel on the bowl.
|
- If the damp towel is placed over the bowl while you are constructing and decorating the house, the icing will remain the proper consistency. If the towel begins to dry, sprinkle it lightly with water to re-dampen. See below for more information about storing the icing properly.
|
|
|
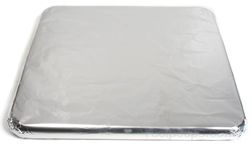
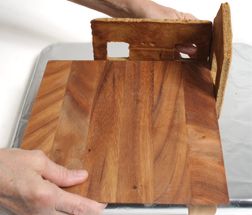
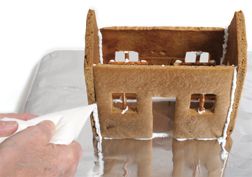
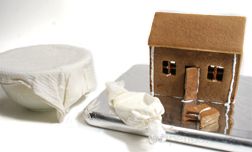
- Prepare a surface to construct the gingerbread house. Cover a board with decorative paper, white freezer wrap paper, or aluminum foil. If you do not have a large board to use, a cookie sheet with sides can be turned upside down and covered in the same manner as a board.
|
 |
|
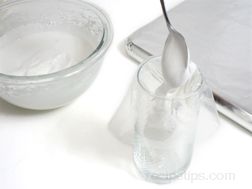
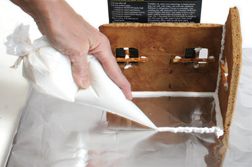
- Place some of the icing in a pastry bag or a small sealable plastic bag, which can have one corner clipped off so it can be used for applying the icing. There are plastic disposable pastry bags available that work really well for applying the icing. Look for them anywhere that they sell cake decorating supplies.
|
 |
|
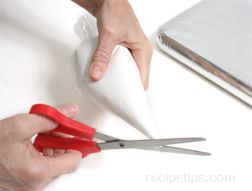
- Once the bag has been filled with icing, tie the opening tightly shut with some string. Clip the end with a scissors, being careful not to cut too much off, resulting in an opening that is too large.
|
 |
|
- Before you begin putting the pieces together, make some markings on the prepared surface as to where the house should sit. Hold up one side wall and an end wall in the location that you want to construct the house. Check squareness with a right angled object.
|
 |
|
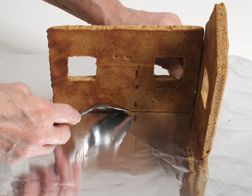
- Once the pieces are squared, score the foil with the edge of a spoon along the bottom edge on the inside of the two pattern pieces.
- Remove the pattern pieces and do the same on the other side wall and end wall. These markings can be used as a guide when you begin placing the pieces on the board.
|
|
|
|
- You are now ready to begin construction. If you want to do some decorative work around the windows and door, you can do that before putting the walls up or you can wait until after the house is constructed. It is easier to decorate them when they are laying flat but then they are a little harder to handle when you are constructing the house.
|
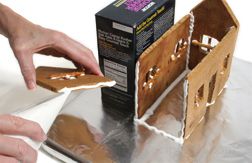
- Begin constructing by placing a thick line of icing on the prepared board where the side wall has been marked. Also, line the bottom edge of the side wall with icing and then place the section on the board where the line of icing was applied.
|
|
 |
- Use a heavy straight sided object to help support the wall. Once the wall is in place, add another line of icing along the bottom edge of the wall on the inside to give the wall additional strength.
|
|
|
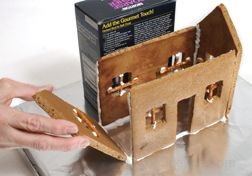
- Next add one of the ends of the house. Add the line of icing to the board as was done for the side wall. Add a line of icing along the bottom edge of the end piece and also along the edge that will connect to the side wall.
|
- Place on the board, connecting it to the side wall, having the end piece placed so its edge is flush with the outside of the side wall. Hold it in place and double check squareness with a right angle object.
|
|
 |
- Once the end is squared, add a line of icing along the bottom edge on the inside and on the inside of the connected corner.
|
|
 |
- Continue constructing the other side wall by first adding a line of icing on the scored line on the foil, which indicates the location of that wall.
|
|
|
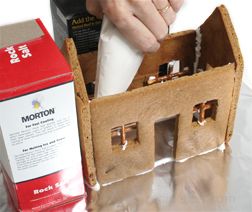
- Apply a line of icing on the left, right and bottom edges of the side wall before placing it on the line of icing that is on the foil. Set the side wall on the icing line and then apply a line of icing along the bottom edge on the inside and along the inside corner.
|
- Then add a line of icing for the end wall. Be sure there is a line of icing on both of the ends of the side walls where the end wall will attach to the house in the corners. Line the bottom edge of the end wall with icing also.
|
|
 |
- Place the end wall on the line of icing and align so that the corners butt up to the iced corners of the side walls.
|
|
 |
- Use a heavy straight sided object to help support the end wall. Once the end wall is in place, add a line of icing along the inside of each of its corners.
|
|
 |
- Once it is together and the icing has had a chance to set a little, run a line of icing along each of the outside corners of the house for added strength. Now allow the house to stand for at least two hours so that the icing has a chance to dry and firm up some before trying to attach the roof.
|
|
 |
 |
|
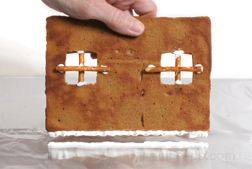
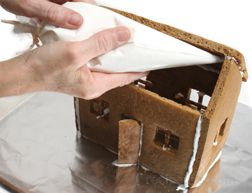
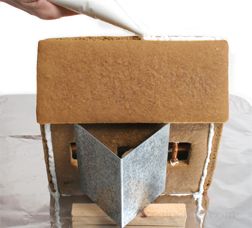
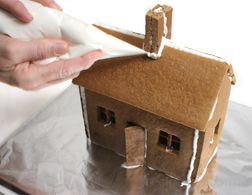
- To attach the roof, line the three edges of the top of the house with icing where one side of the roof will be placed.
|
|
|
- Carefully place the first half of the roof on the iced side. Hold in place for a few minutes to allow the icing to begin drying. Then add a line of icing in each seam of the roof on the inside of the house.
|
|
|
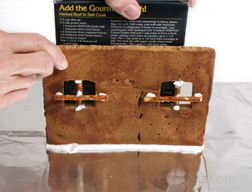
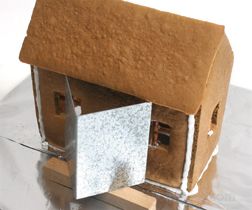
- After adding a line of icing to the inside roof seams, use an object to prop the roof up so it does not start to slip down while it is drying. Allow the first half of the roof to dry for an hour before attempting to place the other half on the house.
|
|
|
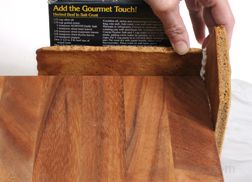
- When placing the second half of the roof on the house, be sure to use a good line of icing on the edges of the house where the roof will be placed. You want to be sure to have a good icing line because you will not be able to reinforce the seams on the inside with more icing on the second half of the roof.
|
|
|
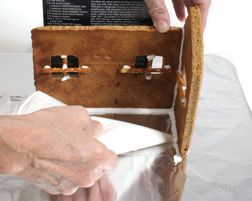
- Hold the second half of the roof in place for a few minutes and then prop it up and allow it to dry. Run a line of icing along the length of the peak for additional strength.
|
- Construct the chimney off of the house. Double check the angle of the chimney to be sure it will fit properly and adjust if necessary by trimming carefully with a knife.
|
 |
|
- Once the chimney is finished, leave it off the house until you are ready to decorate. Allow the chimney and the house to set overnight to give it a chance to dry completely before decorating.
|
How to Salvage Broken Pieces
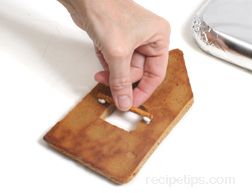
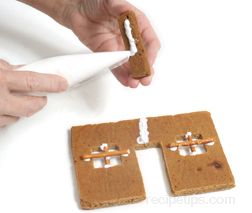
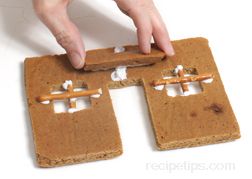
- If a piece of the house breaks or cracks when you are working with it, it can be repaired with icing. Do the repairs on the side of the piece that will be facing to the inside of the house. Apply a line of icing on the crack and then apply some to a scrap piece of gingerbread to use as a brace.
|
|
 |
 |
|
- Attach the scrap piece across the crack and hold in place for 1 to 2 minutes to allow the icing to begin setting up. Then allow the piece to sit for at least two hours before handling.
|
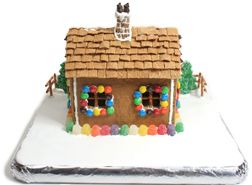
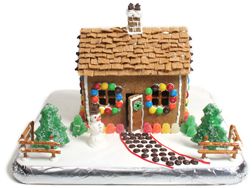
Decorating the Gingerbread House
|
The house is now ready to decorate. You can use anything you feel would work for decorating as long as it is edible.
If you are going to use colored icing, place small amounts of the icing into separate bowls, add the necessary amount of food coloring to get the icing to the color you desire. Be sure to cover the containers to keep the icing from drying out when you are not using it. |
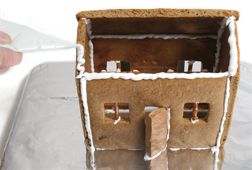
- Begin by attaching the chimney of the gingerbread house. Line the bottom edge of the chimney with a line of icing and then place on the roof. Hold in place for a few minutes and then run a line of icing along the bottom edges where it connects to the roof to help secure it.
|
|
|
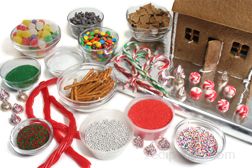
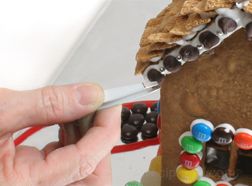
- The house is now ready to be decorated in any manner you desire. Candies make great decorations. Some of the popular candies used are candy canes, gumdrops, M&M's®, red hots, Skittles®, LifeSavors®, mints, chocolate chips, chocolate kisses, and licorice. You can also use colored sugars, sprinkles, chopped nuts, marshmallows, pretzels, cereal, wafers, graham crackers, or cookies if desired.
|
|
|
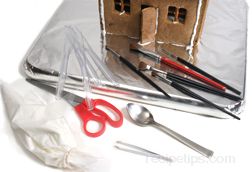
- Some useful tools for decorating are small paint brushes, tweezers, scissors, plastic knives, and disposable pastry bags.
|
|
 |
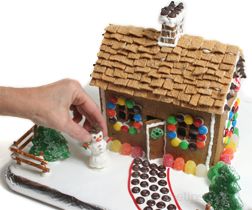
- Use the icing as glue to attach the decorative items to the house. Cereal squares work well for shingles on the roof.
|
|
 |
- The icing can also be thinned down slightly and used as a paint to decorate the house or other items. The icing can have food coloring added to create colors or a colored sugar can be used.
|
|
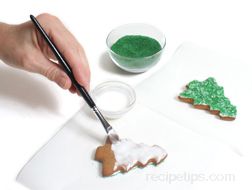 |
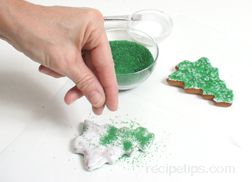
- Apply a coat of thinned icing using a small paint brush and then sprinkled the colored sugar on the icing while it is still wet so that it will stick to the icing. Allow that side to dry completely and then turn the object over and repeat this process on the other side.
|
|
 |
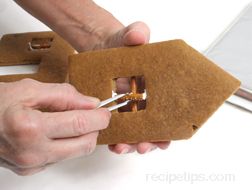
- A tweezers is very handy to use when placing small objects on the house.
|
|
 |
Note: When attaching objects to the walls of the house with the icing, apply the icing to the object and then wait 30 to 45 seconds before attaching it to the house. This allows the icing to begin setting up slightly and helps the object adhere to the house faster. |
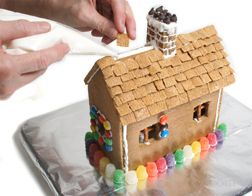
- Once the house is finished you can add decorations to the yard. You can add shrubs, trees, pathways, snowmen, gingerbread people, or just more candy to add extra color and fun to the house.
|
|
 |
 |
|
 |
- When you are all done decorating the house, allow it to stand for a couple of hours if possible before moving it around.
- Now it is ready to enjoy. You just have to decide if you will keep it to decorate for the holiday or allow everyone to start nibbling.
|
|
 |
Storing the Royal Icing
| The royal icing works great for constructing and decorating the gingerbread house. It has a nice white color and it dries firmly, which makes it great for gluing pieces together and attaching the decorations. But, royal icing has a tendency to dry fairly quickly so it is important to take precautions while using it so it does not dry out before you are finished. If you follow the procedures below, the royal icing should remain very workable for you throughout the entire construction and decorating process. |
|
|
- If you are not ready to use the icing immediately, dampen a dish towel and place it over the bowl of icing to keep it from drying out. Remove the towel to take some of the frosting out to work with and then replace the damp towel on the bowl. If the damp towel is placed over the bowl while you are constructing and decorating the house, the icing will remain the proper consistency.
|
- If the towel begins to dry, sprinkle it lightly with water to re-dampen. If the towel is kept damp, the icing will stay the proper consistency for several days. If it is to be stored overnight, dampen the towel quite well (be sure water is not dripping from it) and then either wrap the entire bowl and towel in plastic or place in a large sealable bag.
- The icing can be stored in this manner for a couple of days as long as it is sealed properly. The next time it is going to be used, it may need to be whisked or stirred because it may separate but it will mix back to its original consistency fairly quickly.
- To store icing in pastry bags, dampen a paper towel and wrap it around the clipped end of the bag. Then place it in a sealable plastic bag, squeeze out the air from the plastic bag and seal tightly. The icing can then be kept for several days. If the icing has separated in the pastry bag, pinch the cut end and then squeeze the icing in the bag, working it back and forth to get it back to its original consistency.
- While you are using the icing in the pastry bag, keep a wet paper towel close to your work area. When the bag is not in use, wrap the wet paper towel around the cut tip so the end does not dry out while decorating the house.
| |