Clarified Butter | Brown Butter | Homemade Butter
Clarified Butter
|
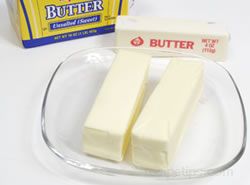
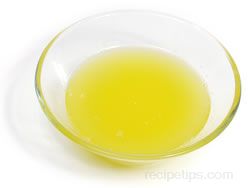
Melting whole butter and removing the milk solids and water, produces clarified butter. It is a rich golden fat that is also referred to as drawn butter. It is very useful in cooking because it has a much higher smoke point than regular butter, due to the removal of the milk solids. The milk solids are what cause whole butter to smoke and burn if heated excessively. The elimination of the milk solids also helps the clarified butter to keep longer than whole butter. Making clarified butter is easily done at home and is worth the effort because of the delicious flavor it provides when used in cooking, as a condiment, or as a dipping sauce for seafood. |
| It is best to use unsalted butter when preparing clarified butter so that the quantity of salt in the finished product can be controlled. When using salted butter, the salt content may become more concentrated after the butter is clarified. Additional salt can always be added to the finished product. |
 |
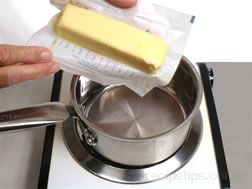
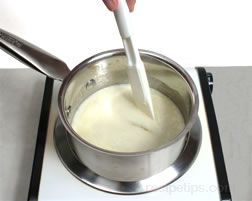
| Warm a saucepan over low heat and add pieces of unsalted butter to the pan. The pieces will melt faster than one large stick of butter. |
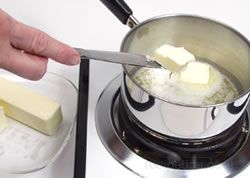 |
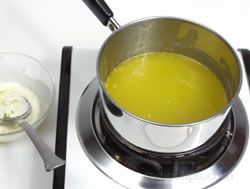
| Heat the butter until foam begins to rise to the surface. |
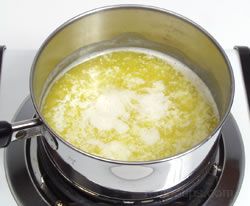 |
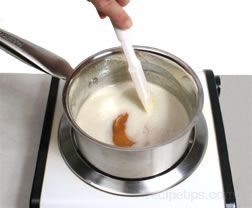
| Skim the surface to remove the foam and impurities. The milk solids will slowly fall to the bottom of the pan. Make sure the heat is low so that the butter does not bubble, which may cause the milk solids to scatter instead of sinking to the bottom of the pan. |
 |
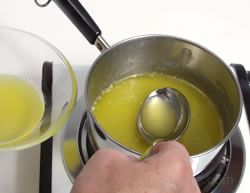
| Continue skimming until the liquid becomes clear and the sediments and water have dropped to the bottom of the pan. |
 |
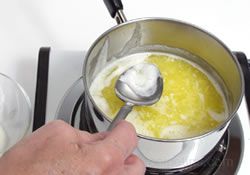
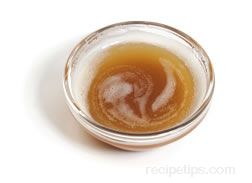
| Carefully remove the clear liquid from the pan, either by pouring it off or ladling it off. Make sure the milk solids and water remain in the pan. Approximately 25% of the original volume of the butter will be lost due to the clarifying process, so one pound of whole butter will yield about ¾ pound (12 oz.) of clarified butter. |
 |
| Clarified butter keeps longer than whole butter due to the removal of the milk solids, although homemade clarified butter may still contain a small amount of milk solids. Like whole butter, clarified butter should be stored in the refrigerator. |
 |
Brown Butter
|
Brown butter is often used as a flavoring condiment for enhancing the taste of other foods. It is easily created by melting butter slowly so that the milk solids begin to brown, but not burn. As the butter is heated, it is transformed into a golden brown liquid with a nutty and complex flavor. If heated too long, it becomes dark and burned and takes on a very unpleasant odor and flavor. |
|
When preparing brown butter, it is best to use of a lightly colored metal pan rather than a dark, nonstick pan so that it is easier to judge the progression of color changes while the butter is heating.
Place one stick of unsalted butter into a cold sauté pan or saucepan. It is best to use unsalted butter when preparing brown butter so that the quantity of salt in the finished product can be controlled. |
 |
| Over medium heat, begin to melt the butter. Turn down the heat if it appears that the butter is melting too rapidly. As the moisture begins to evaporate from the butter, it will begin to foam, and the milk solids will begin to drop to the bottom of the pan. Skim the surface to remove the excess foam and impurities. The steps in the initial stage in preparing brown butter are similar to the steps in preparing clarified butter. |
 |
|
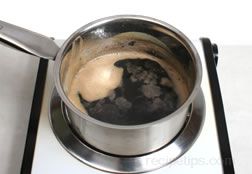
As the butter begins to change to a caramel colored liquid with a rich, nutty aroma, decrease the heat so that the butter does not begin to burn. When the butter has reached the correct golden color, remove the pan from the heat and allow it to cool for ten minutes. |
 |
| Once the butter begins to brown, it can darken and burn rapidly if the heat is too intense. The butter will quickly take on a blackened appearance and burnt odor. If you have never prepared brown butter before, it may be wise to have a bowl or sink of ice water handy so that the pan can be plunged into the cold water, which quickly lowers the temperature of the butter and prevents it from burning. |
 |
Brown butter can be used as is or it can be poured through a fine mesh sieve, cheesecloth, or coffee filter, to remove additional impurities.
|
 |
| Brown butter can be stored in an airtight storage container and refrigerated for several weeks or it can be frozen for long-term storage. When reheating frozen brown butter, use caution when melting and heating it on the stove top so as not to burn the butter with a setting that is too high. The frozen butter can also be heated on a low microwave setting. |
Homemade Butter
|
Fresh sweet cream butter can be produced easily at home, but with the abundance of butter found in food stores, it is not something that is often made at home. It is definitely worth trying and it can be a fun project for kids.
Manual Method |
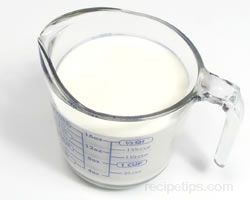
| The only ingredient required to make butter is heavy, sweet cream. The cream should be well chilled before beginning. |
 |
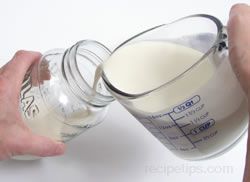
| Butter can be produced manually, using a large jar for shaking the cream. Make sure the jar has been well chilled. Pour the chilled cream into the jar. Screw the lid on tightly, and begin shaking. |
 |
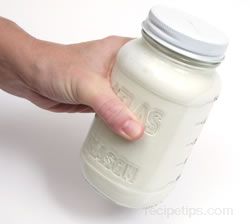
| After shaking constantly for 20 to 30 minutes, chunks of butter will start to form. Because of the length of time required for shaking, this process is not a popular butter making method, but can be a fun children's project. |
 |
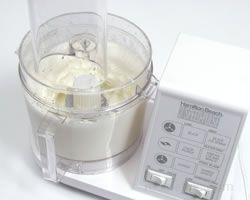
| A more popular method for producing homemade butter is with the use of a blender or food processor. It requires much less time than shaking the cream by hand. Begin by pouring chilled cream into the blender or food processor. |
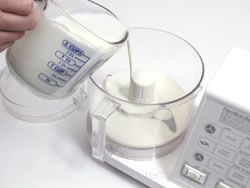 |
| Blend the cream on high speed. The cream will quickly change into whipped cream and shortly after this stage it will develop a much thicker consistency. |
 |
| After continued blending, the cream will become thinner again and the color will begin to change to a dirty, off-white. This indicates that the liquid is beginning to separate from the butterfat. |
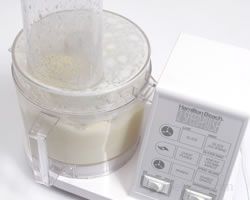 |
| Keep blending until the butterfat is separated from the liquid, but do not over-blend. The color will change again (this time to the familiar pale yellow color associated with sweet cream butter). |
 |
|
Finishing Procedures for Manual and Machine Methods |
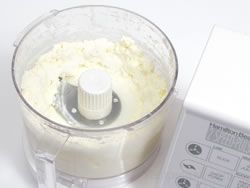
| Once the butter has been separated, the liquid, which is buttermilk, can be drained off. |
 |
| The buttermilk can be saved for future use. |
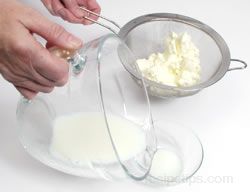 |
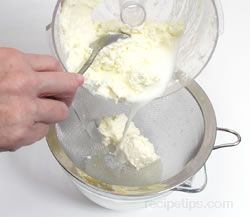
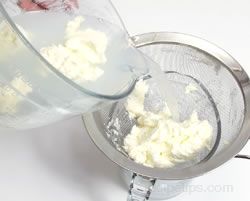
| Place the butter in a clean bowl and rinse it with cold water. Pour the butter and water into a strainer to drain off the liquid. |
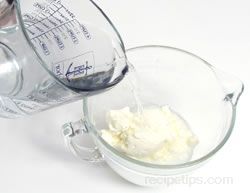 |
| Repeat the rinsing procedure until the water is clear when it is strained from the butter. |
 |
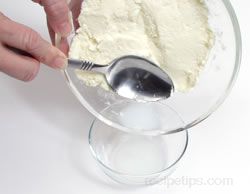
| Transfer the butter to a clean bowl and press the butter with the back of a spoon to squeeze out additional liquid. |
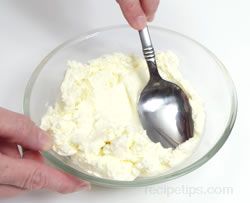 |
| Pour off the liquid that oozes from the butter. |
 |
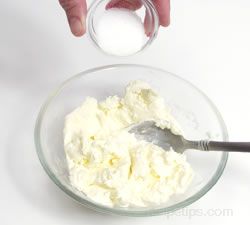
| Salt may be added to the butter if desired. The salt also acts as a preservative, helping to keep the butter fresh for a longer period. The butter can be packed into containers and shaped into any form that is required before it is chilled. |
 | |