|
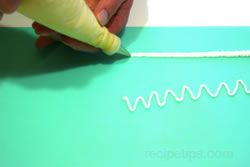
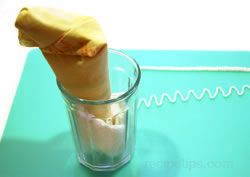
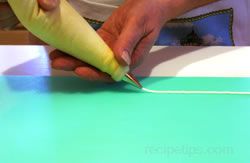
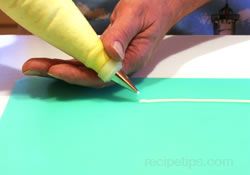
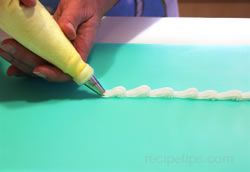
Piping or Line Work
Round Tube: #2, #3, or #4
Angle of Bag: 45°
- Touch the surface when starting to get frosting to stick. Raise the tip slightly as you move along the surface applying the line of frosting. To stop, touch the surface again, stop squeezing, and then pull tip up.
- Note: Too much pressure when squeezing the bag will cause a rippled line and if there is too little pressure the line will break.
|
|
 |
 |
|
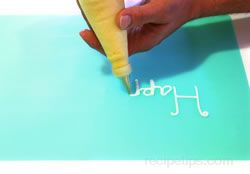
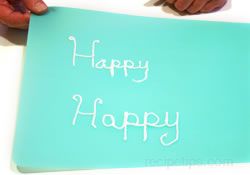
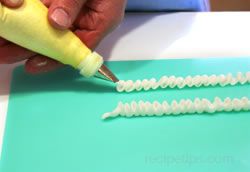
Writing or Printing
Round Tube: #2 or #3
Angle of Bag: 45°
- To write, touch the tip to the surface, write with a steady flow of frosting. The tip should just be touching the surface slightly as you go. To stop at the end of a word, touch the surface again, stop squeezing, and then pull tip up.
- To print, apply the frosting in the same manner only you will be creating shorter strokes to create the letters rather than one continuous flow for each word.
- Note: It is a good idea to cut a piece of paper approximately the size of the space you are going to be writing in and write the message out on the paper before writing with the frosting on the cake. This way you will have an idea of how it will fit and what size you should make the lettering.
|
|
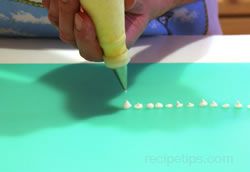
Dots
Round Tube: #2, #3, or #4
Angle of Bag: 90°
- Hold the tip of the tube just above the surface, almost touching. Squeeze the bag until the dot is the size you want, leaving the tip in the frosting as you squeeze. When it is the right size, stop squeezing and pull tip directly up and out of the dot.
|
|
|
|
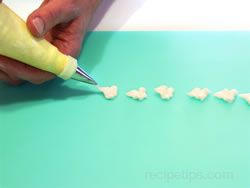
Stars
Open Star Tube: #16, 21, or #29
Angle of Bag: 90°
- Hold the bag so that the tip of the tube is about 1/8 inch above the surface and squeeze.
|
|
|
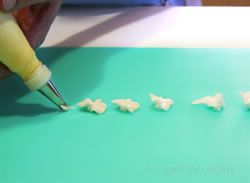
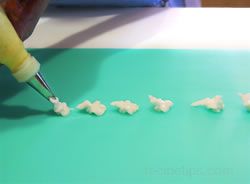
- Stop squeezing when the star is the desired size.
|
|
 |
- Then pull the tip straight up out of the star.
- Note: To achieve a great star shape, be sure to stop squeezing the pastry bag before removing the tip from the star and lift it straight up.
|
|
 |
 |
|
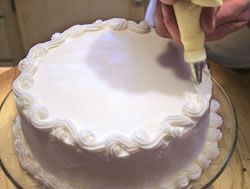
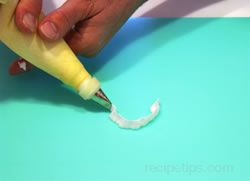
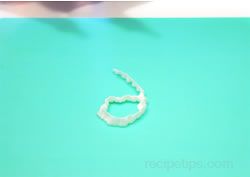
Rosettes
Open Star Tube: #21 or #29
Angle of Bag: 90°
- Hold the tip about 1/8 to 1/4 inch above the surface and squeeze out a small mound the size you want the rosette to be.
|
 |
|
- Then turn the bag until you have made almost a complete circle.
|
 |
|
- Just before making a full circle stop squeezing, make a slight dip down, and then quickly lift the tip straight up out of the rosette.
|
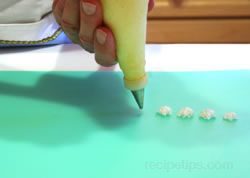
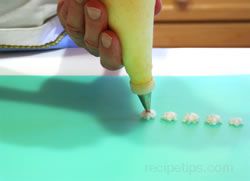
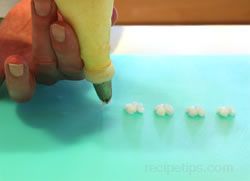
Drop Flower
Closed Star Tube: small #34, large #2D, #4
Angle of Bag: 90°
- To start the drop flower, hold the tip about 1/8 to 1/4 inch above the surface and begin squeezing the frosting out.
|
|
 |
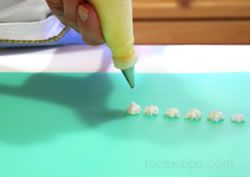
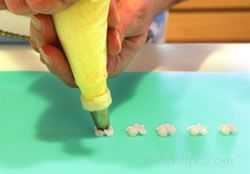
- Squeeze out a mound the size you want the drop flower to be and then stop squeezing.
|
|
 |
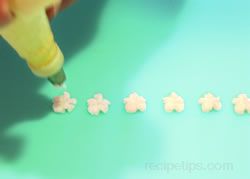
- Make a slight dip down, and then quickly lift the tip straight up away from the drop flower.
|
|
|
 |
|
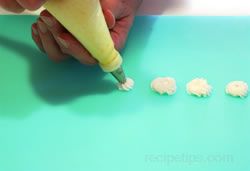
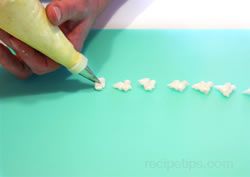
Plain Leaf
Leaf Tube: #65, #67, or #352
Angle of Bag: 45°
- Begin with slightly thinned frosting. With the bag at a 45° angle, position the tip so it touches the surface. Squeeze with heavy pressure to create the base of the leaf; lift the tip slightly, pulling towards you as you begin to lighten the pressure.
|
 |
|
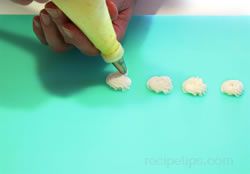
- Continue to pull towards you, lightening the pressure. When it is the length you desire, stop applying pressure and pull the tip away. Drawing the bag towards you in this manner should form a point at the end when the tip is pulled away.
|
|
Ruffled Leaf
Leaf Tube: #65, #67, or #352
Angle of Bag: 45°
- Create the base of the leaf in the same manner as the plain leaf shown above.
|
|
 |
- As you start to draw back, move the bag forward and back several times as you are creating the leaf. This should form some ruffles in the leaf as you move forward and back.
|
|
 |
- Finish the leaf in the same manner as the plain leaf.
- Note: To make the leaf stand up, pull more upwards, keeping the tail end off the surface when you stop squeezing and pull the tip away.
|
|
|
|
|
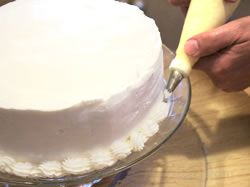
Shells
Open Star Tube: #16, 21, or #29
Angle of Bag: 45°
- With the tip slightly above the surface, squeeze out a fair amount of frosting, allowing it to fan out. Start to lighten up on the pressure and begin pulling the tip down until it hits the surface.
|
 |
|
- Then pull the bag towards you, allowing the tip to draw the frosting to a point. The frosting should be similar to a teardrop in shape.
|
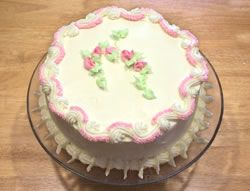
Note: Most of these shapes can be used to create borders on the cake. Create the borders by butting the shapes up next to each other in a continuous line wherever you want a border to be applied. |
 |
|
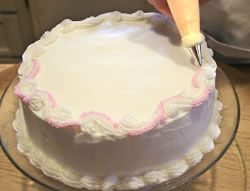
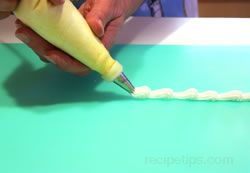
Ruffles
Rose Tube: #104
Angle of Bag: 45°
- Place the opening of the tip parallel to the surface. Start by touching the surface, slowly squeeze out the frosting and move the tip up and down slightly while moving the bag along. This should create a ruffled look to the stream of frosting being applied to the cake.
|
- Note: You can create a variation in the style of the ruffle by holding the tip at slightly different angles as you are squeeze out the frosting and move along the length of the ruffle. Experiment with different angles to see the different variations you can create.
|
|
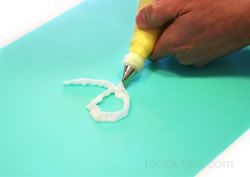
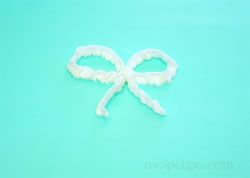
Bows
Rose Tube: #104
Angle of Bag: 45°
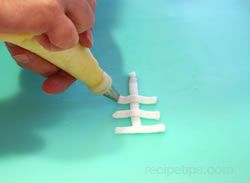
- With the wide end of the tip down and the narrow end straight up, touch the surface of the cake with the tip placed where the center of the bow should be. Begin squeezing the bag while moving the tip to the right.
|
|
|

|
|
|
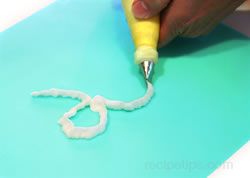
- Loop the tip around, back to the starting point. Begin back at the starting point at the center of the bow and squeeze, moving in a downward sweep to form a streamer on the right side.
|
|
|
|
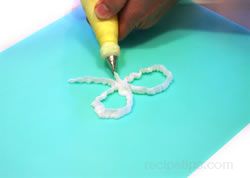
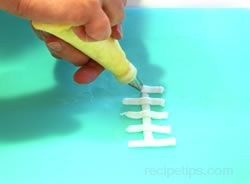
- Begin back at the center point, squeezing the bag while moving the tip to the left. Then continue up and around to the right to form the second loop. Stop squeezing when you are back at the starting point.
|
|
|
|
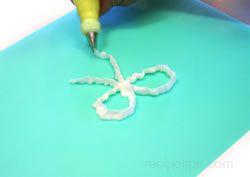
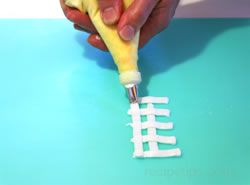
- Begin again back at the starting point at the center of the bow and squeeze, moving in a downward sweep to form a streamer on the left side.
|
 |
|
- Once you complete the streamer on the left side, the bow is complete. You can use these steps to create any size bow that is needed.
|

|
|
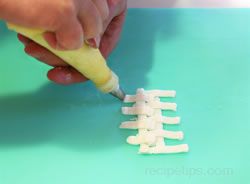
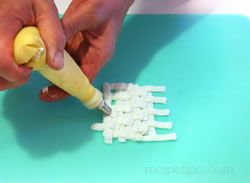
Basketweave
Basket Weave Tube: #47, or #48
Angle of Bag: 45°
- Be sure the cake has a crumb coating before starting the basketweave. This will keep the cake from showing through if there are any gaps in the basketweave. Position the tube so it is touching the surface of the cake with the flat side down. Squeeze a vertical strip down the side of the cake from the top edge to the bottom edge.
|
|
|
|
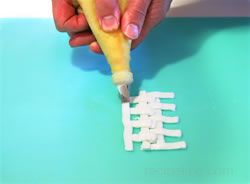
- Starting at the top, make approximately 2 inch horizontal stripes centered over the vertical stripe. Apply horizontal stripes from top to bottom, spacing them apart the same measurement as the width of the stripe. This will leave the correct amount of space needed when the next column of horizontal stripes are added.
|
|
|
|
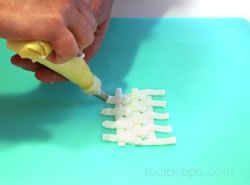
- After all the horizontal stripes are added over the first vertical stripe, add another vertical stripe to the right of the first one. Place it just over the right edge of the horizontal stripes so that they look like they are running under the second vertical stripe.
|
|
- Start adding in the next column of horizontal stripes, starting just to the right edge of the first vertical stripe, filling in the space in between each horizontal stripe in the first column. Make these horizontal stripes the same length as the stripes in the first column, running them over the second vertical stripe.
|
|
|
|
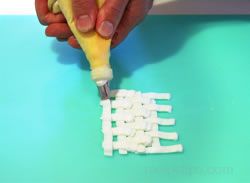
- Add in the next vertical stripe, placing it just over the right edge of the second horizontal stripes so that they look like they are running under the third vertical stripe.
|
|
- Start adding the next column of horizontal stripes, starting just to the right edge of the second vertical stripe, filling in the space in between each horizontal stripe in the second column. Make these horizontal stripes the same length as the other horizontal stripes in the first and second column, running them over the third vertical stripe.
|
|
|
|
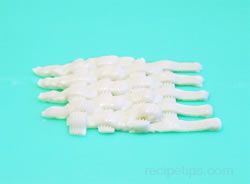
- Continue on in the same manner all the way around the entire cake until it is covered with the basketweave.
|
 |
|
- These series of vertical and horizontal stripes will create the basketweave pattern. After the basketweave is completed you may prefer to add a border around the bottom and top edge to give it a more finished appearance.
|