|
Roasting | Frying | Grilling and Broiling | Steaming | Poaching | Braising and Stewing
Sautéing | Stir-Frying | Microwaving | Checking Doneness | Carving | Tips
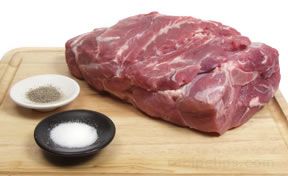
Pork today is leaner than ever before, which is a health benefit as it decreases the amount of fat in our diets, but leaner pork also affects the way in which we should cook pork. Because there is less fat to moisten and to add flavor to the meat, we have to be careful that we do not overcook pork. It was once thought that pork had to be cooked to an internal temperature of 185°F to ensure that trichina would be killed. We now know that trichina is killed at 137°F but it is still recommended to cook pork to an internal temperature of 155°F to 160°F to be safe to eat. Cooking to 185°F will produce tough, dry meat.
There are various methods that can be used to produce juicy and flavorful pork. Some methods work better than others on different cuts of meat. There are two basic methods: dry heat and moist heat. Dry heat is most often used on cuts that are naturally tender, such as bacon, chops, steaks, loin roasts, and tenderloins. Moist Heat is most often used on cuts that are less tender, such as ribs, shoulder cubes and boneless Boston butt roasts. Each method has many different techniques that can be used, which may be determined by the recipe or by the personal preference of the person doing the cooking. Shown below are the most common methods used, some of the cuts best cooked using these methods, and basic instructions on each. Keep in mind that there are many good techniques for accomplishing these cooking methods.
Roasting
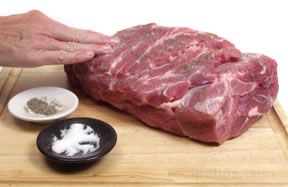
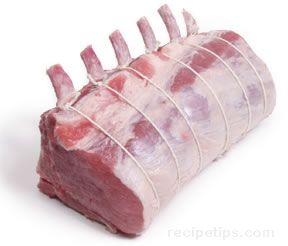
Roasting is a dry heat cooking method which is a popular choice for large tender cuts of meat. Roasting, which is basically the same method of cooking as baking, is often used when preparing cuts such as Boston butt roasts, picnic roasts, fresh ham roasts, smoked ham roasts, crown roasts, loin roasts, tenderloins, and ribs. Cuts that do not have natural marbling can benefit from barding of the meat to provide the necessary fat for flavor and to help moisten the meat while it is cooking. Marinating the meat before roasting or basting it with meat juices throughout the cooking time will also help produce tender and juicy meat. Roasting is a good method to use when preparing a meal where other dishes have to be made before serving the meal. It generally consists of a longer cooking time than other methods and needs little attention during the cooking period. This leaves time for preparing other dishes.
Roasting is accomplished by cooking the pork, uncovered in a heated oven. The meat must first have the excess fat trimmed, and if necessary or desired, it should be tied.
|
- A standing rib roast is tied to because the outside layer of meat has a tendency to separate from the inner rib-eye muscle. The rib roast is generally tied by wrapping strings around the roast, between each of the bones.
|
- Roasts that have been tied retain their shape and provide a more appealing roast when cooked.
- Most often any boneless roasts will be tied to reshape it once the bones have been removed. It is shaped into a roll that is the same thickness throughout. If the boneless roast will be stuffed, the stuffing is added, the roast is then rolled up and tied to hold the stuffing in the roast.
|
|
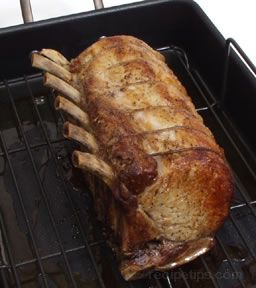 |
To cook, the roast is placed on a rack in a shallow roasting pan. The rack is not necessary but if not used, the bottom of the cut will sit in the juices and be stewed, which will not allow it to become brown and crisp on the surface like the rest of the meat. If the meat does not have any surface fat, it can be rubbed down with 1 ½ to 2 teaspoons of oil and then seasoned.
Meat is sometimes seared before roasting to seal in juices and brown the surface of the meat to add flavor. Searing can be accomplished by using several different methods. One method is to use a high temperature for a short period of time at the beginning of the roasting time and then reduce the heat for the remainder of the time. This quickly browns the outer surface and seals in the juices. Another searing method used involves frying the meat in a very hot pan until all sides have been nicely browned and then placing it in the oven to finish cooking.
If the meat is not going to be seared in the oven, the oven should be preheated to either 325°F or 350°F (450°F for pork tenderloin) and the meat should be at room temperature.
The length of time a cut of pork will have to cook will depend on the size of the cut and whether it is tied, stuffed, bone-in, or boneless. The best way to determine if the meat has cooked long enough is to check for doneness. It is important not to overcook pork because it will become tough and dry, but if under cooked it will not have the proper flavor or texture. It also needs to be cooked to the proper doneness to make it safe to eat. Shown below are signs to look for to determine doneness.
- When pricked, the juices should run clear, with no pinkish coloring.
- Cut into the meat and check to see that it is white in color. When cooked to medium doneness there may be slight traces of pink in the middle.
- To ensure doneness, check with a meat thermometer. A thermometer inserted into the thickest part of the cut should produce a temperature of 160°F for medium doneness (165°F to 170°F for well done).
For best results, the meat should be allowed to rest (a waiting period before carving) for 10 to 15 minutes. During this time the meat will continue to cook and will increase in temperature 5 to 10 degrees. Resting also allows the juices to be redistributed through the meat before it is carved. Remove strings if tied, and slice or carve to the desired thickness.
Roasting Tips:
- For a crisp surface on your roast, be sure the oven is fully preheated before placing the roast into the oven in an uncovered pan.
- To add extra flavor, rub the surface of the meat with your favorite seasonings before roasting.
- Roasting at a lower oven temperature (NEVER roast meat below 200°F) will result in meat that is more flavorful and moist. It will take longer to cook but the results will be worth the wait.
- A roast with a bone in it will cook faster than a boneless roast because the bone will conduct heat faster than the meat.
- Do not use sharp utensils that may pierce the meat when trying to turn it because piercing allows valuable juices to escape. Use other utensils, such as wooden spoons and spatulas for turning the meat.
- If cooking more than one roast, be sure that there is uniform space around them so that they will cook evenly. The roasts should not be touching and there should be enough space around them to allow air and heat to circulate.
- When placing a thermometer in the meat to check for doneness, be sure that the stem of it is not touching a bone because this can result in a false reading.
- Using the drippings from the roasted meat will provide great flavor when making a stock, gravy or sauce.
Frying
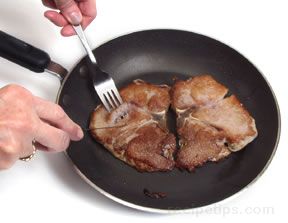
Frying is a dry heat cooking method, which is a quick and simple way of cooking pork. It can be accomplished by the use of two different methods, pan-frying and deep frying. Both methods work on the principle of using hot oil to cook the meat, producing cuts of pork with a crispy brown outside and juicy, flavorful meat inside. The meat is often coated with a thin layer of flour, bread crumbs or batter. Smaller cuts of pork are generally used for frying rather than larger cuts, such as roasts and hams. The best choice of pork cuts for frying are chops, steaks, ham slices, Canadian bacon, bacon, sausage, and ground pork.
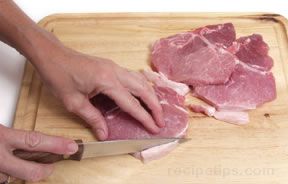
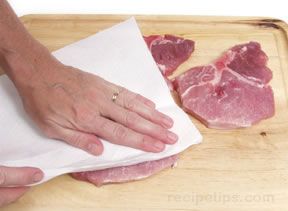
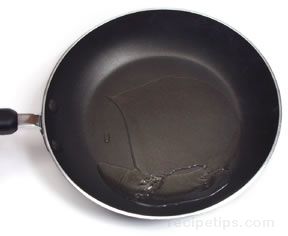
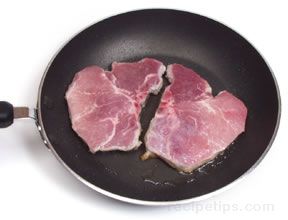
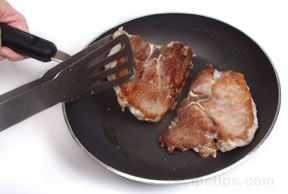
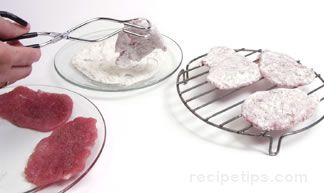
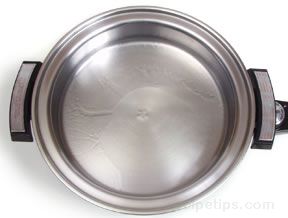
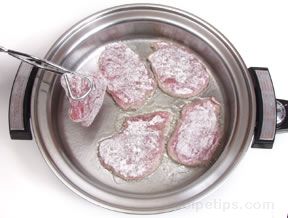
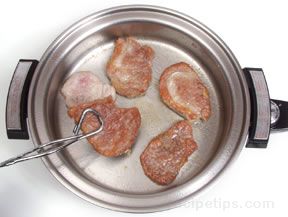
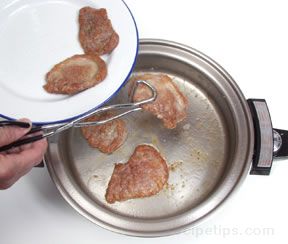
Pan-Frying: When pan-frying pork, use a heavy skillet with deep sides. The cuts of pork can be prepared by simply sprinkling with salt and pepper, marinating, or coating with your favorite seasonings to create a desired flavor. Excess fat should be trimmed and the pieces dried off with a paper towel before frying. If pieces are coated with flour or bread crumbs, they should be placed on a rack and allowed to dry. This may require 20 to 30 minutes. Allowing the pieces to dry will provide for even browning of the meat when frying.
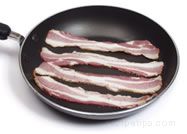
Bacon: When frying bacon, place the strips into a heavy frying pan that has not been preheated or had oil added. Fry the bacon over medium low heat. The amount of cooking time will depend on the thickness of the slices and desired doneness, but will generally vary from 7 to 12 minutes.
|
 |
- Place the bacon in an unheated pan. Cook over medium low heat.
|
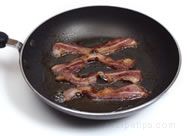
- Cook until bacon is golden brown. Turn occasionally while cooking.
|
- When cooked to the desired doneness, remove from the pan and place bacon on a paper towel to allow the grease to drain.
|
 |
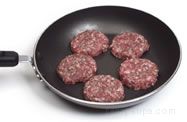
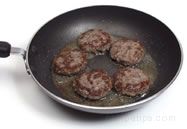
Ground Pork: Frying ground pork generally does not require the addition of oil unless the meat does not contain sufficient natural fat. Ground pork can also be made into patties and then fried. The meat is done when all the pieces are lightly browned or the patties are browned on the outside and no longer pink in the center. The excess fat should be drained off before serving.
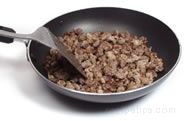 |
- Ground pork is fried over medium heat, and should be stirred and crumbled into pieces as it cooks.
|
- Ground pork is done when all the crumbled pieces lose their pinkish color and they are nicely browned.
|
|
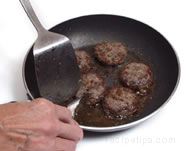
- Ground pork can also be made into patties. To fry, place them in an unheated frying pan. Patties should not be crowded in the pan to allow even cooking and browning.
|
 |
- Cook over medium heat until nicely browned on both sides.
|
- The patties are done when they are browned on the outside and no longer pink in the center.
|
 |
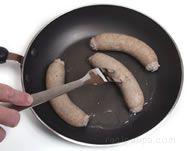
Sausages: Pork sausages can also be cooked using the pan-frying method. If they are precooked sausages, they can be placed in an unheated frying pan and cooked until nicely browned and heated to an internal temperature of 140°F.
|
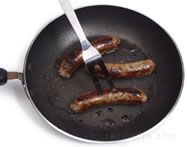 |
- Place sausages in an unheated frying pan. Add a small amount of oil or pierce the casing of the sausage to allow the sausages to release some of their own fat while they are cooking.
|
- Fry sausages on medium low heat until all sides are evenly browned. If sausages were not pierced when cooking began, pierce the casing while frying to prevent casings from splitting open.
|
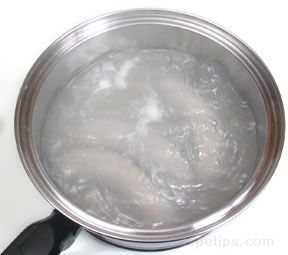
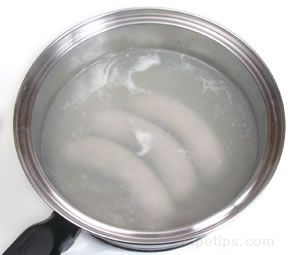
If they are fresh sausages, it is best to poach them for a few minutes before frying to ensure that they will get fully cooked without the outer layer becoming over done. Once they have been poached, fry them in the same manner as the precooked sausages. Do not pierce the sausages until after they have been poached and are in the frying pan, otherwise too much of the fat may escape while poaching, causing the sausages to be dry.
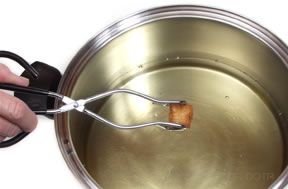
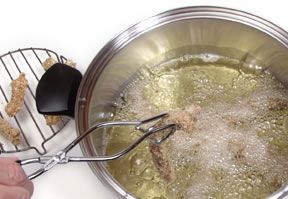
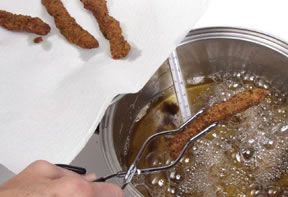
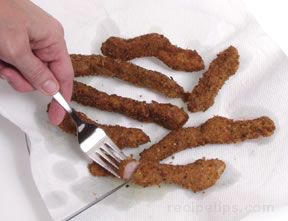
Deep Frying: When meat is deep fried, it is cooked by the transfer of heat from the oil used in deep frying and not directly from a heat source. Generally the cuts that are best for deep frying are smaller sized boneless cuts, such as cubes, strips and cutlets. Deep frying larger cuts make it more difficult to produce a cooked piece of meat that is properly done in the middle and not over done on the outside.
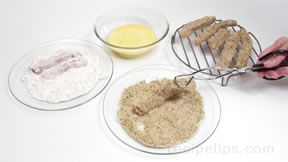
Often pieces that are deep fried have a crumb coating or a batter applied to them before frying, to add flavor and provide a crispy outside coating. When a crumb coating is used, the pieces of meat are dredged in flour, dipped in egg and then coated with bread or cracker crumbs. They are then set aside to dry for 20 to 30 minutes before frying.
|
|
|
| If coating with a batter, the pieces can be coated just before frying but be sure excess batter is allowed to drip off before placing the meat in the hot oil. |
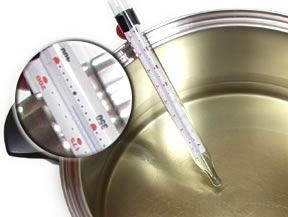
To fry, fill a deep pan or an electric deep-fat fryer with enough oil so that the cuts you are cooking can be completely submerged in the oil. Heat the oil to between 350°F and 375°F.
With either method of frying, an important part of the process is keeping the oil at the proper temperature. Once the meat is placed in the hot oil the temperature of the oil will drop. But, if the oil continues to bubble consistently, it will cook the pork properly. If the temperature of the oil becomes too hot, the outside of the pork cut burns before the inside is done. To prevent this from happening, the temperature may need to be turned down a little once the meat starts browning, but not too much or the meat will be greasy. Controlling the temperature of the oil is an important part of producing delicious fried pork cuts. Shown below are some additional tips on frying pork.
- When pan-frying, the best cuts to use are boneless. Boneless cuts will lay flat on the bottom of the pan and allow the meat to cook more evenly. When the bone is left in the chop or steak, the meat around it cooks slower. Frequently, when trying to thoroughly cook the meat around the bone, the outer edges will become over done.
- Use tongs or a spatula instead of a fork when placing pieces in the pan or when turning. Piercing meat with a fork allows juices to escape.
- To help reduce splattering when frying, dry all meat with a paper towel before placing in the hot oil and if the meat has a crumb coating, let the meat stand for 20 to 30 minutes before frying. Be sure all utensils and equipment are dry before they come in contact with the oil. Water will make the oil splatter when it is heated.
- Using canola oil provides a milder taste and it contains healthier amounts of saturated and polyunsaturated fats.
- If using butter when pan-frying, mix equal portions of butter and oil to help prevent butter from burning.
- When pan-frying chops or steaks, dredging with a light coat of flour will assist in providing a nicely browned coating on the meat and create extra brown pieces on the bottom of the pan to aid in making a flavorful sauce.
Grilling and Broiling
Grilling and broiling are basically the same type of cooking method. They both use a dry heat that quickly cooks the surface and then slowly moves to the middle of the meat. When grilled or broiled properly, the meat will have a crisp flavorful outside coating with a moist center. The main difference between the methods is being that grilling applies the heat to the bottom surface of the meat, and broiling applies heat to the top surface. Also, grilling with charcoal infuses the meat with a smoky flavor from the juices dripping on the coals. When broiling this infusion of flavor does not occur.
Grilling and broiling are ideal for cooking smaller pork cuts, such as chops, steaks, ham slices, tenderloins, ribs, ground pork patties, sausages, and kabobs. Because grilling and broiling use high heat and short cooking times, it tends to toughen the meat, so it is best to use the most tender cuts available. Lean pork cuts will benefit from marinating before they are grilled or broiled.
Chops and steaks that are going to be grilled or broiled should be a minimum of ¾ to 1 inch thick because the high heat will cook the meat quickly and it is easy to overcook thinner cuts of meat causing them to dry out. The meat must be watched carefully while cooking by either of these methods. Coating the pork with a little oil or marinating it before cooking will help keep it moist. It is important that the heat source be properly preheated so that it seals the juices into the meat quickly. The temperature at which the pork is cooked and the distance it is placed from the heat source are both important for providing tender, juicy, properly done pork.
Grilling: When grilling, the meat should be 3 to 6 inches away from the heat source and cooked at a medium heat. To check the temperature of the grill, place the palm of your hand at the cooking level (3 to 6 inches) above the heat source. If you can leave it there for 5 or 6 seconds the grill will cook at a low to medium low heat. If your hand must be pulled away after 3 seconds it is at a medium heat, and if it can only be left there for 2 seconds the temperature is hot. The thicker the cut the farther away from the heat source it should be or the heat source should be at a lower temperature to prevent the outside of the cut from burning before the inside is properly cooked. You will also have to decide whether you will use direct or indirect heat during the grilling time. Depending on the cut, you may use both. A cut of pork may require direct heat to seal the outside and indirect to allow the cut to cook thoroughly to the center.
Cooking with indirect heat occurs when you use an area of the grill that is not directly over the heat source. Using indirect heat slows the cooking process down, which allows the center of the cut to cook thoroughly without burning the outside. On charcoal grills, coals are pushed to one side of the grill or banked into a ring around the outer edges. On gas grills, the side of the burner, which is below the area where the food will be placed, is turned off after the grill is preheated. This will provide an area on the grill that will be a low heat source. The meat is placed over the area in which there are no coals or over the burner that is turned off on a gas grill. The meat is generally cooked with the grill hood closed. Indirect heat is good for cooking larger cuts of meat, such as roasts, ribs and ham.
Cooking with direct heat occurs when you cook the meat directly over the heat source. The meat is cooked quickly over medium or high heat coals or over burners set to medium or high heat on a gas grill. Thin chops, under ¾ inch thick, should be cooked over high heat for only 2 or 3 minutes per side and watched carefully to prevent overcooking. The meat is generally cooked with the hood down and is turned once during the cooking process. Direct heat is good for cooking smaller cuts of pork, such as chops, steaks, ham slices, ground patties, and precooked sausages. Fresh sausages should be poached to precook before grilling or they should be grilled using indirect heat.
To help prevent the meat from sticking to the grate on which it will be placed, brush the grate with oil and preheat the grill before placing the meat on the grate. While the meat is cooking, be sure to watch the pieces carefully, turning when one side is nicely browned. It is generally suggested to turn the cuts only once. Larger cuts that are cooked over indirect heat do not normally need to be turned. Also, do not overcrowd the pieces so if flare-ups occur from the drippings there is room to move pieces out of the way of the flames.
Broiling: The benefit from the infusion of smoked flavoring that occurs when grilling does not occur when broiling pork. It relies on the caramelizing of the surface, or the addition of seasoning to enhance the flavor. Flavor can be added by the use of a mixture of herbs, marinades or basting sauces.
As with grilling, the distance from the heat source is important for proper cooking. You want to produce a pork cut that has a golden brown surface and a juicy, tender inside that is thoroughly cooked but not overcooked. To check for proper cooking distance for broiling, place a cut of pork on the broiler rack and place the rack on the broiler pan. Set the broiler pan in the oven and measure the distance from the heat source in the oven to the top of the meat. It should be 3 to 6 inches away, depending on the thickness of the cut. Thinner cuts, under 1 ½ inches, should be approximately 3 to 4 inches away and thicker cuts, over 1 ½ inches, should be 4 to 5 inches away. Pork cuts that benefit from slower cooking, such as ribs, should be placed 5 or 6 inches away from the heat source.
After determining the proper broiling distance, adjust oven racks accordingly. Remove the broiler pan from the oven and remove the meat. Place the empty broiler pan and rack back in the oven and preheat it for 9 or 10 minutes. Once preheated, the meat should be placed on the preheated broiler rack and then placed in the oven to broil. As with grilling, it is necessary to watch the meat carefully as it cooks, making sure it is not cooking too fast and if it does, adjust the heat accordingly. When one side is nicely browned, turn it to the other side to finish cooking. Do not line the broiler rack with aluminum foil because it will prevent the drippings from falling into the pan below and then flare-ups may occur.
The length of time a cut of pork should be grilled or broiled depends on the size and thickness of the cut and whether it is bone-in, or boneless. The best way to determine if the cut has cooked long enough is to check for doneness. It is important not to overcook pork or the result will be a tough and dry cut of meat, but if under cooked it will not have the proper flavor or texture. It also needs to be cooked to the proper doneness to make it safe to eat. Shown below are signs to look for to determine doneness.
- Apply pressure to the cut by pressing it with the flat side of a knife. If the cut feels slightly firm it is done but if it is soft and springy, it needs to be cooked longer.
- Cut into the meat and check meat to see that it is opaque in color. When cooked to medium doneness there may be slight traces of pink in the middle.
- To ensure doneness, check with a meat thermometer. A thermometer inserted into the thickest part of the cut should produce a temperature of 160°F for medium doneness (165°F to 170°F for well done).
For best results, the meat should be removed from the heat source when its internal temperature reaches 150°F to 155°F and then allowed to rest (a waiting period before carving) for 10 to 15 minutes. Smaller, thinner cuts only require a resting time of 3 to 5 minutes. During this time the meat will continue to cook and will reach the 160°F. Resting also allows the juices to be distributed through the meat.
Grilling and broiling tips:
- Preheat grill or broiler to the proper temperature to ensure the meat surface is seared quickly to seal in the juices.
- To prevent the meat from sticking, use clean racks and coat them with vegetable oil or a nonstick vegetable oil spray.
- To keep chops, steaks and ham slices flat while grilling and broiling, clip the fat and rind around the edges at 1 to 1 ½ inch intervals.
- When grilling, aromatic woods such as hickory, mesquite, apple, or cherry can be added to the preheated coals to give the meat a distinctive flavor.
- Do not use a fork to turn the pork cuts as they cook. The piercing causes juices to escape. Use tongs to turn.
- Leave an area in the charcoal grill without coals so that if a flare up occurs or some of the meat is cooking too fast, you can move the meat to this cooler area. On a gas grill, leave one burner on low.
Steaming
Steaming is a moist heat method of cooking. It results in tender and moist meat through the use of steam. When steaming meat, minimum shrinkage occurs, and it is one of the most healthy methods of cooking because no additional fat is used. Although water is used in this process as in boiling, the meat retains more of the nutrients because it does not sit directly in the water, preventing the nutrients from being leached out of the meat. Pork can be steamed with a traditional steamer that fits on top of a sauce pan or by using a rack that sits in the bottom of a tightly covered pan that allows the food to be suspended above the water. Steaming can also be accomplished by the use of an electric steamer or a bamboo steamer.
Steaming is very popular in Asian cooking and most often the pork is ground, diced, cubed, or sliced before steaming. Ribs are also steamed. Many times other ingredients are mixed with the meat or poured over it and they are then steamed. Ground pork and diced pork are often mixed with other ingredients and formed into balls or loafs before steaming.
When steaming pork with a traditional steamer, fill the steamer pot half full of water and bring to a full boil using a high heat. Depending on the recipe, herbs or other flavorings can be added to the water to be imparted into the meat during steaming. Place a single layer of meat in the steamer and place the steamer in the pot over the boiling water, making sure no water is coming up through the holes in the steamer. Cover and cook for the amount of time indicated on the recipe being used. If using a rack or tray in the bottom of a large pot instead of a traditional steamer, add at least one inch of water to the pot and bring to a boil. Place the pork in a heatproof dish and place the dish on the rack in the pot of boiling water. Be sure water is not boiling up over the heatproof dish. Cover with a tight lid and cook for the appropriate time. Check for doneness and if thoroughly cooked, remove meat from steamer and serve as directed on the recipe.
Steaming Tips:
- Marinate cubed pork, sliced pork and ribs before steaming to give them a distinctive flavor.
- Impart flavor into the meat by adding ingredients to the steaming water, such as onions, carrots, celery, and fresh gingerroot.
- Other ingredients, such as vegetables, can be steamed with the meat but be sure to not overcrowd.
- For efficient use of time when preparing recipes that call for pork and rice, steam pork over rice as it is cooking.
- Avoid removing the cover to the pot during the cooking process. This will allow heat and steam to escape, resulting in extended cooking times.
Poaching
Poaching is a moist heat method of cooking. It is also a healthy method of cooking pork because no fat is added during the cooking process. It retains the flavor, tenderness and moisture through a gentle simmering process. Poaching is a good method to use when cooking pork cuts that are naturally less tender, such as shoulder cuts, leg/ham cuts and pork shanks. Cooking by this method provides a very flavorful cut of pork because it draws additional flavor from the meat itself and the bones as it cooks. Additional flavor can be imparted into the meat by adding flavoring or seasoning, such as bay leaves, cloves, allspice berries and cinnamon stick, to the poaching water.
The poached pork can be eaten as part of a main meal or used as an ingredient for sandwiches and other dishes. The liquid in which the meat is poached can be used as a broth or reduced and used in making a sauce to be served with the meat. It can also be used to cook other foods to be served with the pork, such as dumplings or vegetables.
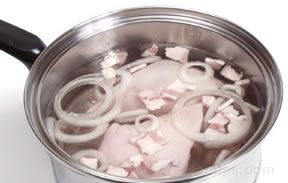
When poaching, do not use a pan that is too large. This will help avoid using of too much water, which would result in a liquid that has a diluted flavor. The pan should be just large enough so that the liquid can move freely around the cut of pork. The liquid used for poaching can be plain water, water seasoned with herbs and spices, stock, or water with the addition of ingredients used as flavoring agents, such as onion, other vegetables, fruits, fruit juices or wine.
|
|
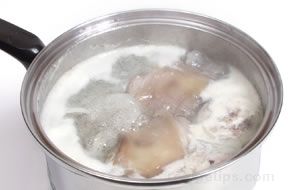
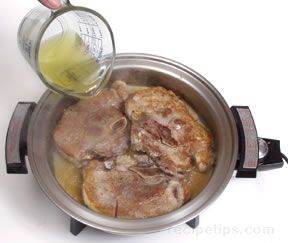
- To poach, place the meat in a saucepan or Dutch oven in which the meat will fit fairly tightly, and then completely cover it with cold liquid. Add flavoring agents if desired.
|
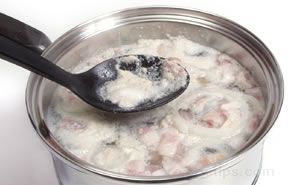 |
- Slowly bring liquid to a boil, skimming the foam that forms on top.
|
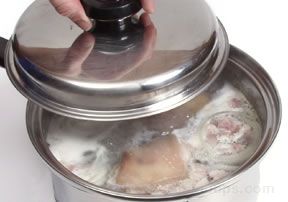
- Bring the liquid to a full boil.
|
 |
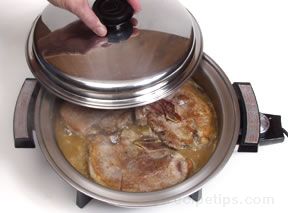
- As soon as it reaches a boil, reduce the heat to low so that the liquid is only gently simmering. Cover and let simmer until the meat is done.
|
 |
|
|
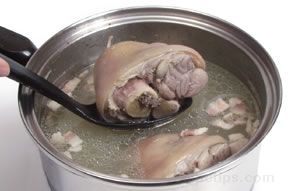
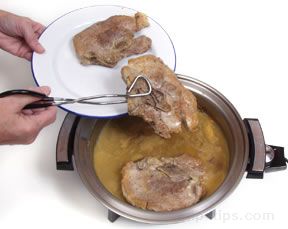
- At the end of the cooking time, remove a piece of the meat to check for doneness.
|
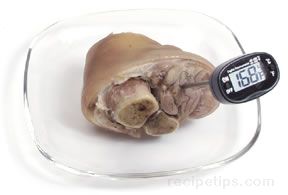 |
- Check for doneness with the use of a meat thermometer. The thermometer should show an internal temperature between 155°F and 165°F. Doneness can also be checked by piercing the thickest areas of meat and check to see that the juices run clear.
|
You can also check doneness by making a small slit in the meat, which if done, should be opaque with a slight hint of pink in the middle. If done, remove from the heat and take the meat from the pan. Cover the meat loosely and let it sit at room temperature to rest for approximately 15 minutes before cutting. After allowing the meat to rest, slice and serve or if it is to be added to another food dish, cool and store in the refrigerator until adding to the other dish.
When poaching is used as the cooking method, it is important to just bring the liquid to a boil and then lower the temperature so that the liquid is simmering very gently. The liquid should barely be moving with only a few bubbles breaking the surface occasionally, not bubbling as it does when boiling. Vigorous boiling will toughen the meat.
Poaching is a good method to use to precook fresh sausages before finishing the cooking process with another method, such as frying, grilling or broiling.
|
|
- To poach fresh sausage, bring water in a sauce pan to a boil and then add the uncooked sausages.
|
|
- Reduce the heat to a gentle simmer and cover. Cook for approximately 10 minutes and then finish cooking and browning them by frying, grilling or broiling.
|
Braising and Stewing
Braising and stewing are very similar moist heat methods of cooking. They both use the same process of searing to enhance color and flavor, and slow cooking in liquid to produce tender, moist meat. Once the meat is browned it's simmered in a covered pan, either on top of the stove or in the oven. The liquid used in this process is diffused through the meat as it cooks, which works to loosen and tenderize the fibers of the meat. Braising and stewing work well for some of the tougher cuts from the shoulder and leg/ham, but is also used for cuts such as ribs and chops.
Braising and stewing are almost identical methods except stewing involves the use of more liquid and the ingredients, including the meat, are cut into smaller size pieces. Braising generally involves smaller cuts such as ribs, steaks, chops, and sausage. When the same process is used with larger cuts, such as roasts, it is sometimes referred to as pot-roasting. It is best to not use lean cuts, such as tenderloins, because they have a tendency to become tough from the longer cooking time.
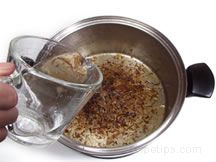
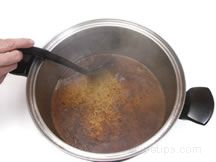
It is beneficial to use the same pan to sear the meat and to simmer the meat so that any pieces remaining in the bottom of the pan will help to add flavor when the sauce is made. Select a heavy sauté or frying pan that is both suitable for the stove top and the oven. The pan should have a fairly tight fitting lid to prevent moisture from escaping. If you use a different pan to finish the cooking process than was used for searing, be sure to deglaze the bottom of the searing pan and use as part of the stewing or braising liquid. Deglaze by adding a little liquid to the bottom of the searing pan and heating to a boil, scraping the bottom to loosen all the browned pieces. Add this deglazing mixture to the pan that will be used to finish cooking the meat. The searing of the meat is not absolutely essential to the cooking process, but it does help to provide for a deeper colored sauce.
 |
 |
Even though you are working with tougher cuts of meat, it is not necessary to marinate the cuts before braising or stewing, unless the cut is extremely tough. Generally slow cooking the meat in the liquids that are added will provide very tender results. Extra flavor can be achieved by using broth, wine, sherry, beer, citrus juices, or vegetable juices as the liquid or part of the liquid that is added for simmering. Other ingredients that can be added to enhance the flavor are herbs and spices, fresh or dried fruit, black olives, walnuts, and mushrooms.
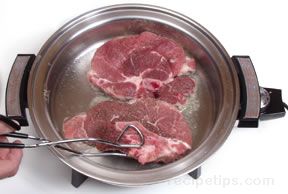
Stewing: To begin stewing, trim excess fat from the pork cut and thoroughly dry the meat off with a paper towel to ensure even browning. The meat can be lightly coated with flour before searing to aid in browning the meat, but it is not essential.
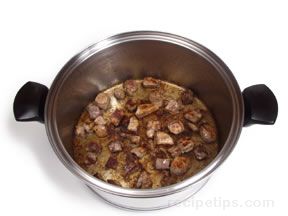
|
- Heat enough oil, or an oil and butter mixture to sufficiently cover the bottom of a heavy pan or Dutch oven, and then place the meat in the heated pan. To ensure even browning, do not overcrowd the pieces. Cook over a medium high heat until pieces are nicely browned on all sides.
|
|
|
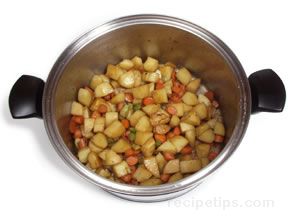
- Once browned, remove pieces from the pan using tongs or two wooden spoons and then quickly sear vegetables and any other desired ingredients in the same pan. Any vegetables that are not suitable for a long cooking time should not be added until the last 20 to 40 minutes of the cooking process.
|
|
|
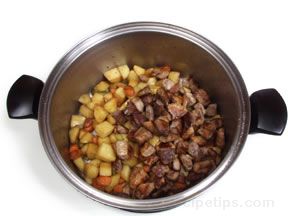
- After searing, discard excess grease and place the meat back in the pan.
|

|
- Add required liquid and flavorings. Heat until the liquid is just coming to a boil and then cover and reduce heat to a gentle simmer, cooking until the meat is done.
|
|
To prevent the meat from becoming dry and stringy, keep the liquid at a simmer through the remaining cooking time and do not allow it to boil. The meat should be checked occasionally throughout the cooking period to see if the liquids need replenishing. |
|
When done, the pork and other ingredients should be removed from the pan so that a pan sauce or gravy can be made. When stewing, thickening of the liquid may or may not be required, depending on the recipe. The stewed meat and other ingredients are added back in with the sauce or gravy and all are served as one dish. |
|
 |
When the meat and other ingredients are ready to be stewed, the covered pan can also be placed in a low temperature oven (275°F to 325°F) to finish cooking, rather than on top of the stove.
If a different pan will be used to finish cooking the stew than what was used to sear the meat and vegetables, the searing pan should be deglazed and the liquid produced from deglazing should be added to the pan that will be used to complete the stew.
Braising: To begin braising, trim excess fat from the pork cut and thoroughly dry the meat off with a paper towel to ensure even browning. The meat can be lightly coated with flour before searing to aid in browning the meat, but it is not essential.
|
- Heat enough oil, or an oil and butter mixture to sufficiently cover the bottom of a heavy pan. Place the meat in the heated pan and sear over medium high heat until pieces are nicely browned on both sides. To ensure even browning, do not overcrowd the pieces.
|
|
|
- Once browned, discard any excess grease and then add the braising liquid.
|
|
|
- Bring the liquid to a boil, and then reduce the heat to low. Cover and continue to cook at a gentle simmer.
|
|
- Cook until meat is tender. The length of time will depend on the type and thickness of the cut. When done, remove from the pan and boil juices to reduce for a sauce to accompany the meat when serving.
|
|
To prevent the meat from becoming dry and stringy, keep the liquid at a simmer through the braisng time and do not allow it to boil. The meat should be checked occasionally throughout the cooking period to see if the liquids need replenishing. |
Sautéing
Sautéing is a dry heat cooking method that quickly cooks the pork using a little oil and high heat. The types of pork best suited for sautéing are the more tender lean cuts, such as loin chops, tenderloin medallions, cutlets, and ground patties. They are often served with a sauce made from the pan drippings. The oil used must be able to withstand high heat without burning. Olive oil, vegetable oil, corn oil, canola oil, and soy oil are commonly used oils when sautéing. Butter can also be used but it should be used in combination with oil so that the butter does not burn when exposed to the high heat used for sautéing.
Sautéing and the searing process, which is used in browning the meat during the beginning steps of braising, are basically the same method of cooking, except that searing browns the meat and seals in its juices, but does not completely cook the meat. Sautéing browns the meat and seals in the juices but it also thoroughly cooks the meat. Seared pork requires the use of another cooking method, such as braising or roasting, to finish the cooking process. When sautéing, the meat is generally thinner and smaller in size, which allows it to completely cook during the sautéing process.
To sauté, use a medium-high heat in order to preheat the pan to condition it before adding oil. Add only enough oil to lightly coat the bottom of the pan to prevent food from sticking. A nonstick pan or a well-seasoned pan may not require as much oil. Be sure the pan and cooking oil are at the proper temperature before adding the meat so that it will begin to cook immediately once it is placed in the pan. The meat should be cut into small pieces that are ½ inch or less in thickness and fairly uniform in size. Season the cuts with salt, pepper and any other required herbs or rubs. The meat should be seasoned before cooking to enhance its flavor as it cooks.
Stir-Frying
Stir-frying, like sautéing, is a dry heat cooking method that quickly cooks the pork in a small amount of oil, using high heat. The difference between the two methods is that sautéing cooks pieces of meat that are about the size of a serving portion and stir-frying involves cooking smaller pieces of food that have been cut into small strips or cubes all similar in size. Stir-frying generally includes other ingredients that are cooked together with the meat. The different foods that are cooked when stir-frying usually require cooking at different intervals. They are stir-fried according to how quickly the foods cook. The process starts by cooking the pork and the slowest cooking vegetables first, such as carrots, cauliflower and onions. Vegetables such as broccoli, green beans, peppers, sugar snap peas and snow peas are added several minutes after the first ingredients and then the fast cooking vegetables such as mushrooms, celery, peas, and scallions are added last. Any fresh herbs should be added at the very end of the cooking time. Fruit is also used in many stir-fry recipes and should be added as directed by the recipe.
Stir-frying is a fast paced cooking method so it is important that everything is ready before beginning the process. Oil, pork, vegetables, seasonings and sauce ingredients should be premeasured and within easy reaching distance. The pan used for stir-frying should be a heavy skillet with deep sides to allow the ingredients to be stirred and tossed without spilling over the edges of the pan while cooking. A wok, which has deep tapered sides that make it easy to stir and toss the ingredients as they are cooking, is a traditional pan used for stir-frying. Although a wok works well it is not a necessity and a nonstick deep skillet also works very well.
Before starting the cooking process be sure the pork and all other ingredients are cut, measured and within easy reach. Remove excess moisture from the pork by patting dry with a paper towel. Start the cooking process by heating the oil in the pan over a medium-high heat, trying to coat the entire surface, bottom and sides, with the oil. Use only enough oil to prevent food from sticking, approximately 1 ½ to 2 tablespoons of oil per pound of ingredients being cooked. Vegetable, corn and peanut oil all work well for stir-frying. When the pan is hot (a piece of food should sizzle as soon as it touches the pan), add the meat and the other longer cooking ingredients required, making sure all ingredients are exposed to the oil and the hottest area of the pan. Cook uncovered over medium-high heat for several minutes, constantly stirring and tossing the ingredients. Continue to add ingredients at the proper stages as requested by the recipe being used. Continue to cook on medium-high heat until the pork is completely cooked and other ingredients are tender but still have a crunchy texture. The food will cook quickly so it is important to add the ingredients at the proper times, being careful not to overcook, which would result in tough, dry meat. If desired, push cooked ingredients to the side of the pan to make a sauce from the pan drippings. Then stir the cooked ingredients back into the sauce to mix them together and serve immediately.
Stir-fry Tips:
- Cut ingredients into small even sized pieces. Using the same size pieces will assist in a more evenly quick cooking of all ingredients. For your convenience, you can purchase the vegetables precut for stir-frying but be prepared to pay more for it.
- To make the cutting of pork into thin strips easier, place the meat in the freezer for about ¾ to 1 hour to firm it up or if the pork was frozen, cut it into the thin strips before it is completely thawed.
- After cutting pork into thin strips, be sure to properly clean the work area. Wash cutting boards in hot soapy water after each use and use a mild bleach solution periodically.
- When adding ingredients to cook, do not add too much at one time because overcrowding will cause steaming to occur, which will prevent the food from frying properly.
- Use metal or wood utensils for stirring and tossing ingredients while cooking and avoid using plastic because it might melt when exposed to the high temperatures.
Microwaving
Microwaving is a quick and convenient method of cooking pork. When cooked properly in the microwave, the results will be a juicy, tender cut of pork. Although the flavor of the meat will not be enhanced as it is with other cooking methods, such as frying, grilling, sautéing, stir-frying and roasting, pork has the ability to absorb flavors, so its taste can be enhanced by the use of many herbs, spices and other flavorings. Such flavorings as allspice berries, juniper berries, chili powder, ginger, paprika, rosemary, thyme, coriander, brown sugar, and maple syrup work well with pork. It can also be cooked with fruit, in wine or in fruit juices to infuse a unique flavor.
When microwaving pork it is best to follow the manufacturer's instruction manual because different varieties of microwaves vary in cooking times, depending on their size and wattage. Smaller boneless cuts of pork cook better in the microwave than larger cuts. If microwaving larger cuts, the bones should be removed because they can block the meat around them from being cooked thoroughly. Pork should be microwaved at a medium to low setting, with the larger cuts being cooked at a lower setting than the smaller cuts to allow the heat to penetrate into the center of the cut without overcooking the outer layers. Pork should not be cooked on high settings in the microwave because it causes the meat to become tough.
Place smaller pork cuts in a microwave safe dish and cover as instructed by the recipe. Cuts that are not uniform in size and shape should be arranged so that the larger, denser pieces are placed around the outer edge while placing the smaller pieces in the middle. Part way through the cooking time the pieces should be rearranged by turning and exchanging positions of pieces that are cooking faster with those that are cooking more slowly. This will assist in getting most of the pieces done at approximately the same time. Larger cuts, such as roasts will benefit from being placed in a cooking bag. The roast should be placed in the bag and then the bag should be placed in an uncovered microwave safe dish.
When cooking, follow the times stated in the recipe as closely as possible and make proper adjustments according to any variance in microwave sizes. The pork should be first cooked for the least amount of time suggested in a recipe because you can always cook it for additional time if not done, but you want to be sure that it does not overcook. It is important to observe the standing times stated in the recipes before testing for doneness because the meat will continue to cook through conduction after it is taken out of the microwave. After the proper standing time, test the meat for doneness with a meat thermometer in several locations to ensure that it has been cooked evenly throughout. Its final temperature should be 160°F. Pork should never be partially cooked in the microwave unless it is going to be transferred immediately to another heat source to finish cooking.
Checking Doneness
Checking doneness is accomplished in basically the same manner regardless of the cooking method you are using. While some methods are more accurate than others, there are certain cuts for which some methods will not be suitable. Shown below are the most common methods for checking doneness.
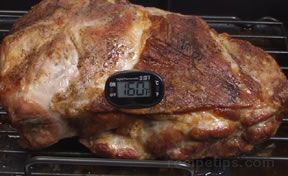
Thermometer: Using a thermometer is the most accurate method for testing doneness. A regular meat thermometer is inserted before placing the meat in the oven or other heat sources and it remains there throughout the cooking time. An instant read thermometer is used to check for the proper temperature once the meat has been cooked. The meat is removed from the heat source and the instant read thermometer is inserted into the thickest part of the meat to provide a temperature reading in approximately 15 seconds.
|
|
|
When checking doneness, remove the meat from the heat source as it reaches an internal temperature that is 5 to 10 degrees lower than the desired doneness temperature for that cut. The meat should stand for 10 to 15 minutes before serving or carving. During the standing time it will continue to cook and the temperature should rise to the appropriate internal temperature. |
Removing the meat when it has reached a temperature that is 5 to 10 degrees lower than the desired temperature and allowing the meat to rest (the 10 to 15 minute standing time) will ensure that the meat will not be overcooked. Smaller cuts such as chops, steaks and cutlets can be left to stand for a shorter period of time, approximately 3 to 5 minutes.
A meat thermometer will not work for checking doneness of some pork cuts. Cuts such as bacon, ribs, pork patties, cubes, and strips would not be able to have doneness checked by the use of a thermometer. Other methods of checking doneness would have to be used. Thinner cuts of chops and steaks are also difficult to check with a thermometer, but if thick enough, it can be inserted from the side into the middle of the chop to get an internal reading.
| Note: When either type of thermometer is inserted into the meat, it must not be touching a bone or it will result in an inaccurate reading. |
| Internal Temperatures for Proper Doneness |
| Roasts - Bone in or boneless |
160°F |
| Tenderloin |
160°F |
| Fresh Hams |
160° - 170°F |
| Whole Leg or Half Leg |
160° - 170°F |
| Smoked Whole or Half Ham |
160°F |
| Smoked and Fully Cooked Ham |
130° - 140°F |
| Chops and Steaks - 1 inch or thicker |
145° - 150°F |
|
Note: If the proper temperature is not reached the meat should be returned to the heat source for further cooking. |
Piercing: Another method for testing doneness is to prick the cut of pork with a fork or the tip of a knife and check to see if the juices that escape run clear. If the juices are clear or have just a very faint pink tint, the meat is done. If the juices are not clear, the meat should be returned to the heat source for further cooking.
Meats that are being cooked by the use of a long braising or stewing method must be tested for doneness by piercing the meat with a skewer or long knife. The object should slide in and out without any resistance when the meat is properly done. A meat thermometer cannot be used to test for doneness because when using these long cooking methods, the meat will reach its maximum cooking temperature long before it reaches the tenderness you are trying to achieve.
Visual: The visual method of determining doneness works best on smaller cuts of pork such as thin chops, steaks, cutlets, and medallions.
|
|
|
Make a small slit with the tip of a knife into the thickest or center part of the cut and then pry the slit open. The meat will be opaque and have a slight pinkish tint if it is properly done to provide a juicy and tender piece. If the meat shows any signs of not being done, it should be returned to the heat source for further cooking. |
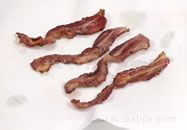
Some smaller cuts of pork can only be checked for doneness by visually looking at them while they are being cooked. Cuts such as sliced bacon and pork strips are browned to desired doneness, but suggested cooking times should be followed to avoid overcooking. Ground pork should be cooked until it no longer shows any pink coloring.
Touch: Cuts such as chops, steaks, ham slices and medallions can be tested for doneness by touch. When pressed with tongs or a fingertip, the cut should feel firm but easily spring back to shape. Some juices may be released, which should be clear or have only a faint tint of pink coloring. Meat that is not done will feel soft and will release darker pink juices. A well-done cut will feel fairly firm when touched and will release little or no juices.
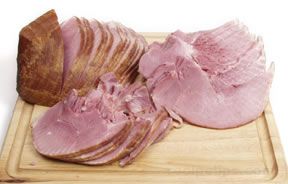
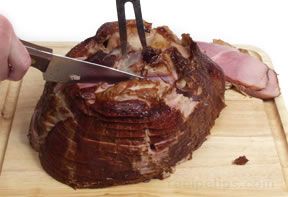
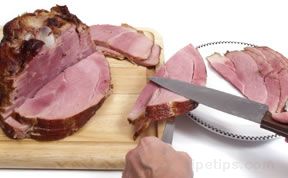
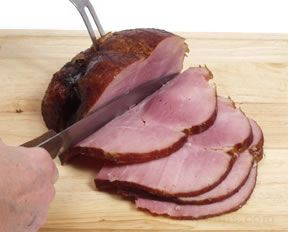
Carving
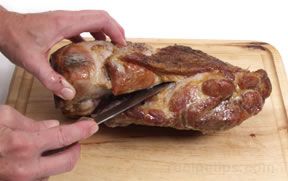
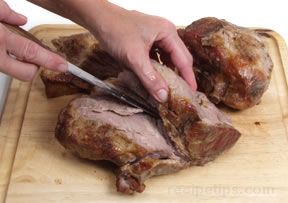
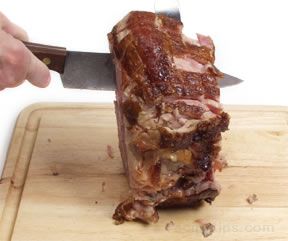
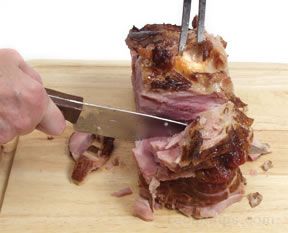
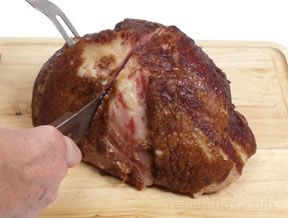
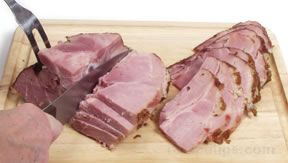
The larger pork cuts will need to be carved into smaller pieces for serving. Before carving, the meat should stand for 10 to 15 minutes after it is removed from the heat source. This allows the juices to be redistributed throughout the meat, resulting in a firmer, juicier and easier to carve cut of pork. Choose a carving knife that is long enough to cut the entire length of the cut. It is important that the knife be extremely sharp so that it will allow thin slices to be carved and make carving easier. Shown below are the steps to carving several different cuts.
Pork Roasts:
|
- Place the roast on a cutting board and determining where the different muscle sections and their grain direction are located.
|
- Separate each muscle section from the roast using a sharp knife.
|
|

|
- Slice each muscle section by holding it steady with a carving fork or hold in place by hand, making sure your fingers are curved away from the cutting edge. Cut slices from each section across the grain into desired thickness. Place the slices on a platter and serve as soon as the entire roast has been carved.
|
Rolled Roasts:
- Place the roast with the flat meat side down so that it is standing vertically on a cutting board.
- Hold roast steady with a carving fork, start at the top and make horizontal cuts across the grain of the roast, cutting slices ¼ to 3/8 inch thick. Remove the strings from the roasts as you come to them when you are carving. If the roast is too tall to slice horizontally, place it with the string side down on the board and cut vertically across the grain of the roast.
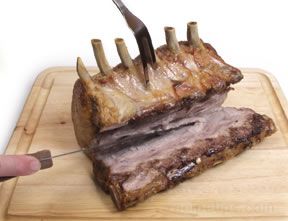
Pork Loin Rib Roasts:
|
- Place the roast on a cutting board and remove the backbone using a sharp knife. Cut off the least amount of meat possible with the backbone, leaving as much meat as you can on the roast.
|
- Place the roast up on the end where the backbone was trimmed off. Hold the roast steady with a carving fork and then cut down between the rib bones with the knife running along one side of the bone. This will result in chop size pieces, each containing a rib bone.
|
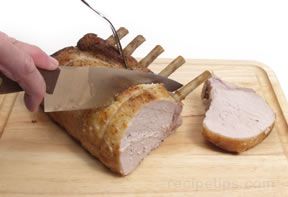
|
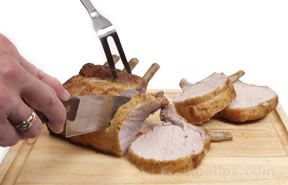
|
- For smaller serving size pieces, cut close, along each side of the rib bones. This will result in thinner slices where only every other slice contains a bone.
|
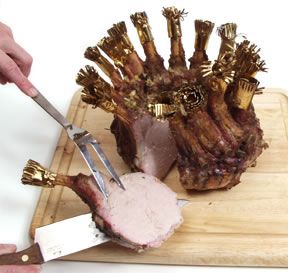
Crown Roasts:
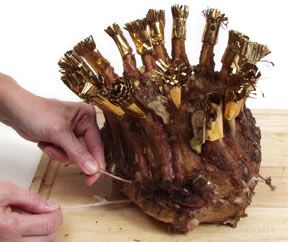
|
- Place the roast on a cutting board and remove the strings used for holding the roast together during the roasting period.
|
- Hold the roast in place with a carving fork and using a sharp knife, slice down between the ribs bones.
|
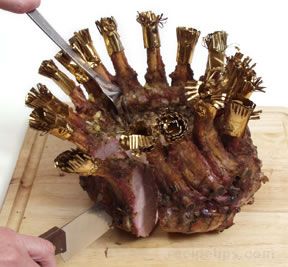 |
|
- Remove each rib with meat attached and place on a meat platter.
|
- OR, if carving at the table, place on the carving platter after removing the string. At the table, use a meat fork to steady the roast and slice down between the ribs to remove a rib with meat and place one on each individual's dinner plate.
|
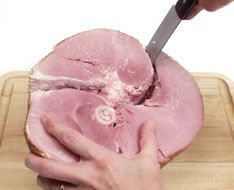
Whole Ham:
- Place the ham on a cutting board and trim off 3 or 4 slices, parallel to its length, from the thin side of the ham. Turn the ham so that it rests on the flat side created from trimming off the slices.
- Hold firmly with a carving fork and starting at the shank end, cut uniform slices across the ham, down to the bone.
- After cutting the slices, cut parallel along the bone to release the slices. Place slices on a serving platter.
- Turn the ham and continue to carve slices in the same manner.
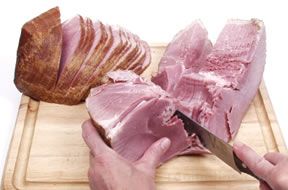
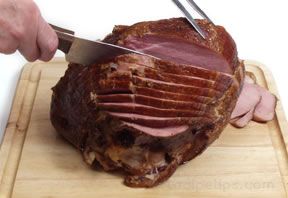
Spiral Sliced Ham:
Special spiral sliced hams provide slices that are uniform in thickness. Three basic cuts are generally all that are required to cut the slices from the bone.
|
- Facing the cut side of the ham, locate the natural muscle lines in the ham. Cut along the first line down almost to the bone. Cut around the bone until the natural muscle line starts to curve upwards. Continue to follow the line all the way up until the knife comes back out the outside edge. This will provide the first section of slices.
|
- Continue to cut along the next natural muscle line to provide the next section of slices.
|
 |
|
- The remaining section will need to be cut along the bone to release it, providing the last section of slices.
|
- The three sliced sections can then be cut into smaller serving sizes if desired.
|
 |
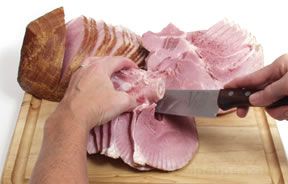
Ham - Shank Half

|
- Place the ham on a cutting board and trim off 2 or 3 thin slices from one side of the ham. Turn the ham so that it rests on the flattened side created from trimming off the slices. This allows the ham to sit more steady while carving.
|
|
- Starting at the narrow end of the ham, begin making 1/4 inch slices (or desired thickness) in the ham. Slicing down to the bone.
|
- After all slices are cut on the first side, place the ham on its flat end. Trim slices off by cutting down through the ham, close to the bone.
|
 |
|
- After cutting down through all the slices, place them neatly on a serving platter.
|
- Flatten one of the remaining uncut sides of the ham by cutting 2 or 3 thin slices off. Stand the ham up on the flattened side and start slicing the uncut side, beginning at the narrow end of the ham.
|
 |
- Set the ham on its flat end and trim down close to the bone to release the slices from the ham. Place slices neatly on the platter with the other ham slices. Continue to trim the two remaining sides of the ham in the same manner.
|
 |
Butt Half - Ham
|
- Lay the flat end of the ham on the cutting board. Cut down through the ham as close to the bone as possible, cutting off the largest section of boneless meat from the ham. Set the boneless section aside to be sliced after slicing the remaining section of the ham.
|
|
- With the flat end still on the cutting board, cut 1/4 inch slices (or desired thickness) parallel to the flat end of the ham. Start slicing at the top and continue down until all slices are cut. Release the slices from the ham by cutting down through the ham, close to the bone. Place the slices neatly on a platter. Slice the other side of the remaining ham in the same manner.
|
 |
- After cutting the slices from the bone-in section of the butt ham, slice the boneless section into the desired thickness. The slices from this section may be fairly large so you may want to cut them in half to produce smaller slices for serving.
|
Tips
Tenderness Tips
- Avoid freezing whenever possible to eliminate moisture loss that occurs during thawing. The moisture loss in thawing results in less tender meat.
- Keep pork from drying out in the refrigerator by keeping it tightly wrapped. If the meat dries out it will become tough.
- Cook to the proper temperature but do not overcook or the meat will become dry and tough.
- Let meat rest for 10 to 15 minutes before carving to allow juices to be distributed throughout the flesh.
- Cutting meat across the grain will produce slices with shorter fibers, resulting in more tender pieces.
Light Tips
- When purchasing pork, look for cuts with lower fat content, such as cuts from the loin or leg.
- Before cooking, trim visible fat to reduce fat content almost in half.
- Cook pork using a low fat cooking method, such as roasting, grilling, broiling, steaming, poaching, braising, or stewing.
- Prepare pork with herbs and spices to enhance the flavor rather than using sauces.
- To reduce the amount of fat used when frying, stir-frying, sautéing, or searing pork in a pan, use a nonstick skillet which requires less added fat, or use a nonstick skillet with a fat free nonstick cooking spray.
- If using the drippings from roasted meat to make sauces and soups, cool in the refrigerator to cause the fat to rise to the surface. The fat will solidify, making it easy to remove and discard.
- After cooking ground pork, place in a strainer and rinse under hot water to remove excess fat.
- After stewed meat is finished cooking, let cool and then chill. Once the stew is chilled the fat will rise to the top and can be easily scraped off to be discarded rather than remaining in the stew. Leaving the stew sit overnight in the refrigerator will also enhance its flavor.
Cooking Tips
- Do not overcook pork or it will become dry and tough. The threat of trichinosis is eliminated when the pork is heated to 137°F but the USDA recommends cooking pork to 160°F to be safe. Cooking to 160°F will result in clear or slightly pink tinted juices and provides meat that is juicy and tender.
- When frying or sautéing, do not place a cover over the pan. This will lock in moisture and cause the meat to braise or steam.
- Lightly coat pork with vegetable oil to keep it from drying out during cooking.
- Before roasting pork, sear all sides to seal in juices.
- Do not overcrowd pork cuts when cooking. Leaving space between them will allow them to brown and cook more evenly.
- If using a marinade for basting, set some aside before placing raw pork in it to marinate. Never reuse marinade that the meat was marinated in.
- Poach uncooked sausages for a few minutes before frying, broiling or grilling. Sausage casings should not be pierced before poaching. Piercing will cause the juices to be released and sausages will become dry.
- Do not partially cook pork and then store in refrigerator to use later. It must be cooked until done. It can be partially cooked or browned using one method, such as microwaving or searing, and then immediately cooked until done using a different method, such as roasting, frying, grilling or broiling.
|